European ASP.NET MVC Hosting

BLOG about Latest ASP.NET MVC Hosting and Its Technology - Dedicated to European Windows Hosting Customer

ASP.NET MVC 6 Hosting - HostForLIFE.eu :: HTML Helpers In ASP.NET MVC

clock April 9, 2020 05:10 by author Peter

What is an Html Helper?
Html helper is a method that is used to render HTML content in a view. Html helpers are implemented using an extension method. If you want to create an input text box with

id=email and name in email:
  <input type=text id=email name=email value=’’/> 


This is all the Html we need to write -- by using the helper method it becomes so easy:
  @Html.TextBox(‘email’) 

It will generate a textbox control whose name is the email.

If we want to assign the value of the textbox with some initial value then use the below method:
  @Html.TextBox(‘email’,’[email protected]’) 

If I want to set an initial style for textbox we can achieve this by using the below way:
  @Html.TextBox(‘email’,’[email protected]’,new {style=’your style here’ , title=’your title here’});  

Here the style we pass is an anonymous type.

If we have a reserved keyword like class readonly and we want to use this as an attribute  we will do this using the below method, which means append with @ symbol with the reserved word.
  @Html.TextBox(‘email’,’[email protected]’,new {@class=’class name’, @readonly=true}); 

If we want to generate label:
  @Html.Label(‘firstname’,’sagar’) 

For password use the below Html helper method to create password box:
  @Html.Password(“password”) 

If I want to generate a textarea then for this also we have a method:
  @Html.TextArea(“comments”,”,4,12,null)  

In the above code 4 is the number of rows and 12 is the number of columns.

To generate a hidden box:
  @Html.Hidden(“EmpID”) 

Hidden textboxes are not displayed on the web page but used for storing data and when we need to pass data to action method then we can use that.

Is it possible to create our Html helpers in asp.net MVC?

Yes, we can create our Html helpers in MVC.

Is it mandatory to use Html helpers?

No, we can use plain Html for that but Html helpers reduce a significant amount of Html code to write that view.
Also, your code is simple and maintainable and if you require some complicated logic to generate view then this is also possible.


ASP.NET MVC 6 Hosting - HostForLIFE.eu :: Partial View in MVC

clock March 20, 2020 12:00 by author Peter

Partial view in ASP.NET MVC is special view which renders a portion of view content. It is just like a user control of a web form application. Partial can be reusable in multiple views. It helps us to reduce code duplication. In other word a partial view enables us to render a view within the parent view.
 

The partial view is instantiated with its own copy of a ViewDataDictionary object which is available with the parent view so that partial view can access the data of the parent view. If we made the change in this data (ViewDataDictionary object), the parent view's data is not affected. Generally the Partial rendering method of the view is used when related data that we want to render in a partial view is part of our model.
 
Creating Partial View
To create a partial view, right-click on view -> shared folder and select Add -> View option. In this way we can add a partial view.
 

Creating Partial View
It is not mandatory to create a partial view in a shared folder but a partial view is mostly used as a reusable component, it is a good practice to put it in the "shared" folder.

HTML helper has two methods for rendering the partial view: Partial and RenderPartial.
    <div> 
        @Html.Partial("PartialViewExample") 
    </div> 
    <div> 
        @{ 
            Html.RenderPartial("PartialViewExample"); 
        } 
    </div>

@Html.RenderPartial
The result of the RenderPartial method is written directly into the HTTP response, it means that this method used the same TextWriter object as used by the current view. This method returns nothing.
 
@Html.Partial
This method renders the view as an HTML-encoded string. We can store the method result in a string variable.
 
The Html.RenderPartial method writes output directly to the HTTP response stream so it is slightly faster than the Html.Partial method.
 
Returning a Partial view from the Controller's Action method:
    public ActionResult PartialViewExample() 
    { 
        return PartialView(); 
    }

Render Partial View Using jQuery
Sometimes we need to load a partial view within a model popup at runtime, in this case we can render the partial view using JQuery element's load method.
    <script type="text/jscript"> 
            $('#partialView').load('/shared/PartialViewExample’); 
    </script>


ASP.NET MVC 6 Hosting - HostForLIFE.eu :: Modal Popup In MVC Application

clock February 28, 2020 11:15 by author Peter

In this post we will implement modal pop up to display the detailed information of user after clicking on detail anchor. So this is the view on which we are going to apply modal popup.

View code
Enumerable<CodeFirst.Models.FriendsInfo> 
 
@{ 
    ViewBag.Title = "Index"; 

 
<h2>Index</h2> 
 
<p> 
    @Html.ActionLink("View All", "Index") 
 
    @using (Html.BeginForm("Search", "Home", FormMethod.Post)) 
    { 
        <table> 
            <tr> 
                <td> 
                    <input type="text" id="txtName" name="searchparam" placeholder="type here to search" /> 
                </td> 
                <td> 
                    <input type="submit" id="btnSubmit" value="Search" /> 
                </td> 
            </tr> 
        </table> 
    } 
 
</p> 
<table class="table"> 
    <tr> 
        <th> 
            @Html.DisplayNameFor(model => model.Name) 
        </th> 
        <th> 
            @Html.DisplayNameFor(model => model.Mobile) 
        </th> 
        <th> 
            @Html.DisplayNameFor(model => model.Address) 
        </th> 
        <th></th> 
    </tr> 
 
    @foreach (var item in Model) 
    { 
        <tr> 
            <td> 
                @Html.DisplayFor(modelItem => item.Name) 
            </td> 
            <td> 
                @Html.DisplayFor(modelItem => item.Mobile) 
            </td> 
            <td> 
                @Html.DisplayFor(modelItem => item.Address) 
            </td> 
            <td> 
                @*@Html.ActionLink("Edit", "Edit", new { id=item.Id }) | 
                    @Html.ActionLink("Details", "Details", new { id=item.Id }) | 
                    @Html.ActionLink("Delete", "Delete", new { id=item.Id })*@ 
 
                <a href="javascript:void(0);" class="anchorDetail"  data-id="@item.Id">Details</a> 
 
            </td> 
        </tr> 
    } 
 
</table>  

As we can see we have detail anchor, with class anchorDetail and with data-id, which will get the id of clicked anchor and show the corresponding data to modal (detail view) on screen.

We have an Action method Details(int id) which will return the partial view.
public ActionResult Details(int Id) 

    FriendsInfo frnds = new FriendsInfo(); 
    frnds = db.FriendsInfo.Find(Id); 
    return PartialView("_Details",frnds); 
 

Here we added a partial view for this purpose to show detail view when user click on detail anchor in the list.

View Code
@model CodeFirst.Models.FriendsInfo 
 
<div> 
   
    <div class="modal-header"> 
        <button type="button" class="close" data-dismiss="modal" aria-hidden="true">×</button> 
        <h4 class="modal-title" id="myModalLabel">FriendsInfo</h4> 
    </div>                
                 
     
    <hr /> 
    <dl class="dl-horizontal"> 
        <dt> 
            @Html.DisplayNameFor(model => model.Name) 
        </dt> 
 
        <dd> 
            @Html.DisplayFor(model => model.Name) 
        </dd> 
 
        <dt> 
            @Html.DisplayNameFor(model => model.Mobile) 
        </dt> 
 
        <dd> 
            @Html.DisplayFor(model => model.Mobile) 
        </dd> 
 
        <dt> 
            @Html.DisplayNameFor(model => model.Address) 
        </dt> 
 
        <dd> 
            @Html.DisplayFor(model => model.Address) 
        </dd> 
 
    </dl> 
</div> 


We have a div for modal pop-up.

<div id='myModal' class='modal'> 
    <div class="modal-dialog"> 
        <div class="modal-content"> 
            <div id='myModalContent'></div> 
        </div> 
    </div>  
     
</div>  


Here is the script for showing modal (partial view) on above div when user click on detail anchor. Here we used Ajax call for this purpose.

Script
@section scripts 

    <script src="~/Scripts/jquery-1.10.2.min.js"></script> 
    <script src="~/Scripts/bootstrap.js"></script> 
    <script src="~/Scripts/bootstrap.min.js"></script> 
<script> 
    var TeamDetailPostBackURL = '/Home/Details'; 
    $(function () { 
        $(".anchorDetail").click(function () { 
            debugger; 
            var $buttonClicked = $(this); 
            var id = $buttonClicked.attr('data-id'); 
            var options = { "backdrop": "static", keyboard: true }; 
            $.ajax({ 
                type: "GET", 
                url: TeamDetailPostBackURL, 
                contentType: "application/json; charset=utf-8", 
                data: { "Id": id }, 
                datatype: "json", 
                success: function (data) { 
                    debugger; 
                    $('#myModalContent').html(data); 
                    $('#myModal').modal(options); 
                    $('#myModal').modal('show');                   
 
                }, 
                error: function () { 
                    alert("Dynamic content load failed."); 
                } 
            }); 
        }); 
        //$("#closebtn").on('click',function(){ 
        //    $('#myModal').modal('hide');   
 
        $("#closbtn").click(function () { 
            $('#myModal').modal('hide'); 
        });       
    }); 
    
</script> 
 

HostForLIFE.eu ASP.NET MVC 6 Hosting
HostForLIFE.eu is European Windows Hosting Provider which focuses on Windows Platform only. We deliver on-demand hosting solutions including Shared hosting, Reseller Hosting, Cloud Hosting, Dedicated Servers, and IT as a Service for companies of all sizes. We have customers from around the globe, spread across every continent. We serve the hosting needs of the business and professional, government and nonprofit, entertainment and personal use market segments.


ASP.NET MVC 6 Hosting - HostForLIFE.eu :: How To Use jQuery To Consolidate AutoComplete Function

clock September 13, 2019 11:51 by author Peter

jQuery UI has an AutoComplete widget. The AutoComplete widget is quite nice and straight forward to use. In this post, I will show you how to use jQuery AutoComplete widget to consolidate AutoComplete function in ASP.NET MVC application.

Step 1

The first step is to add the jQuery scripts and styles. With ASP.NET MVC, the following code does the work:

@Styles.Render("~/Content/themes/base/css")
@Scripts.Render("~/bundles/jquery")   
@Scripts.Render("~/bundles/jqueryui")

Step 2

Using the AutoComplete widget is also simple. You will have to add a textbox and attach the AutoComplete widget to the textbox. The only parameter that is required for the widget to function is source. For this example, we will get the data for the AutoComplete functionality from a MVC action method.

$(document).ready(function () {
    $('#tags').autocomplete(
        {
            source: '@Url.Action("TagSearch", "Home")'
    });
})

In the above code, the textbox with id=tags is attached with the AutoComplete widget. The source points to the URL of TagSearch action in the HomeController: /Home/TagSearch. The HTML of the textbox is below:

<input type="text" id="tags" />


Step 3

When the user types some text in the textbox, the action method (TagSearch) is called with a parameter in the request body. The parameter name is term. So, your action method should have the following signature:

public ActionResult TagSearch(string term)
{
    // Get Tags from database
    string[] tags = { "ASP.NET", "WebForms",
                    "MVC", "jQuery", "ActionResult",
                    "MangoDB", "Java", "Windows" };
    return this.Json(tags.Where(t => t.StartsWith(term)),
                    JsonRequestBehavior.AllowGet);
}

Now, the AutoComplete functionality is complete!

HostForLIFE.eu ASP.NET MVC 6 Hosting
HostForLIFE.eu is European Windows Hosting Provider which focuses on Windows Platform only. We deliver on-demand hosting solutions including Shared hosting, Reseller Hosting, Cloud Hosting, Dedicated Servers, and IT as a Service for companies of all sizes. We have customers from around the globe, spread across every continent. We serve the hosting needs of the business and professional, government and nonprofit, entertainment and personal use market segments.


ASP.NET MVC 6 Hosting - HostForLIFE.eu :: HTTP Verbs In MVC 5

clock June 18, 2019 12:12 by author Peter

In this article, I will explain the concept of HTTP verbs in MVC 5. I will also explain the various types of HTTP verbs in MVC 5 and how it works in the project.

What is HTTP?

  • HTTP stands for hypertext transfer protocol.
  • This protocol works while working with a client-server application.
  • This protocol provides communication between the client and the server.

HTTP provides methods (verbs) for the actions performed on a response. HTTP verbs are used on an action method. HTTP provides the following main verbs.

  • Get
  • Post
  • Put
  • Delete

HTTP Get
This verb is used to get existing data from the database. In HttpGet, data travels in the URL only. To use the HttpGet method, we use HttpGet attribute on the Action method. It is also the default HTTP verb.

Example
domain.com/student/GetStudent/1
domain.com/student/GetStudent?studentid=1


[HttpGet] 
public object GetStudent(int studentid) 

   // code here 


HTTP Post

This verb is used while we have to create a new resource in the database. In HttpPost, data travels in the URL and body. To use HttpPost method, we use HttpPost attribute on the Action method.

Example
domain/student/Studentsave


Body - Json body
[HttpPost] 
public object Studentsave(studentclass obj) 


HTTP Put

This verb is used while we have to update an existing resource in the database. In HttpPut, the data travels in the URL and body. To use HttpPut method, we use HttpPut attribute on the Action method.

Example
domain.com/student/studentupdate/1

Body- Json body
[HttpPut] 
public object Studentupdate(int studentid ,Studentclass objVM) 


HTTP Delete
This verb is used while we have to delete the existing resources in the database. In HttpDelete, data travels in the URL and body. To use HttpDelete, we use HttpDelete attribute on the Action method.

Example

domain.com/student/studentdelete/1

[HttpDelete]   
public object Studentupdate(int studentid)   
{   
}  
HostForLIFE.eu ASP.NET MVC 6 Hosting
European best, cheap and reliable ASP.NET hosting with instant activation. HostForLIFE.eu is #1 Recommended Windows and ASP.NET hosting in European Continent. With 99.99% Uptime Guaranteed of Relibility, Stability and Performace. HostForLIFE.eu security team is constantly monitoring the entire network for unusual behaviour. We deliver hosting solution including Shared hosting, Cloud hosting, Reseller hosting, Dedicated Servers, and IT as Service for companies of all size.


ASP.NET MVC 6 Hosting - HostForLIFE.eu :: How to Get Lookup Data in ASP.NET MVC 6?

clock April 12, 2019 12:28 by author Peter

In this article, I will explain about getting lookup dataa into you view ASP.Net MVC 6. This is a super common problem I encounter when building ASP.net MVC applications. I have a form that has a drop down box. Not only do I need to select the correct item from the edit model to pick from the drop down but I need to populate the drop down with the possible values.

Over the years I've used two approaches to doing this. The first is to push into the ViewBag a list of values in the controller action. That looks like
public ActionResult Edit(int id){ 
    var model = repository.get(id);

    ViewBag.Provinces = provincesService.List();

    return View(model);
}
Then in the view you can retrieve this data and use it to populate the drop down. If you're using the HTML helpers then this looks like

@Html.DropDownListFor(x=>x.province, (IEnumerable<SelectListItem>)ViewBag.Provinces)
This becomes somewhat messy when you have a lot of drop downs on a page. For instance consider something like

public ActionResult Edit(int id){ 
  var model = repository.get(id);

    ViewBag.Provinces = provincesService.List();
    ViewBag.States = statesService.List();
    ViewBag.StreetDirections = streetDirectionsService.List();
    ViewBag.Countries = countriesService.List();
    ViewBag.Counties = countiesService.List();

    return View(model);
}

The work of building up the data in the model becomes the primary focus of the view. We could extract it to a method but then we have to go hunting to find the different drop downs that are being populated. An approach I've taken in the past is to annotate the methods with an action filter to populate the ViewBag for me. This makes the action look like

[ProvincesFilter]
[StatesFilter]
[StreetDirectionsFilter]
[CountriesFilter]
[CountiesFilter]
public ActionResult Edit(int id){ 
  var model = repository.get(id);
  return View(model);
}

One of the filters might look like

public override void OnActionExecuting(ActionExecutingContext filterContext) 
{
    var countries = new List<SelectListItem>();
    if ((countries = (filterContext.HttpContext.Cache.Get(GetType().FullName) as List<SelectListItem>)) == null)
    {
        countries = countriesService.List();
        filterContext.HttpContext.Cache.Insert(GetType().FullName, countries);
    }
    filterContext.Controller.ViewBag.Countries = countries;
    base.OnActionExecuting(filterContext);
}

This filter also adds a degree of caching to the request so that we don't have to keep bugging the database.

Keeping a lot of data in the view bag presents a lot of opportunities for error. We don't have any sort of intellisense with the dynamic view object and I frequently use the wrong name in the controller and view, by mistake. Finally building the drop down box using the HTML helper requires some nasty looking casting. Any time I cast I feel uncomfortable.

@Html.DropDownListFor(x=>x.province, (IEnumerable<SelectListItem>)ViewBag.Provinces)
Now a lot of people prefer transferring the data as part of the model; this is the second approach. There is nothing special about this approach you just put some collections into the model.

I've always disliked this approach because it mixes the data needed for editing with the data for the drop downs which is really incidental. This data seems like a view level concern that really doesn't belong in the view model. This is a bit of a point of contention and I've challenged more than one person to a fight to the death over this very thing.

So neither option is particularly palatable. What we need is a third option and the new dependency injection capabilities of ASP.net MVC open up just such an option: we can inject the data services directly into the view. This means that we can consume the data right where we retrieve it without having to hammer it into some bloated DTO. We also don't have to worry about annotating our action or filling it with junk view specific code.

To start let's create a really simple service to return states.

public interface IStateService 
{
    IEnumerable<State> List();
}

public class StateService : IStateService 
{
    public IEnumerable<State> List() {
        return new List<State>
        {
            new State { Abbreviation = "AK", Name = "Alaska" },
            new State { Abbreviation = "AL", Name = "Alabama" }
        };
    }
}

Umm, looks like we're down to only two states, sorry Kentucky.

Now we can add this to our container. I took a singleton approach and just registered a single instance in the Startup.cs.

services.AddInstance(typeof(IStateService), new StateService()); 
This is easily added the the view by adding

@inject ViewInjection.Services.IStateService StateService

As the first line in the file. Then the final step is to actually make use of the service to populate a drop down box:

<div class="col-lg-12"> 
        @Html.DropDownList("States", StateService.List().Select(x => new SelectListItem { Text = x.Name, Value = x.Abbreviation }))
</div> 

That's it! Now we have a brand new way of getting the data we need to the view without having to clutter up our controller with anything that should be contained in the view.

HostForLIFE.eu ASP.NET MVC 6 Hosting
European best, cheap and reliable ASP.NET hosting with instant activation. HostForLIFE.eu is #1 Recommended Windows and ASP.NET hosting in European Continent. With 99.99% Uptime Guaranteed of Relibility, Stability and Performace. HostForLIFE.eu security team is constantly monitoring the entire network for unusual behaviour. We deliver hosting solution including Shared hosting, Cloud hosting, Reseller hosting, Dedicated Servers, and IT as Service for companies of all size.


ASP.NET MVC 6 Hosting - HostForLIFE.eu :: Easiest Way to Make CheckBox

clock March 29, 2019 11:53 by author Peter

In this article I show you, how easy it is to make a CheckBox on ASP.NET. The use of radio buttons and checkboxes using ASP.Net programming where the function of the radio button is choosing just one selection with a circle that is a point in the middle if we choose it. While the checkbox is square shaped that there is a tick if selected. To create a function of the radio button. We will explain below:

  • First you must create a project by choosing ASP.Net which is in the File> New Project> Other Languages> Visual C #> Web> Select Empty ASP.Net Web Application.
  • Fill in the name and click OK aspproject05
  • Right Click On aspproject05 in the top right corner select ADD> New Item> Web Form. And give CheckBox.aspx as a name.
  • Next create a CheckBox, button, label by entering this code is in the <div>

<asp:CheckBox ID="chkNews" Text="Do you want to get more update ?" runat="server" />
<br />
<asp:Button ID="btnSubmit" Text="Submit" runat="server" OnClick="btnSubmit_Click" /> <hr/>
<asp:Label ID="lblResult" runat="server" />


Code Description:

<Asp: CheckBox ID = "chkNews" Text = "Do you want to get more update ?" runat = "server" />
This script serves as the manufacture CheckBox with ID named chkNews, which says Do you want to get more update? sent or received by the server.

<br />
This script is used to create a new line

<Asp: Button ID = "btnSubmit" Text = "Submit" runat = "server" OnClick = "btnSubmit_Click" />
This script is used to manufacture the ID button button named btnSubmit, that says Submit sent to the server to have an action Click if the button is clicked.

<Asp: Label ID = "lblResult" runat = "server" />

This script serves to create a label with name ID lblResult the printed blanks to be sent to the server.


When you're done simply double-Click button and type in the code below:

lblResult.Text = chkNews.Checked.ToString ();


Code Description:

LblResult.Text = chkNews.Checked.ToString ();

The above code serves as outputan of chkBerita when checked or not displayed by a label that berID lblResult that are boolean. This means that when we press the button without us tick checkbox section will appear on labels False lblResult whereas if we check the CheckBox and pressing the button it will show True.

HostForLIFE.eu ASP.NET MVC Hosting
European best, cheap and reliable ASP.NET hosting with instant activation. HostForLIFE.eu is #1 Recommended Windows and ASP.NET hosting in European Continent. With 99.99% Uptime Guaranteed of Relibility, Stability and Performace. HostForLIFE.eu security team is constantly monitoring the entire network for unusual behaviour. We deliver hosting solution including Shared hosting, Cloud hosting, Reseller hosting, Dedicated Servers, and IT as Service for companies of all size.


ASP.NET MVC 6 Hosting - HostForLIFE.eu :: ASP.NET MVC Request Life Cycle

clock March 12, 2019 09:39 by author Peter

If you have worked on ASP.NET MVC, you must be familiar with how when you type in an URL, the appropriate controller is chosen, and the action fired. Today we will dig a little deeper within the MVC request life cycle. Before we start discussing its life cycle, let's briefly understand the concept of HttpHandlers and HttpModules.

Handlers are responsible for generating the actual response in MVC. They implement the IHttpHandler class and only one handler will execute per request. On the other hand, HttpModules are created in response to life cycle events. Modules can, for example, be used for populating HttpContext objects. A request can use many modules. These classes derive from IHttpModule. We are now ready to learn about the MVC Request Life Cycle. The MVC life cycle can be briefly demonstrated as below,


When a request is fired for the first time, the Application_Start method in the Global.asax file is called. This method calls the RegisterRoutes method as below,
    public class MvcApplication : System.Web.HttpApplication 
        { 
            protected void Application_Start() 
            { 
                AreaRegistration.RegisterAllAreas(); 
                FilterConfig.RegisterGlobalFilters(GlobalFilters.Filters); 
                RouteConfig.RegisterRoutes(RouteTable.Routes); 
                BundleConfig.RegisterBundles(BundleTable.Bundles); 
            } 
        } 


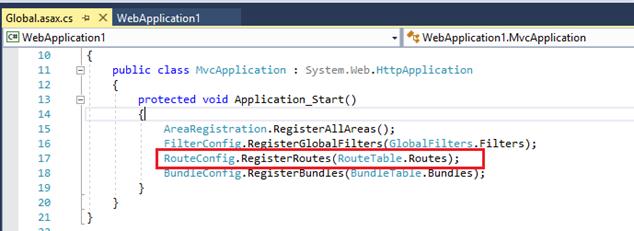
RegisterRoutes method stores the routes defined in that method, in a static collection in the Routetable class.
Each route has an HttpHandler defined for it. In our case above, the MapRoute method defines the HttpHandler.
Next, the URLRoutingModule is called. It matches the request route with the routes defined in the route table. It calls the GetHttpHandler method which returns an instance of an MVCHandler.

The MVCHandler calls the ProcessRequest method. The controller execution and initialization happens inside this method. ProcessRequest calls ProcessRequestInit, which uses ControllerFactory to select an appropriate controller based on the supplied route. The ControllerFactory calls the Controller Activator which uses the dependency resolver to create an instance of the controller class.

Once the controller is created its Execute method is called.

Now comes the point where the action must be executed. The execute method in the controller calls the ExecuteCore method which calls the InvokeAction method of ActionInvoker. Action Invoker determines which action must be selected based on certain conditions, depending upon the methods available, their names and the action selectors used for them.

Once the action is selected, Authentication & Authorization filters are fired next.
Once the action passes through the authentication and authorization filter checks, the model binding takes place. The information needed for the action to execute is gathered in this step.

OnActionExecuting action filters are fired next. Once the OnActionExecuting filters are executed a response for the action is generated. The thing to note here is that the response is generated at this stage, but not executed.

Next, the OnActionExecuted filters are executed.  Once all the filters have finished executing, the response is finally executed in the ExecuteResult method which is called from the InvokeActionResult by the ActionInvoker. If the response is a view or a partial view, the ViewEngine will render it, else it will be handled appropriately. The ExecuteResult will find the appropriate view using FindView or FindPartialView method. This method will search for the view in specific locations and then render it. This is the final step in generating the response.

If you would like to further dig into the MVC request life cycle, I would highly recommend Alex Wolf’s pluralsight course by the same name.

HostForLIFE.eu ASP.NET MVC 6 Hosting
HostForLIFE.eu is European Windows Hosting Provider which focuses on Windows Platform only. We deliver on-demand hosting solutions including Shared hosting, Reseller Hosting, Cloud Hosting, Dedicated Servers, and IT as a Service for companies of all sizes. We have customers from around the globe, spread across every continent. We serve the hosting needs of the business and professional, government and nonprofit, entertainment and personal use market segments.


ASP.NET MVC 6 Hosting - HostForLIFE.eu :: Create A Password Protected PDF In MVC

clock February 19, 2019 10:37 by author Peter
Sometimes, we need to create a PDF file that opens only when the users put in a password when prompted. Let us see how to create a password-protected PDF file in MVC.

First, let's open Visual Studio and create a new project. We need to select the ASP.NET Web application type.

Select Web API as the template and in the "Add folders and core references" section, we need to select MVC and Web API. Click on "Change Authentication" on the right side pane and select "No Authentication".


In the web.config file, let us define one key named Filepath and use it in our code. The PDF file must be present there.

It is good to change the key's value when it's placed in web.config.
<appSettings> 
     <add key="FilePath" value="Anil\PDF\LDEPRD9.pdf"/> 
 </appSettings> 


Add the below code to the Home Controller.
string FilePath = ConfigurationManager.AppSettings["FilePath"].ToString(); 
public ActionResult DownloadFile() 

    try 
    { 
        byte[] bytes = System.IO.File.ReadAllBytes(FilePath); 
        using (MemoryStream inputData = new MemoryStream(bytes)) 
        { 
        using (MemoryStream outputData = new MemoryStream()) 
        { 
        string PDFFilepassword = "123456"; 
        PdfReader reader = new PdfReader(inputData); 
        PdfReader.unethicalreading = true; 
PdfEncryptor.Encrypt(reader, outputData, true, PDFFilepassword, PDFFilepassword, PdfWriter.ALLOW_SCREENREADERS);
        bytes = outputData.ToArray(); 
        Response.AddHeader("content-length", bytes.Length.ToString()); 
        Response.BinaryWrite(bytes); 
        return File(bytes, "application/pdf"); 
       } 
      } 
    } 
    catch (Exception ex) 
    { 
        throw ex; 
    } 


string PDFFilepassword = "123456";   
PdfReader reader = new PdfReader(inputData);   
PdfReader.unethicalreading = true;   
PdfEncryptor.Encrypt(reader, outputData, true, PDFFilepassword, PDFFilepassword, PdfWriter.ALLOW_SCREENREADERS); 


In the PDFFilepassword variable, you can set anything as password - the file name, PAN card number, or you can validate the entered value against the values stored in the database.

In Route.config, we can define the default route with the Controller And ActionName.

Run the website and enter http://localhost:49744/Home/DownloadFile. 

Here, Home is the controller name and DownloadFile is the action name. 

It shows the following Password prompt.


After entering the right password and successful authentication, the PDF file will get opened.

HostForLIFE.eu ASP.NET MVC 6 Hosting
HostForLIFE.eu is European Windows Hosting Provider which focuses on Windows Platform only. We deliver on-demand hosting solutions including Shared hosting, Reseller Hosting, Cloud Hosting, Dedicated Servers, and IT as a Service for companies of all sizes. We have customers from around the globe, spread across every continent. We serve the hosting needs of the business and professional, government and nonprofit, entertainment and personal use market segments.


ASP.NET MVC 6 Hosting - HostForLIFE.eu :: Server Sent Events In ASP.NET MVC

clock February 15, 2019 08:14 by author Peter

In some Web Applications, we need to show real time data to the end users, which means if any changes occur (new data available) in the Server, it needs to show an end user. For instance, you are doing chat in Facebook in one tab of your Browser. You opened another tab in the same Browser and send a message to the same user (with whom, you are doing chat in the previous chat). You will see that message will appear in both the tabs and it is called real-time push.

In order to accomplish the functionality, mentioned above, the client sends interval basis AJAX requests to the Server to check, if the data is available or not. ServerSentEvents(SSE) API helps ensure the Server will push the data to the client when the data is available in the Server.

What are Server Sent Events?
SSE is an acronym and stands for Server Sent Events. It is available in HTML5 EventSource JavaScript API. It allows a Web page to get the updates from a Server when any changes occurs in the Server. It is mostly supported by the latest Browsers except Internet Explorer(IE).

Using code
We are going to implement a requirement like there is a link button and click on it and it displays current time each second on an interval basis.
In order to achieve the same, we need to add the following action in HomeController. It sets response content type as text/event-stream. Next, it loops over the date and flushes the data to the Browser.
    public void Message() 
    { 
        Response.ContentType = "text/event-stream"; 
     
        DateTime startDate = DateTime.Now; 
        while (startDate.AddMinutes(1) > DateTime.Now) 
        { 
            Response.Write(string.Format("data: {0}\n\n", DateTime.Now.ToString())); 
            Response.Flush(); 
     
            System.Threading.Thread.Sleep(1000); 
        } 
         
        Response.Close(); 
    }


Once we are done with the Server side implementation, it's time to add the code in the client side to receive the data from the Server and displays it.

First, it adds a href link, which calls initialize() method to implement SSE. Second, it declares a div, where the data will display. Thirdly, it implements Server Sent Events(SSE) through JavaScript with the steps, mentioned below.
    In the first step, it checks whether SSE is available in the Browser or not. If it is null, then it alerts to the end user to use other Browser.
    In the second step, if SSE is available, then it creates EventSource object with passing the URL as a parameter. Subsequently, it injects the events, mentioned below.

        onopen- It calls when the connection is opened to the Server
        onmessage- It calls when the Browser gets any message from the Server
        onclose- It calls when the Server closes the connection.

    <a href="javascript:initialize();" >Click Me To See Magic</a> 
    <div id="targetDiv"></div> 
     
    <script> 
         
        function initialize() { 
            alert("called"); 
     
            if (window.EventSource == undefined) { 
                // If not supported 
                document.getElementById('targetDiv').innerHTML = "Your browser doesn't support Server Sent Events."; 
                return; 
            } else { 
                var source = new EventSource('../Home/Message'); 
     
                source.onopen = function (event) { 
                    document.getElementById('targetDiv').innerHTML += 'Connection Opened.<br>'; 
                }; 
     
                source.onerror = function (event) { 
                    if (event.eventPhase == EventSource.CLOSED) { 
                        document.getElementById('targetDiv').innerHTML += 'Connection Closed.<br>'; 
                    } 
                }; 
     
                source.onmessage = function (event) { 
                    document.getElementById('targetDiv').innerHTML += event.data + '<br>'; 
                }; 
            } 
        } 
    </script>


Output

Here, we discussed about SSE(Server Sent Events). It is very important API available in HTML5. It helps to push data from the Server to the client when any changes occurs in the Server side. If you want to use a bidirectional communication channel, you can use HTML5 Web Sockets API. The disadvantage of SSE is it is Browser dependent. If the Browser doesn't support SSE, then the user can't see the data, but it is easy to use it. You can also use SignalR for realtime pushing the data to the end user.

HostForLIFE.eu ASP.NET MVC 6 Hosting
HostForLIFE.eu is European Windows Hosting Provider which focuses on Windows Platform only. We deliver on-demand hosting solutions including Shared hosting, Reseller Hosting, Cloud Hosting, Dedicated Servers, and IT as a Service for companies of all sizes. We have customers from around the globe, spread across every continent. We serve the hosting needs of the business and professional, government and nonprofit, entertainment and personal use market segments.


About HostForLIFE

HostForLIFE is European Windows Hosting Provider which focuses on Windows Platform only. We deliver on-demand hosting solutions including Shared hosting, Reseller Hosting, Cloud Hosting, Dedicated Servers, and IT as a Service for companies of all sizes.

We have offered the latest Windows 2019 Hosting, ASP.NET 5 Hosting, ASP.NET MVC 6 Hosting and SQL 2019 Hosting.


Tag cloud

Sign in