In ASP.NET Core MVC, you can restrict the file types that can be uploaded by adding server-side validation. Here's a simple example of how to accomplish this:

Why do we need to restrict uploaded File Type in an ASP.NET Core?
- Security: Allowing unrestricted file uploads can pose security risks. Certain file types, such as executable files (.exe), scripts (.js, .ps1), or files containing macros (.docm), could be used to execute malicious code on the server or client-side when downloaded. Restricting file types mitigates these risks by preventing potentially harmful files from being uploaded.
- Data Integrity: Limiting the accepted file types ensures that the application only processes files that are compatible with its functionality. Accepting only specific file types reduces the chances of errors or unexpected behavior caused by unsupported file formats.
- Compliance: In some industries or applications, there might be regulatory or compliance requirements regarding the types of files that can be uploaded. Enforcing restrictions helps ensure compliance with such standards.
- Resource Management: Different file types require different processing and storage resources. By restricting the allowed file types, you can better manage server resources and avoid unnecessary strain on the system.
- User Experience: Providing clear restrictions on acceptable file types helps users understand what they can upload, reducing confusion and errors during the file upload process. This improves the overall user experience of the application.
1-Client-Side Validation (Optional): You can use the HTML5 accept attribute on your file input to restrict file types. However, keep in mind that this can be easily bypassed by users, so server-side validation is essential.
<input type="file" name="file" accept=".pdf,.doc,.docx">
2. Server-Side Validation: In your controller action, where you handle the file upload, you can check the file's content type or extension and reject files that are not allowed.
Add a controller
- In Solution Explorer, right-click Controllers > Add > Controller.
- In the Add New Scaffolded Item dialog box, select MVC Controller - Empty > Add.
- In the Add New Item - RestrictUploadedFileSize_Demo dialog, enter FileUploadController.cs and select Add.
Replace the contents of Controllers/ FileUploadController.cs with the following code.
using Microsoft.AspNetCore.Mvc;
namespace RestrictUploadedFileSize_Demo.Controllers
{
public class FileUploadController : Controller
{
public IActionResult Index()
{
return View();
}
[HttpPost]
public async Task<IActionResult> FileUpload(IFormFile SingleFile)
{
if (SingleFile == null || SingleFile.Length == 0)
{
ModelState.AddModelError("", "File not selected");
return View("Index");
}
var permittedExtensions = new[] { ".jpg", ".png", ".gif" };
var extension = Path.GetExtension(SingleFile.FileName).ToLowerInvariant();
if (string.IsNullOrEmpty(extension) || !permittedExtensions.Contains(extension))
{
ModelState.AddModelError("", "Invalid file type.");
}
// Optional: Validate MIME type as well
var mimeType = SingleFile.ContentType;
var permittedMimeTypes = new[] { "image/jpeg", "image/png", "image/gif" };
if (!permittedMimeTypes.Contains(mimeType))
{
ModelState.AddModelError("", "Invalid MIME type.");
}
//Validating the File Size
if (SingleFile.Length > 10000000) // Limit to 10 MB
{
ModelState.AddModelError("", "The file is too large.");
}
if (ModelState.IsValid)
{
var filePath = Path.Combine(Directory.GetCurrentDirectory(), "wwwroot/uploads", SingleFile.FileName);
//Using Streaming
using (var stream = new FileStream(filePath, FileMode.Create, FileAccess.Write))
{
await SingleFile.CopyToAsync(stream);
}
// Process the file here (e.g., save to the database, storage, etc.)
return View("UploadSuccess");
}
return View("Index");
}
}
}
This code snippet checks both the file extension and content type to ensure that it meets your criteria. You can adjust the allowed file types and content types according to your requirements. Additionally, you can improve this validation logic based on your specific needs, such as checking the file's signature or using a more comprehensive file type validation library.Add a view
- Right-click on the Views folder, then Add > New Folder and name the folder Companies
- Right-click on the Views/ FileUpload folder, and then Add > New Item.
- In the Add New Item dialog, select Show All Templates.
- In the Add New Item - RestrictUploadedFileSize_Demo dialog:
- In the search box in the upper-right, enter the view
- Select Razor View - Empty
- Keep the Name box value, Index.cshtml.
- Select Add
- Replace the contents of the Views/Companies/Index.cshtml Razor view file with the following:
Index.cshtml
@{
ViewData["Title"] = "Index";
}
<h2>File Upload</h2>
<hr />
<div class="row">
<div class="col-md-12">
<form method="post" asp-controller="FileUpload" asp-action="FileUpload"enctype="multipart/form-data">
<div asp-validation-summary="All" class="text-danger"></div>
<input type="file" name="SingleFile" class="form-control" />
<button type="submit" name="Upload" class="btn btn-primary">Upload</button>
</form>
</div>
</div>
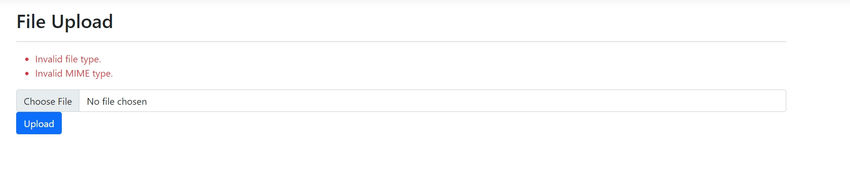
Run the Application
Select Ctrl+F5 to run the app without the debugger. Visual Studio runs the ASP.NET app and opens the default browser.

Restricting uploaded file types in ASP.NET Core increases security, data integrity, regulatory compliance, resource efficiency, and user experience. It's a critical component of developing robust and secure web apps.