The Non-Action Selectors in ASP.NET MVC will be explained in this post. A public method in a controller that can be accessed via a URL is called an action method. Therefore, by default, a URL request can be used to invoke any public methods that are present in a controller. A Controller's Non-Action attribute can be used to limit access to public methods. Another built-in property that shows that a Controller's public method is not an action method is Non-Action. When we don't want that technique to be regarded as an action method, we employ it.

Let's see the Non-Action Selectors in action via this example.
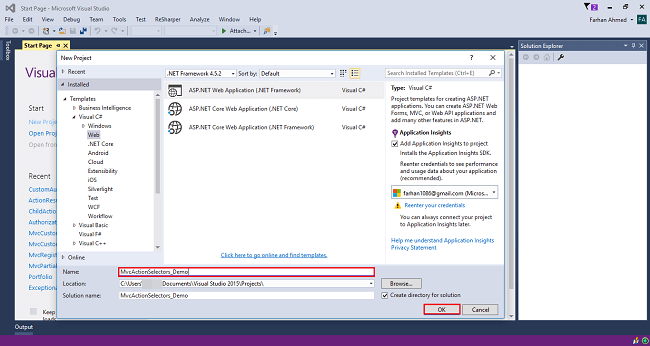
Step 1
Open Visual Studio 2015 or an editor of your choice and create a new project.
Step 2
Choose "web application" project and give an appropriate name to your project.
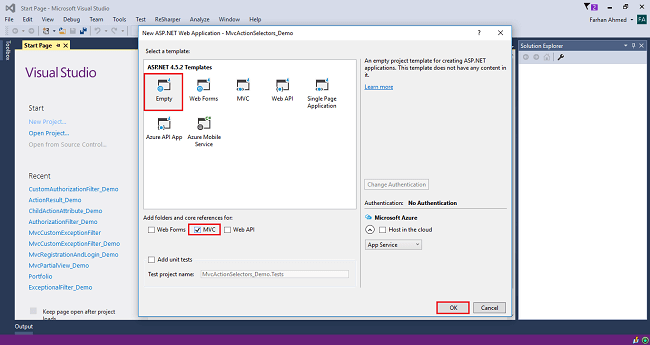
Step 3
Select "empty" template, check on the MVC box, and click OK.
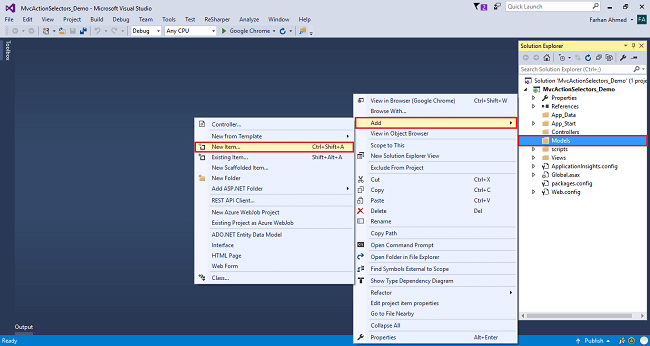
Step 4
Right-click on the Models folder and add a database model. Add Entity Framework now. For that, right-click on Models folder, select Add, then select New Item.
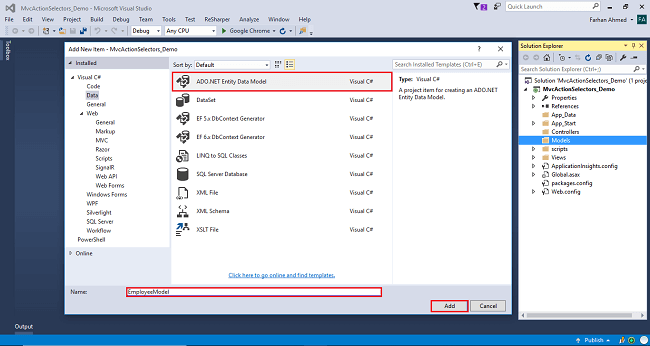
You will get a window; from there, select Data from the left panel and choose ADO.NET Entity Data Model, give it the name EmployeeModel (this name is not mandatory, you can give any name) and click "Add".
After you click on "Add a window", the wizard will open. Choose EF Designer from the database and click "Next".

You will get a window; from there, select Data from the left panel and choose ADO.NET Entity Data Model, give it the name EmployeeModel (this name is not mandatory, you can give any name) and click "Add".

The connection will be added. If you wish, save the connection name as you want. You can change the name of your connection below. It will save the connection in the web config. Now, click "Next".

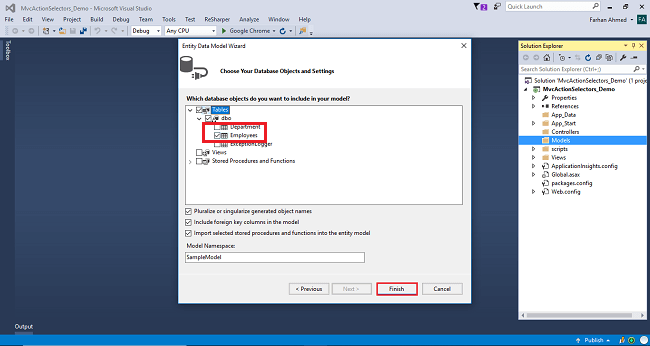
After clicking on NEXT, another window will appear. Choose the database table name as shown in the below screenshot and click "Finish".
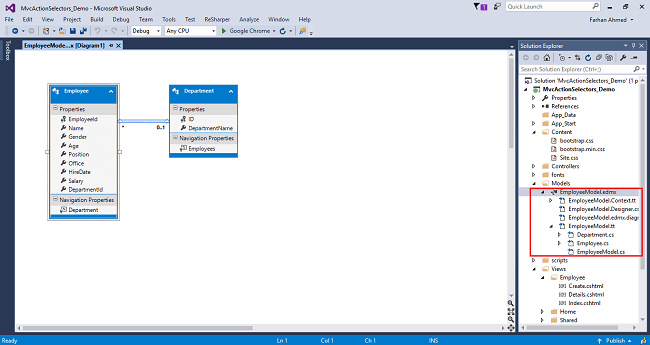
Entity Framework gets added and the respective class gets generated under the Models folder.
Step 5
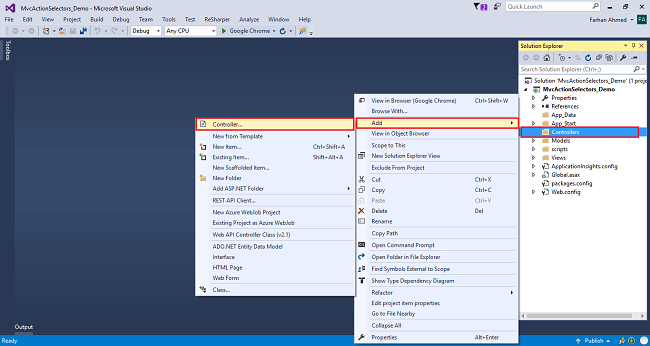
Right-click on Controllers folder add a controller.
Step 5
Right-click on Controllers folder add a controller.
A window will appear. Choose MVC5 Controller-Empty and click "Add".
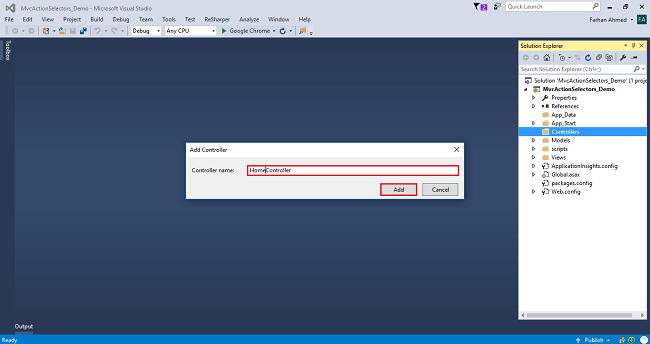
After clicking on "Add", another window will appear with DefaultController. Change the name to HomeController and click "Add". The HomeController will be added under the Controllers folder. Don’t change the Controller suffix for all controllers, change only the highlight, and instead of Default, just change Home.
Controller without NonAction attribute
using System;
using System.Collections.Generic;
using System.Linq;
using System.Web;
using System.Web.Mvc;
using MvcActionSelectors_Demo.Models;
namespace MvcActionSelectors_Demo.Controllers
{
public class DepartmentController : Controller
{
private readonly EmployeeContext _dbContext=new EmployeeContext();
public ActionResult Index()
{
var department = _dbContext.Departments.ToList();
return View(department);
}
public string HelloWorld()
{
return "<h2>Hello World, Welcome to programming.</h2>";
}
}
}
Controller with NonAction attribute
using System;
using System.Collections.Generic;
using System.Linq;
using System.Web;
using System.Web.Mvc;
using MvcActionSelectors_Demo.Models;
namespace MvcActionSelectors_Demo.Controllers
{
public class DepartmentController : Controller
{
private readonly EmployeeContext _dbContext=new EmployeeContext();
public ActionResult Index()
{
var department = _dbContext.Departments.ToList();
return View(department);
}
[NonAction]
public string HelloWorld()
{
return "<h2>Hello World, Welcome to programming.</h2>";
}
}
}
Step 6
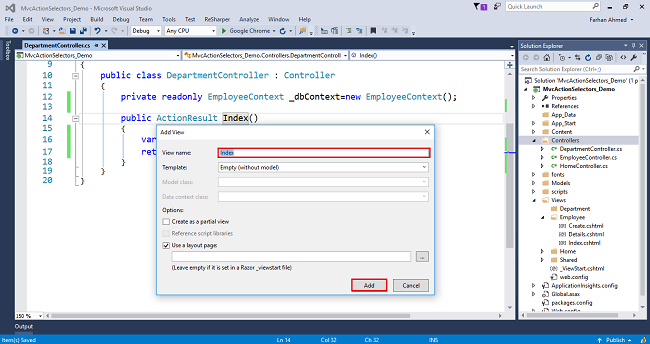
Right-click on Index method in HomeController. The "Add View" window will appear with default index name checked (use a Layout page). Click on "Add".
Code for Index View
@model IEnumerable<MvcActionSelectors_Demo.Models.Department>
@{
ViewBag.Title = "Index";
}
<h2>List of Department</h2>
<table class="table table-bordered">
<thead>
<tr>
<th>@Html.DisplayNameFor(m=>m.ID)</th>
<th>@Html.DisplayNameFor(m=>m.DepartmentName)</th>
</tr>
</thead>
<tbody>
@foreach (var dep in Model)
{
<tr>
<td>@dep.ID</td>
<td>@dep.DepartmentName</td>
</tr>
}
</tbody>
</table>
Step 7
Build and run the project using Ctrl+F5.
http://localhost:56100/Department/HelloWorld

Now, if you navigate to http://localhost:56100/Department/HelloWorld, you will get an error the resource cannot be found as shown below.

In general, it’s a bad practice to have a public method in a Controller that is not an action method. If we have any such method for performing business calculations, it should be somewhere in the Model and not in the Controller. However, if for some reason, we want to have public methods in a controller and we don’t want to treat them as actions, then use Non-Action attribute.