This article introduces how to capture video with a webcam from an ASP.NET Core 3.1 MVC Application using WebRTC.

WebRTC (Web Real-Time Communication) is a free and open-source project which enables web applications and sites to capture and optionally stream audio and/or video media, as well as to exchange arbitrary data between browsers without requiring an intermediary. The technologies behind WebRTC are implemented as an open web standard and available as regular JavaScript APIs in all major browsers.
Let's follow the steps mentioned below to capture a video from a simple ASP.NET Core 3.1 MVC application.
Step 1
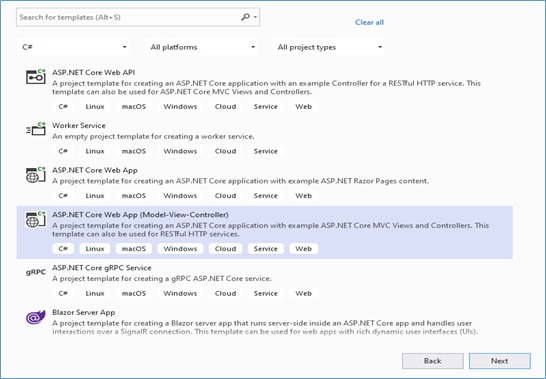
Create an ASP.NET Core 3.1 MVC Web Application.
Step 2
Now go to the Solution Explorer to add a new controller, right-click Controllers > Add > Controller, and give a suitable name like this.
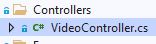
The following is the code snippet for VideoController.cs.
public class VideoController : Controller
{
[HttpGet]
public IActionResult Index()
{
return View();
}
[HttpPost]
public async Task<IActionResult> SaveRecoredFile()
{
if( Request.Form.Files.Any())
{
var file = Request.Form.Files["video-blob"];
string UploadFolder = Path.Combine(Directory.GetCurrentDirectory(), "wwwroot", "UploadedFiles");
string UniqueFileName = Guid.NewGuid().ToString() + "_" + file.FileName+ ".webm";
string UploadPath = Path.Combine(UploadFolder, UniqueFileName);
await file.CopyToAsync(new FileStream(UploadPath, FileMode.Create));
}
return Json(HttpStatusCode.OK);
}
}
Please note that SaveRecoredFile() action method will be used to store the recorded video into a folder and handle post requests.
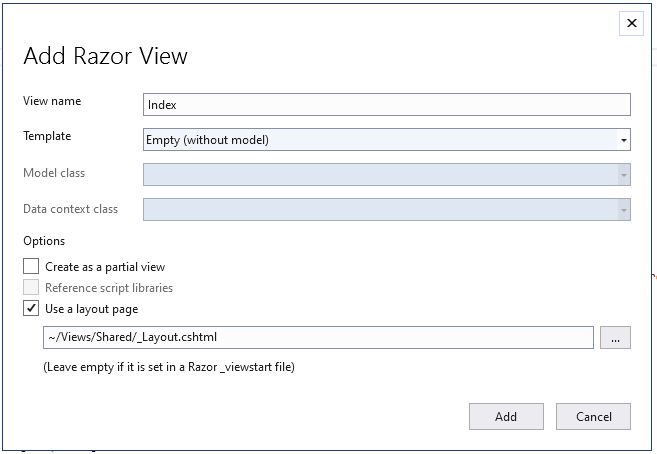
Now Open the VideoController.cs > Set cursor inside the Index Action Method and right-click on inside the Index action method > click on Add View as follows and make sure to check the Use a Layout page option
After adding the view, let's add some HTML code and scripts. The following is the code snippet for the Index.cshtml View.
@{
ViewData["Title"] = "Index";
Layout = "~/Views/Shared/_Layout.cshtml";
}
<div id="container">
<h1>
<a href="//webrtc.github.io/samples/" title="WebRTC samples homepage">ASP.NET Core 3.1 samples</a>
<span>Audio/Video Recording</span>
</h1>
<p>
For more information see the MediaStream Recording API <a href="http://w3c.github.io/mediacapture-record/MediaRecorder.html"
title="W3C MediaStream Recording API Editor's Draft">Editor's Draft</a>.
</p>
<video id="gum" playsinline autoplay muted style="border: 1px solid rgb(15, 158, 238); height: 240px; width: 320px;"></video>
<video id="recorded" playsinline loop style="border: 1px solid rgb(15, 158, 238); height: 240px; width: 320px;"></video>
<div>
<button id="start" class="btn btn-success">Start camera</button>
<button id="record" disabled class="btn btn-info">Start Recording</button>
<button id="play" disabled class="btn btn-warning">Play</button>
<button id="download" disabled class="btn btn-dark">Download</button>
<button id="stop" class="btn btn-danger">Stop camera</button>
</div>
<div> Recording format: <select id="codecPreferences" disabled></select> </div>
<div>
<h4>Media Stream Constraints options</h4>
<p>Echo cancellation: <input type="checkbox" id="echoCancellation"></p>
</div>
<div><span id="errorMsg"></span></div>
</div>
Step 3
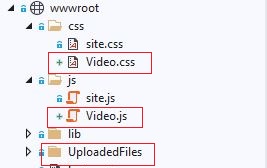
Now create a folder where the captured video files will be stored and add the below Video.css and Video.js file also in css and js folder under wwwroot folder like this.
The following is the code snippet for Video.css
p.borderBelow {
margin: 0 0 20px 0;
padding: 0 0 20px 0;
}
video {
vertical-align: top;
--width: 25vw;
width: var(--width);
height: calc(var(--width) * 0.5625);
}
video:last-of-type {
margin: 0 0 20px 0;
}
video#gumVideo {
margin: 0 20px 20px 0;
}
Here is the code snippet of Video.js. This script is used to capture the video and store it in the folder.
'use strict';
/* globals MediaRecorder */
let mediaRecorder;
let recordedBlobs;
const codecPreferences = document.querySelector('#codecPreferences');
const errorMsgElement = document.querySelector('span#errorMsg');
const recordedVideo = document.querySelector('video#recorded');
const recordButton = document.querySelector('button#record');
recordButton.addEventListener('click', () => {
if (recordButton.textContent === 'Start Recording') {
startRecording();
} else {
stopRecording();
recordButton.textContent = 'Start Recording';
playButton.disabled = false;
downloadButton.disabled = false;
codecPreferences.disabled = false;
}
});
const playButton = document.querySelector('button#play');
playButton.addEventListener('click', () => {
const mimeType = codecPreferences.options[codecPreferences.selectedIndex].value.split(';', 1)[0];
const superBuffer = new Blob(recordedBlobs, { type: mimeType });
recordedVideo.src = null;
recordedVideo.srcObject = null;
recordedVideo.src = window.URL.createObjectURL(superBuffer);
recordedVideo.controls = true;
recordedVideo.play();
});
const downloadButton = document.querySelector('button#download');
downloadButton.addEventListener('click', () => {
const blob = new Blob(recordedBlobs, { type: 'video/webm' });
const url = window.URL.createObjectURL(blob);
const a = document.createElement('a');
a.style.display = 'none';
a.href = url;
a.download = 'test.webm';
document.body.appendChild(a);
a.click();
PostBlob(blob);
setTimeout(() => {
document.body.removeChild(a);
window.URL.revokeObjectURL(url);
}, 100);
});
function handleDataAvailable(event) {
console.log('handleDataAvailable', event);
if (event.data && event.data.size > 0) {
recordedBlobs.push(event.data);
}
}
function getSupportedMimeTypes() {
const possibleTypes = [
'video/webm;codecs=vp9,opus',
'video/webm;codecs=vp8,opus',
'video/webm;codecs=h264,opus',
'video/mp4;codecs=h264,aac',
];
return possibleTypes.filter(mimeType => {
return MediaRecorder.isTypeSupported(mimeType);
});
}
function startRecording() {
recordedBlobs = [];
const mimeType = codecPreferences.options[codecPreferences.selectedIndex].value;
const options = { mimeType };
try {
mediaRecorder = new MediaRecorder(window.stream, options);
} catch (e) {
console.error('Exception while creating MediaRecorder:', e);
errorMsgElement.innerHTML = `Exception while creating MediaRecorder: ${JSON.stringify(e)}`;
return;
}
console.log('Created MediaRecorder', mediaRecorder, 'with options', options);
recordButton.textContent = 'Stop Recording';
playButton.disabled = true;
downloadButton.disabled = true;
codecPreferences.disabled = true;
mediaRecorder.onstop = (event) => {
console.log('Recorder stopped: ', event);
console.log('Recorded Blobs: ', recordedBlobs);
};
mediaRecorder.ondataavailable = handleDataAvailable;
mediaRecorder.start();
console.log('MediaRecorder started', mediaRecorder);
}
function stopRecording() {
mediaRecorder.stop();
}
function handleSuccess(stream) {
recordButton.disabled = false;
console.log('getUserMedia() got stream:', stream);
window.stream = stream;
const gumVideo = document.querySelector('video#gum');
gumVideo.srcObject = stream;
getSupportedMimeTypes().forEach(mimeType => {
const option = document.createElement('option');
option.value = mimeType;
option.innerText = option.value;
codecPreferences.appendChild(option);
});
codecPreferences.disabled = false;
}
function PostBlob(blob) {
//FormData
var formData = new FormData();
formData.append('video-blob', blob);
// POST the Blob
$.ajax({
type: 'POST',
url: "Video/SaveRecoredFile",
data: formData,
cache: false,
contentType: false,
processData: false,
success: function (result) {
if (result) {
console.log('Success');
}
},
error: function (result) {
console.log(result);
}
})
}
async function init(constraints) {
try {
const stream = await navigator.mediaDevices.getUserMedia(constraints);
handleSuccess(stream);
} catch (e) {
console.error('navigator.getUserMedia error:', e);
errorMsgElement.innerHTML = `navigator.getUserMedia error:${e.toString()}`;
}
}
document.querySelector('button#start').addEventListener('click', async () => {
document.querySelector('button#start').disabled = true;
document.querySelector('button#stop').disabled = false;
const hasEchoCancellation = document.querySelector('#echoCancellation').checked;
const constraints = {
audio: {
echoCancellation: { exact: hasEchoCancellation }
},
video: {
width: 1280, height: 720
}
};
console.log('Using media constraints:', constraints);
await init(constraints);
});
document.querySelector('button#stop').addEventListener('click',async () => {
document.querySelector('button#stop').disabled = true;
document.querySelector('button#start').disabled = false;
const video = document.querySelector('video#gum');
const mediaStream = video.srcObject;
await mediaStream.getTracks().forEach(track => track.stop());
video.srcObject = null;
});
Step 4
Now add the below lines in _Layout.cshtml.
<link rel="stylesheet" href="~/css/Video.css" />
<script src="https://webrtc.github.io/adapter/adapter-latest.js"></script>
<script src="~/js/Video.js" asp-append-version="true" async></script>
The following is the complete code snippet of _Layout.cshtml.
<!DOCTYPE html>
<html lang="en">
<head>
<meta charset="utf-8" />
<meta name="viewport" content="width=device-width, initial-scale=1.0" />
<title>@ViewData["Title"] - Sample_Code</title>
<link rel="stylesheet" href="~/lib/bootstrap/dist/css/bootstrap.min.css" />
<link rel="stylesheet" href="~/css/site.css" />
<link rel="stylesheet" href="~/css/Video.css" />
</head>
<body>
<header>
<nav class="navbar navbar-expand-sm navbar-toggleable-sm navbar-light bg-white border-bottom box-shadow mb-3">
<div class="container">
<a class="navbar-brand" asp-area="" asp-controller="Home" asp-action="Index">Sample_Code</a>
<button class="navbar-toggler" type="button" data-toggle="collapse" data-target=".navbar-collapse" aria-controls="navbarSupportedContent"
aria-expanded="false" aria-label="Toggle navigation">
<span class="navbar-toggler-icon"></span>
</button>
<div class="navbar-collapse collapse d-sm-inline-flex flex-sm-row-reverse">
<ul class="navbar-nav flex-grow-1">
<li class="nav-item">
<a class="nav-link text-dark" asp-area="" asp-controller="Home" asp-action="Index">Home</a>
</li>
<li class="nav-item">
<a class="nav-link text-dark" asp-area="" asp-controller="Home" asp-action="Privacy">Privacy</a>
</li>
</ul>
</div>
</div>
</nav>
</header>
<div class="container">
<main role="main" class="pb-3">
@RenderBody()
</main>
</div>
<footer class="border-top footer text-muted">
<div class="container">
© 2021 - Sample_Code - <a asp-area="" asp-controller="Home" asp-action="Privacy">Privacy</a>
</div>
</footer>
<script src="https://webrtc.github.io/adapter/adapter-latest.js"></script>
<script src="~/js/Video.js" asp-append-version="true" async></script>
<script src="~/lib/jquery/dist/jquery.min.js"></script>
<script src="~/lib/bootstrap/dist/js/bootstrap.bundle.min.js"></script>
<script src="~/js/site.js" asp-append-version="true" ></script>
@RenderSection("Scripts", required: false)
</body>
</html>
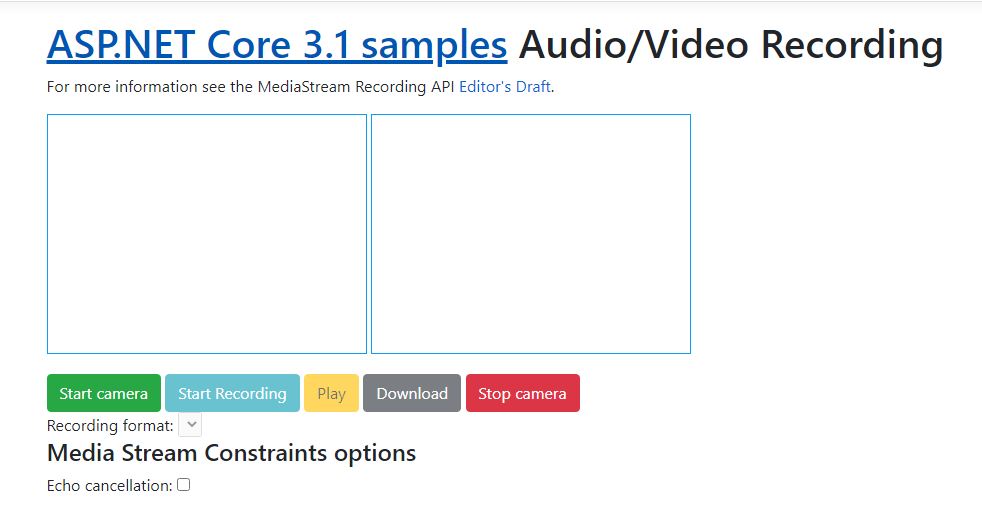
Now let's build and run the application to see the output.