European ASP.NET MVC Hosting

BLOG about Latest ASP.NET MVC Hosting and Its Technology - Dedicated to European Windows Hosting Customer

ASP.NET MVC Hosting - HostForLIFEASP.NET :: Routing In MVC Application ( Types And Implementation Methods )

clock September 22, 2021 07:47 by author Peter

Introduction
This article will summarize adjusting routing configurations in an MVC project
The aim of the adjustments was to trace a problem that a certain action was hit multiple times
The problem had nothing to do with routing, but I investigated routing configuration in my search for the cause

The rest of the article will describe different types of routing supported and the configurations needed in the levels of,

  • Application execution pipeline (middleware)
  • The controllers and action

Definitions
Routing is responsible for matching incoming HTTP requests and dispatching those requests to the app's executable endpoints
Endpoints are the app's units of executable request-handling code. Endpoints are defined in the app and configured when the app starts

Types of routing
Conventional Based Routing

It is the basic routing type implemented by default.
You will find the middleware pipeline configured to implement this type through the following code in the startup.cs.
app.UseEndpoints(endpoints => {
endpoints.MapControllerRoute(name: "default", pattern: "{controller=Home}/{action=Index}/{id?}");
})


The HTTP request with a URL of format /Home/Index or Home/Index/1 will be processed by the action method Index n Home Controller or By Z Action method in the Y controller if the URL was http://abc.com/Y/Z.

Area Conventional Based Routing

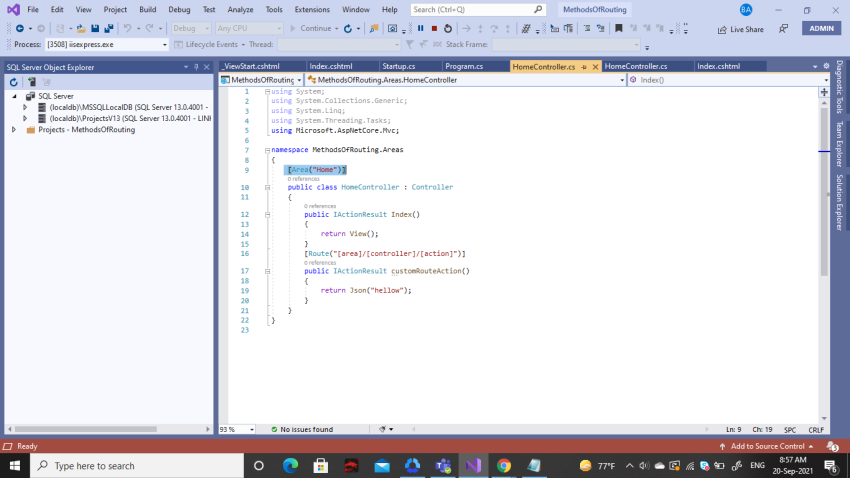
  • Areas provide a way to partition an ASP.NET Core Web app into smaller functional groups
  • Each group has its own set of Razor Pages, controllers, views, and models

Controller level
View Level
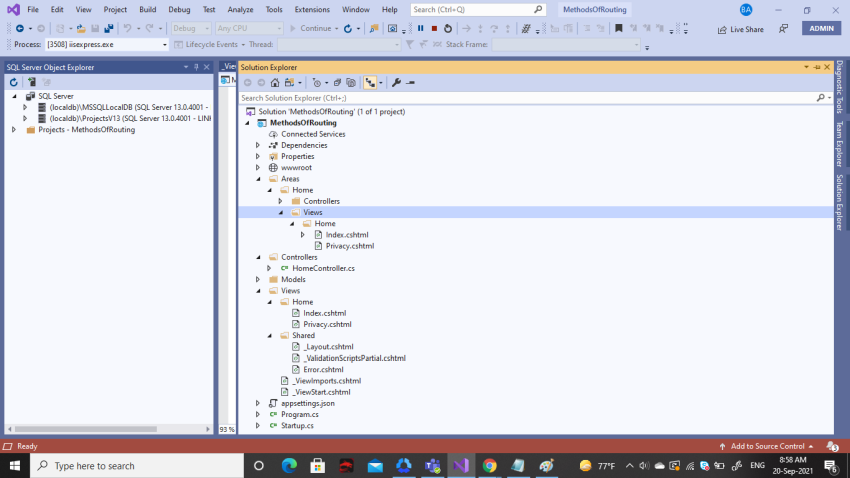

Application execution pipeline can be configured to enable area-based routing in either one of the following two ways.
Using a code similar to the previous one as follows,
endpoints.MapControllerRoute(name: "Area", pattern: "{area:exists}/{controller=Home}/{action=Index}/{id?}", defaults: new {
    area = "Home"
});


Using MapAreaControllerRoute method IEndpointRouteBuilderInterface as in the following example,

endpoints.MapAreaControllerRoute(pattern: "{area}/{controller}/{action}/{id?}", name: "areas", areaName: "Home", defaults: new {
    controller = "Home", action = "Index"
});

Mixed Conventional Based Routing
    In Mixed Conventional Based Routing
    The URL specified in the HTTP request is checked against the patterns specified in both routing types
    Default routing is determined by finding a match against the patterns specified in each routing type in order

Attribute routing
Hopefully, we will discuss this in a later article.

Examples
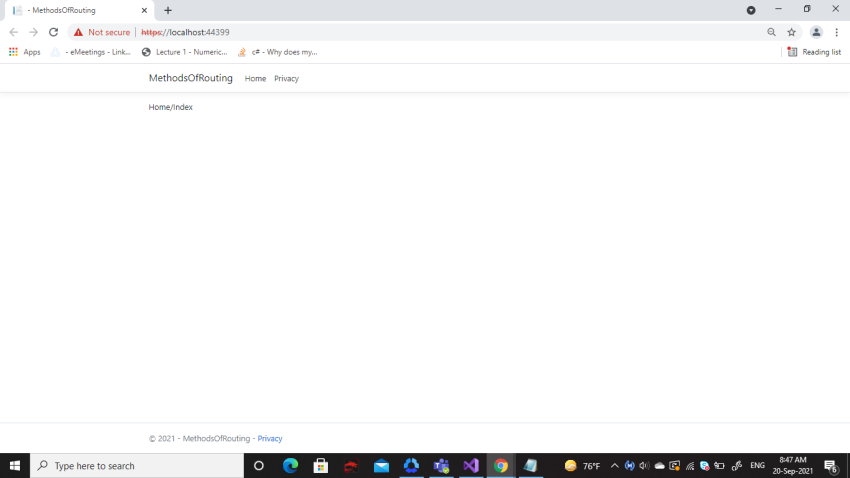
Default routing type (conventional without area support).
configuration in the startup.cs
app.UseEndpoints(endpoints => {
    endpoints.MapControllerRoute(name: "default", pattern: "{controller=Home}/{action=Index}/{id?}");
})

Result
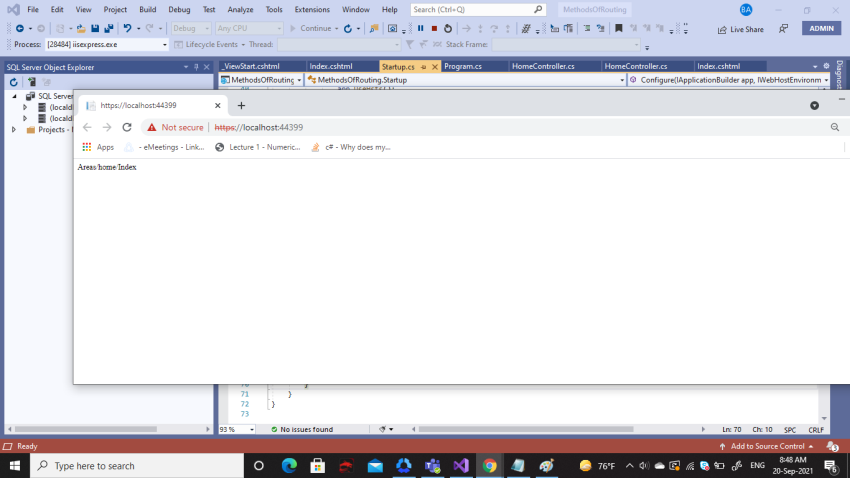
Conventional with area support
Configuration in the startup.cs either,
endpoints.MapAreaControllerRoute(pattern: "{area}/{controller}/{action}/{id?}", name: "areas", areaName: "Home", defaults: new {
    controller = "Home", action = "Index"
});


or,
endpoints.MapControllerRoute(name: "Area", pattern: "{area:exists}/{controller=Home}/{action=Index}/{id?}", defaults: new {
    area = "Home"
});

Result
Mixed conventional

Example 1 - configuration

endpoints.MapControllerRoute(name: "default", pattern: "{controller=Home}/{action=Index}/{id?}");
endpoints.MapAreaControllerRoute(pattern: "{area}/{controller}/{action}/{id?}", name: "areas", areaName: "Home", defaults: new {
    controller = "Home", action = "Index"
});

Result
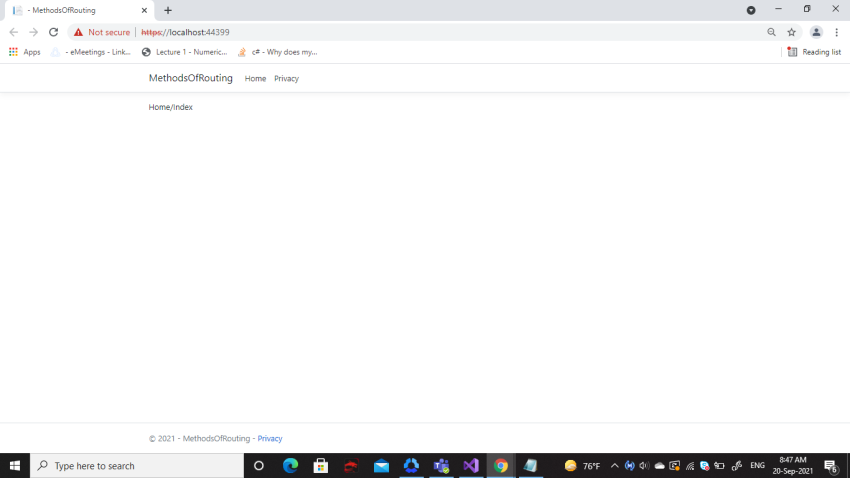
Example 2 - Configuration
endpoints.MapAreaControllerRoute(pattern: "{area}/{controller}/{action}/{id?}", name: "areas", areaName: "Home", defaults: new {
    controller = "Home", action = "Index"
});
endpoints.MapControllerRoute(name: "default", pattern: "{controller=Home}/{action=Index}/{id?}");

Result
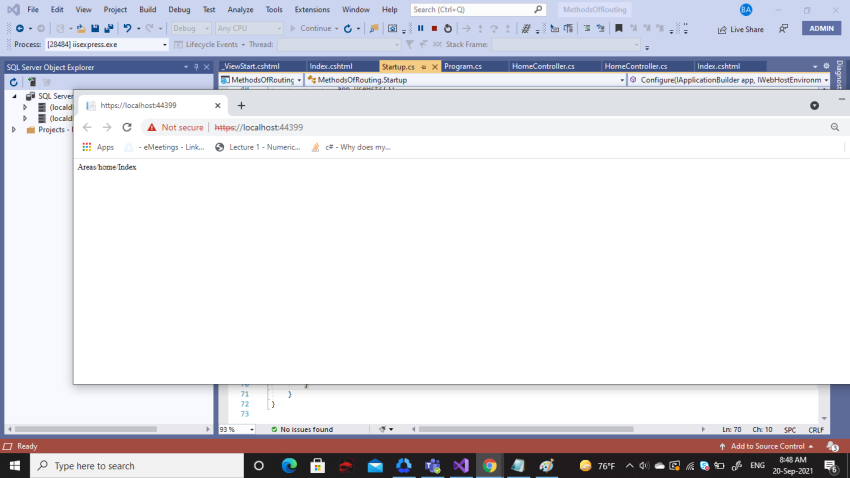
Redirecting from an action in a controller not belonging to an area to an action belonging to an area.

From Controller this will work only if area conventional routing comes first in the startup.cs file as follows,
endpoints.MapAreaControllerRoute(pattern: "{area}/{controller}/{action}/{id?}", name: "areas", areaName: "Home", defaults: new {
    controller = "Home", action = "Index"
});
endpoints.MapControllerRoute(name: "default", pattern: "{controller=Home}/{action=Index}/{id?}");

Otherwise, errors of too many directions will occur.
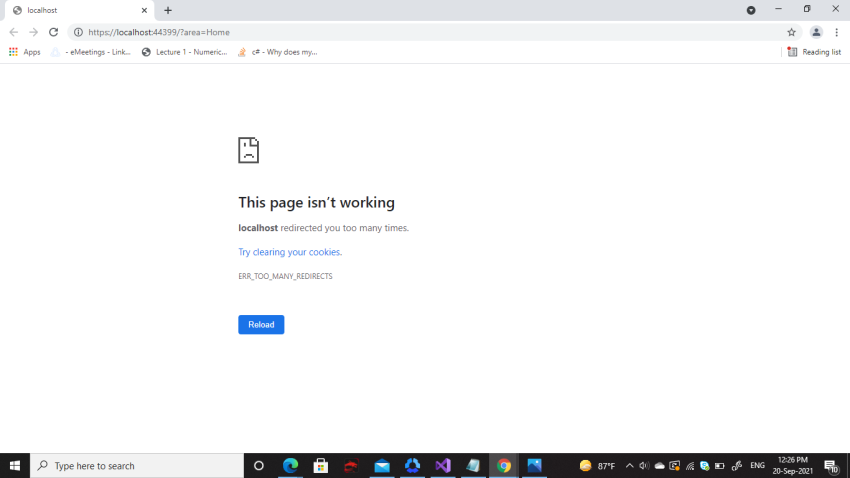

Through a hyperlink.

Example
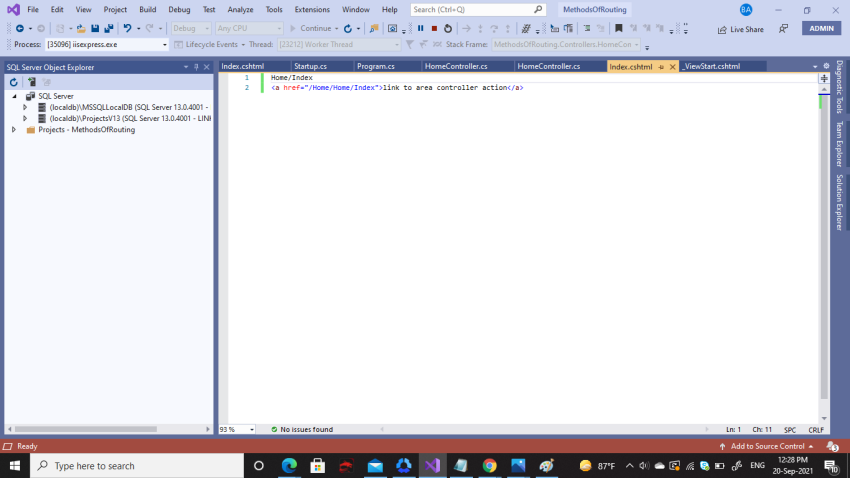

Result
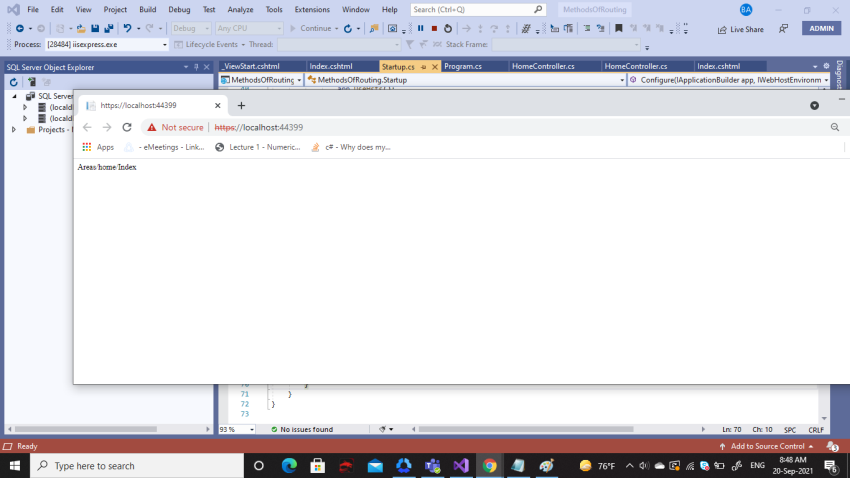
This article summarized different conventional routing implementation methods as well as ways to navigate between routes.


ASP.NET MVC Hosting - HostForLIFEASP.NET :: Simple Blazor Components In .NET CORE MVC 3.1

clock September 16, 2021 10:05 by author Peter

In this article, we will add a Razor component to our existing .NET Core MVC project.
 
Blazor is a framework for building interactive client-side web UI with .NET. With it, you can:

    Create rich interactive UIs using C# instead of JavaScript.
    Share server-side and client-side app logic written in .NET.
    Render the UI as HTML and CSS for wide browser support, including mobile browsers.

Blazor apps are based on components. A component in Blazor is an element of UI, such as a page, dialog, or data entry form.
 
Let's start with a few simple steps.

Step 1

Step 2


Step 3
Add a Microsoft.AspNetCore.Components reference to your project if not available.

Step 4
Add a Component folder inside the view/shared folder, then add a Razor component.


Step 5
For the Razor component we have written a simple method named "GetData", which you can see below. Also, I have made 2 public properties for getting data from the view and decorating it with the attribute name as Parameter.

    <div class="card-header">  
      
        <h3>DataComponent</h3>  
        <button @onclick="Getdata" class="btn btn-dark">Click to GetData    </button>  
    </div>  
    <div class="card-body">  
        <br />  
        <div class="@style">@Data </div>  
    </div>  
      
    @code {  
        [Parameter]  
        public string Data { get; set; } = string.Empty;  
        [Parameter]  
        public string style { get; set; }  
        private void Getdata()  
        {  
            Data = "I am Working";  
            style = "badge-success";  
      
        }  
      
    }  


Step 6
The below code you need to add to your _Layout.cshtml  
This is for registering Blazor to your web application:
    <base href="~/" />  
    <script src="_framework/blazor.server.js"></script>


Step 7
Add simple _Imports.razor file to your root of the project which consists of the below code. These namespaces are required to access the component features over your components.

    @using System.Net.Http  
    @using Microsoft.AspNetCore.Authorization  
    @using Microsoft.AspNetCore.Components.Authorization  
    @using Microsoft.AspNetCore.Components.Forms  
    @using Microsoft.AspNetCore.Components.Routing  
    @using Microsoft.AspNetCore.Components.Web  
    @using Microsoft.JSInterop  
      
    @using System.IO   

Step 8
Add services.AddServerSideBlazor(); to your startup file method name ConfigureServices.
Add endpoints.MapBlazorHub(); to your Configure method.

    public void ConfigureServices(IServiceCollection services)  
        {   
            services.AddServerSideBlazor();  
            services.AddControllersWithViews();  
        }  
      
        // This method gets called by the runtime. Use this method to configure the HTTP request pipeline.  
        public void Configure(IApplicationBuilder app, IWebHostEnvironment env)  
        {  
            if (env.IsDevelopment())  
            {  
                app.UseDeveloperExceptionPage();  
            }  
            else  
            {  
                app.UseExceptionHandler("/Home/Error");  
                // The default HSTS value is 30 days. You may want to change this for production scenarios, see https://aka.ms/aspnetcore-hsts.  
                app.UseHsts();  
            }  
            app.UseHttpsRedirection();  
            app.UseStaticFiles();  
      
            app.UseRouting();  
      
            app.UseAuthorization();  
      
            app.UseEndpoints(endpoints =>  
            {  
                endpoints.MapControllerRoute(  
                    name: "default",  
                    pattern: "{controller=Home}/{action=Index}/{id?}");   
                endpoints.MapBlazorHub();  
            });  
      
        }  

Step 9
The last step is to render components on your View page.
You can see that I am passing 2 parameters as requested in our DataViewComponent.razor file

    @{  
        ViewData["Title"] = "Home Page";  
    }  
    <div class="text-center">  
        <h1 class="display-4">Welcome</h1>  
          
    </div>  
      
    <div class="card">  
         
            @(await Html.RenderComponentAsync<BlazorComponentProject.Views.Shared.Components.DataViewComponent>(RenderMode.ServerPrerendered,new {  Data="I came from Index",style= "badge-danger" }))  
               
          
    </div>   

Our main focus in this article was to help you to integrate your existing Web application build in .NET Core MVC 3.1 with Blazor and use the Blazor components in it. Please refer to the project and debug the process for more understanding. I hope it helps!


ASP.NET MVC Hosting - HostForLIFEASP.NET :: Scheduling In ASP.NET MVC Core

clock September 6, 2021 07:22 by author Peter

In this blog, we will learn how to use the Quartz scheduler in ASP.NET Core. We may perform jobs in the background using this scheduler. We can use Quartz scheduling to perform a job every 5 minutes.


Step 1
To begin, make a project with the ASP.NET core web application template. Choose Asp.net MVC for your online application.

Step 2
There are two ways to install the Quartz package.

Search for Quartz in the Nuget package manager and install it.

Using NuGet package manager console.


Step 3
Now we'll make a folder under the models and call it anything we want. We'll make a task and a scheduler in this folder.

Create Task
The objective is to create a basic class where you can write your logic.

We'll add a task in the schedule folder and call it task1. We shall save the current time in a text file in this task.

The class code is shown below,
using Quartz;
using System;
using System.Collections.Generic;
using System.IO;
using System.Linq;
using System.Threading.Tasks;
namespace QuartzSchduling.Models.Schedule {
    public class Task1: IJob {
        public Task Execute(IJobExecutionContext context) {
            var task = Task.Run(() => logfile(DateTime.Now));;
            return task;
        }
        public void logfile(DateTime time) {
            string path = "C:\\log\\sample.txt";
            using(StreamWriter writer = new StreamWriter(path, true)) {
                writer.WriteLine(time);
                writer.Close();
            }
        }
    }
}

Now, beneath the c drive, make a folder and call it to log. In this folder, we'll make a text file with the name sample.txt.

Scheduler task
We'll now construct a new class that will handle the trigger task. This class's job is to start the task that I've already established. Set the frequency at which it runs.

Below is the code of the class,
using Quartz;
using Quartz.Impl;
using System;
using System.Collections.Generic;
using System.Linq;
using System.Threading.Tasks;
namespace QuartzSchduling.Models.Schedule {
    public class SchedulerTask {
        private static readonly string ScheduleCronExpression = "* * * ? * *";
        public static async System.Threading.Tasks.Task StartAsync() {
            try {
                var scheduler = await StdSchedulerFactory.GetDefaultScheduler();
                if (!scheduler.IsStarted) {
                    await scheduler.Start();
                }
                var job1 = JobBuilder.Create < Task1 > ().WithIdentity("ExecuteTaskServiceCallJob1", "group1").Build();
                var trigger1 = TriggerBuilder.Create().WithIdentity("ExecuteTaskServiceCallTrigger1", "group1").WithCronSchedule(ScheduleCronExpression).Build();
                await scheduler.ScheduleJob(job1, trigger1);
            } catch (Exception ex) {}
        }
    }
}

You've only completed one job in the code above. If you wish to execute more than one job, just create a new class, as we did with task1.

We will now add this job to taskscheduler.
//First Task
var job1 = JobBuilder.Create < Task1 > ().WithIdentity("ExecuteTaskServiceCallJob1", "group1").Build();
var trigger1 = TriggerBuilder.Create().WithIdentity("ExecuteTaskServiceCallTrigger1", "group1").WithCronSchedule(ScheduleCronExpression).Build();
//  Second Task
var job2 = JobBuilder.Create < Task2 > ().WithIdentity("ExecuteTaskServiceCallJob2", "group2").Build();
var trigger2 = TriggerBuilder.Create().WithIdentity("ExecuteTaskServiceCallTrigger2", "group2").WithCronSchedule(ScheduleCronExpression).Build();
await scheduler.ScheduleJob(job1, trigger1);
await scheduler.ScheduleJob(job2, trigger2);

You've just seen the ScheduleCronExpression in the code above. The cron expression is a format that specifies how often your task will be performed.

Below I give you some examples,

Every Second : * * * ? * *
Every Minute : 0 * * ? * *
Every Day noon 12 pm : 0 0 12 * * ?

Final Step
Now register your scheduler task to startup.

public Startup(IConfiguration configuration) {
    //The Schedular Class
    SchedulerTask.StartAsync().GetAwaiter().GetResult();
    Configuration = configuration;
}


All you have to do now is run your code and check your text file, which is often running at the time you set in the cron expression.

In this blog, we learned how to schedule a task in asp.net core, which we can use to perform any operation, such as sending mail at a certain time. As a result, we can perform any operation with this, and it's quite easy to set up.


ASP.NET MVC Hosting - HostForLIFEASP.NET :: ASP.NET MVC Model Binder And Custom Binder

clock September 1, 2021 08:26 by author Peter

ASP.NET MVC Model binding is one of the best features in ASP.NET MVC Framework. It is a bridge between HTTP request and action methods. It helps GET and POST to get automatically transferred into the data model.

MVC Model Binder uses Default Model Binder for building model parameter for MVC runtime.

Now,  before this we would like to first explain simple model binding.

Now, we have created a new MVC Web application project by File- New Project- Web Application – MVC.
Now, we will add a new strongly typed View which we will bind to the model, as shown below.
    @model ModelBinding.Models.Client  
    @ {  
        ViewBag.Title = "GetClient";  
    } < h3 Details < /h3>   
      < h2 >   
      Cleint Code: @Model.ClientCode   
        < br / >   
        Cleint Name: @Model.ClientName   
    < /h2> 

Now, add a Client Model in Models folder, as shown below.
    public class Client {  
        public string ClientCode {  
            get;  
            set;  
        }  
        public string ClientName {  
            get;  
            set;  
        }  
    } 

Add ClientController which is shown below.
    public class ClientController: Controller {  
        // GET: Client  
        public ActionResult GetClient() {  
            Client cnt = new Client {  
                ClientCode = "1001",  
                    ClientName = "Peter"  
            };  
            return View(cnt);  
        }  
    }  


Now, add another action method as EnterClient which will allow the users to enter client details, as shown below.
    public ActionResult EnterCleint() {  
        return View();  
    }  


As shown below, it is having two textboxes and Submit button. Along with it, the form is using POST method for the action Submit.
    @ {  
        ViewBag.Title = "EnterCleint";  
    } < h2 > EnterCleint < /h2> < form action = "Submit"  
    method = "post" > Cleint Code: < input type = "text"  
    name = "ClientCode " / > < br / > Cleint Name: < input type = "text"  
    name = "ClientName " / > < br / > < input type = "submit"  
    value = "Submit"  
    id = "Submit" / > < /form>  
 Now, we will create Submit action methond in the Controller.
    public ActionResult Submit() {  
        Client cnt = new Client {  
            ClientCode = Request.Form["CleintCode"],  
                ClientName = Request.Form["CleintName"]  
        };  
        return View("GetClient", cnt);  
    }  


In the above code, we are fetching the values on the basis of textbox name and assigning it to Client and passing to GetCleint View.

Now, you can improve your code by adding parameter of type model in action method as shown below,
    public ActionResult Submit(Client cnt) {  
        return View("GetClient", cnt);  
    }  


Here, we have to take care textboxes name must be same in above example.

Now, if we will take a real-life example - the designing team works on design and developers work on development i.e. property name of the model and control names are different. In this case, it is very difficult to maintain the name on both sides or we can say lots of efforts is required for the same.

To overcome such a scenario, we can take the help of Model Binders, we can say Model Binder has mapping code which connects your user interface with your Model. It acts like a bridge between the Model and View.

Now, let’s see the same with example.

Lets add a View having two textboxes and Submit button. Along with it, the form is using post method to action Submit.
    @ {  
        ViewBag.Title = "EnterCleint";  
    } < h2 > EnterCleint < /h2> < form action = "Submit"  
    method = "post" > Cleint Code: < input type = "text"  
    name = "txtClientCode" / > < br / > Cleint Name: < input type = "text"  
    name = "txtClientName" / > < br / > < input type = "submit"  
    value = "Submit"  
    id = "Submit" / > < /form>  


In the above example, the View is having two textboxes, i.e., txtClientCode and txtClientName which are not same as property names of Client model.

Now, add a new folder as Utilities.
Now, add a class, ClientBinder class, which will implement the System.Web.Mvc.IModelBinder as shown below.
    public class ClientBinder: IModelBinder {  
        public object BindModel(ControllerContext controllerContext, ModelBindingContext bindingContext) {  
            HttpContextBase context = controllerContext.HttpContext;  
            string clientCode = context.Request.Form["txtClientCode"];  
            string clientName = context.Request.Form["txtClientName"];  
            return new Client {  
                ClientCode = clientCode,  
                    ClientName = clientName  
            };  
        }  
    }  

In the above code, we are accessing the form object from the request object with the help of context object and converting it into Model, i.e., Client.

Now, we need to use the above ClientBinder and map it to our Client object which we will do in below.
    ActionResult Submit([ModelBinder(typeof(ClientBinder))] Client cnt)  

In the above code, we are using ClientBinder.

Now, add/modify the action method.
    public ActionResult Submit([ModelBinder(typeof(ClientBinder))] Client cnt) {  
        return View("GetClient", cnt);  
    }  


That's it. We are done here.


About HostForLIFE

HostForLIFE is European Windows Hosting Provider which focuses on Windows Platform only. We deliver on-demand hosting solutions including Shared hosting, Reseller Hosting, Cloud Hosting, Dedicated Servers, and IT as a Service for companies of all sizes.

We have offered the latest Windows 2019 Hosting, ASP.NET 5 Hosting, ASP.NET MVC 6 Hosting and SQL 2019 Hosting.


Tag cloud

Sign in