In this article will learn CURD (Create, Update, Read and Delete) operation which is common for most web applications. Here will understand SQL Database, Dapper Micro-ORM (Object Relation Mapper) along with repository pattern using ASP.NET Core 6 MVC.

What is Dapper?
Dapper is a micro ORM or it is a simple object mapper framework that helps to map the native query output to a domain class.
Creating a New Project in Visual Studio 2022
Start Visual Studio software and select Create a new project.
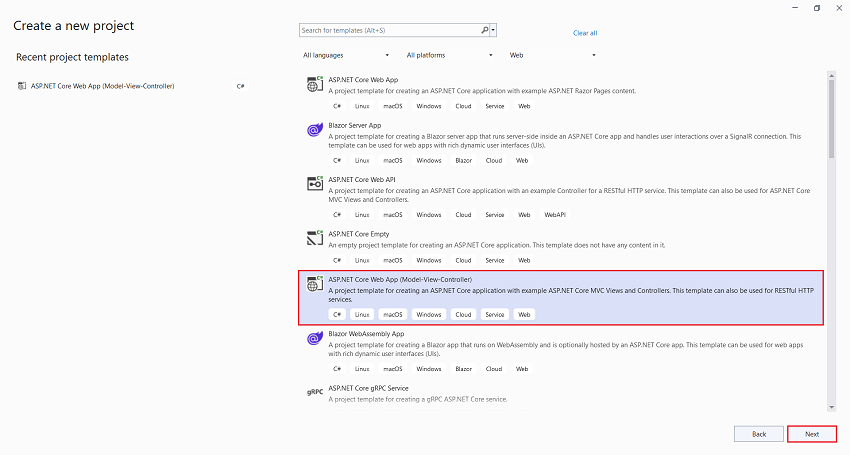
In the Create a new project dialog, select ASP.NET Core Web App (Model-View Controller) > Next.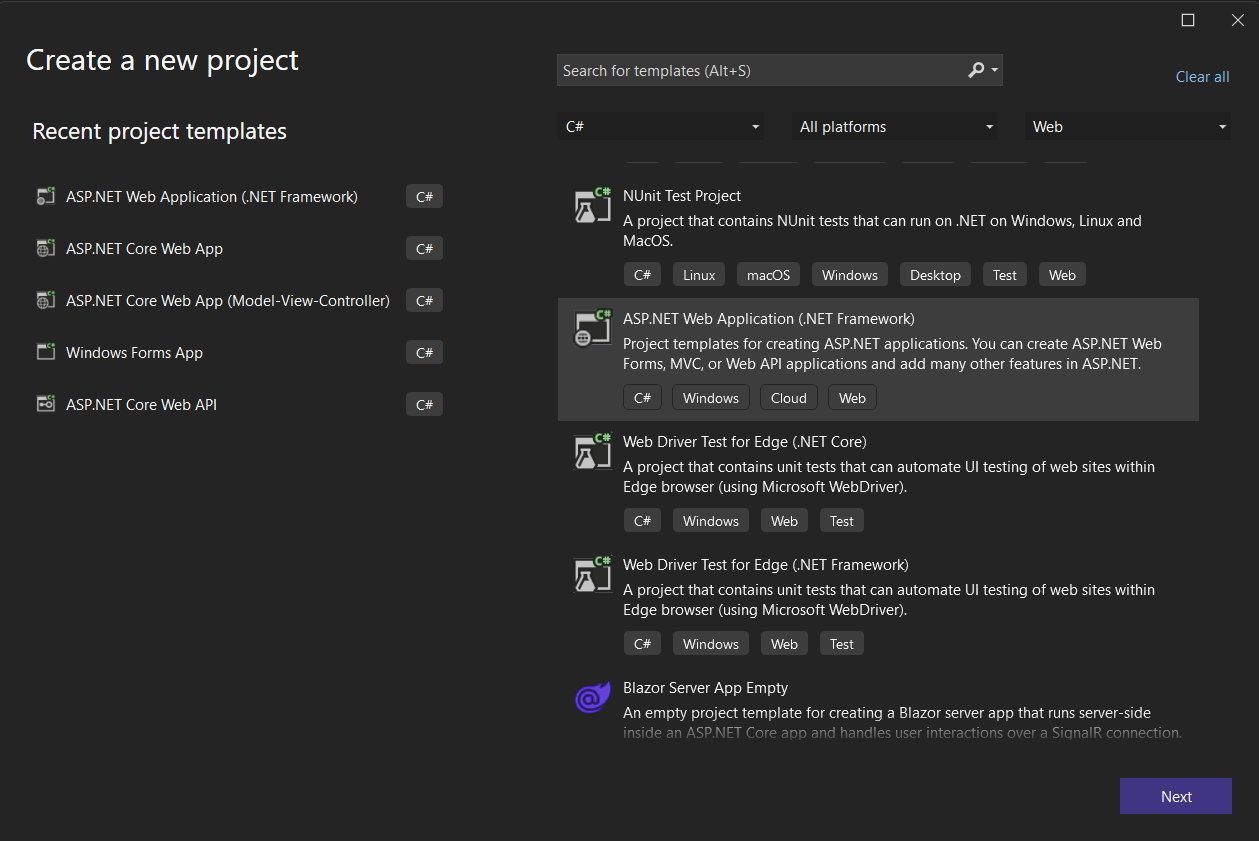
In the Create a new project dialog, select ASP.NET Core Web App (Model-View Controller) > Next.
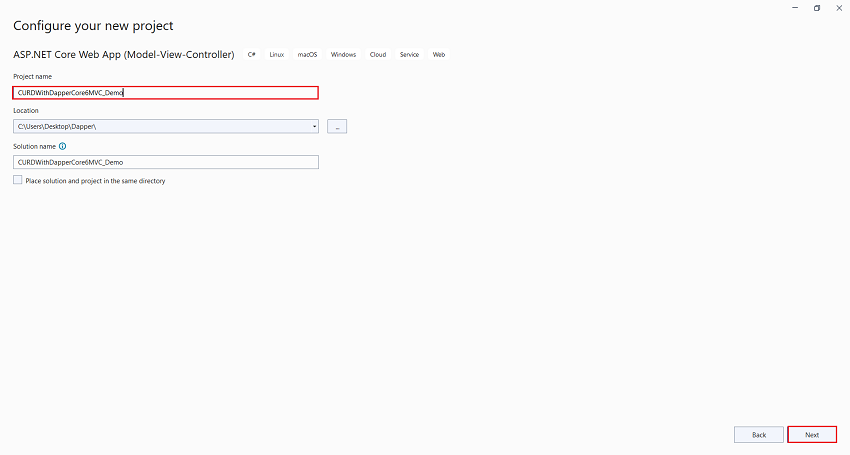
In the Configure your new project dialog, enter CURDWithDapperCore6MVC_Demo for Project name. It's important to name the project CURDWithDapperCore6MVC_Demo. The capitalization needs to match each namespace when code is copied. Select Next.
In the Additional information dialog, select .NET 6.0 (Long-term support). Select Create
The Visual Studio project 2022 will now generate the structure for the selected application. In this example, we are using ASP.Net MVC so we can create a controller to write the code, or so we can use the existing controller. There you can enter the code and build/run the application.
Install the Dapper, Microsoft.Data.SqlClient Library through NuGet Package Manager
The Visual Studio software provides the NuGet Package manager option to install the package directly to the solution.
In Visual Studio Select Tools > NuGet Package Manager > Manage NuGet Packages for the solution. The below screenshot shows how to open the NuGet Package Manager.
Search for the specific package Dapper, Microsoft.Data.SqlClient using the search box on the upper left. Select a package from the list to display its information, enable the Install button and a version-selection drop-down, as shown in the below screenshot. The NuGet package will be installed for your project and reference will be added, as seen in the screenshot below.
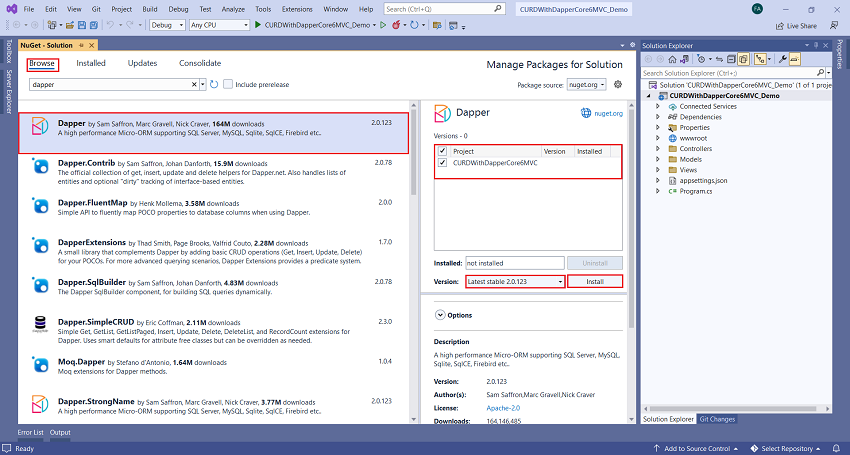
In the above image, we can see the list of the related search items. We need to select the required option to install the package to the solution.
Add Connection String
In solution explorer select a file appsettings.json double click on this file to open "Add" connection string as shown below.
{
"Logging": {
"LogLevel": {
"Default": "Information",
"Microsoft.AspNetCore": "Warning"
}
},
"AllowedHosts": "*",
"ConnectionStrings": {
"DefaultConnection": "Data Source=.;Initial Catalog=Companies-DB;Integrated Security=True;Pooling=False;Encrypt=false"
}
}
Add Models class
Right-click the Models folder > Add > Class. Name the file Company.cs
using System.ComponentModel.DataAnnotations;
namespace CURDWithDapperCore6MVC_Demo.Models
{
public class Company
{
public int Id { get; set; }
[Display(Name ="Company Name")]
public string CompanyName { get; set; }
[Display(Name = "Company Address")]
public string CompanyAddress { get; set; }
public string Country { get; set; }
[Display(Name = "Glassdoor Rating")]
public int GlassdoorRating { get; set; }
}
}
Add DBContext Folder and DapperContext Class
Right click on Project in Solution Explorer>Add New>New Folder. Rename this folder to DBContext. Now right click on DBContext folder > Add> New Item> C# class name this class DapperContext.
using Microsoft.Data.SqlClient;
using System.Data;
namespace CURDWithDapperCore6MVC_Demo.DBContext
{
public class DapperContext
{
private readonly IConfiguration _configuration;
private readonly string _connectionString;
public DapperContext(IConfiguration configuration)
{
_configuration = configuration;
_connectionString = _configuration.GetConnectionString("DefaultConnection");
}
public IDbConnection CreateConnection() => new SqlConnection(_connectionString);
}
}
Add Repositories Folder and ICompanyRepository Interface
Right click on Project in Solution Explorer>Add New>New Folder. Rename this folder to Repositories. Now right click on DBContext folder > Add> New Item>C# Interface and name this interface ICompanyRepository.
using CURDWithDapperCore6MVC_Demo.Models;
namespace CURDWithDapperCore6MVC_Demo.Repositories
{
public interface ICompanyRepository
{
Task<IEnumerable<Company>> GetCompanies();
Task<Company> GetCompany(int? id);
Task CreateCompany(Company company);
Task UpdateCompany(int id, Company company);
Task DeleteCompany(int id);
}
}
Add Company Repository class to Implement Interface
Right click on Repositories Add> New Item>C# class and name this class to CompanyRepository.
using CURDWithDapperCore6MVC_Demo.DBContext;
using CURDWithDapperCore6MVC_Demo.Models;
using Dapper;
using System.Data;
namespace CURDWithDapperCore6MVC_Demo.Repositories
{
public class CompanyRepository : ICompanyRepository
{
private readonly DapperContext context;
public CompanyRepository(DapperContext context)
{
this.context = context;
}
public async Task<IEnumerable<Company>> GetCompanies()
{
var query = "SELECT * FROM Companies";
using (var connection = context.CreateConnection())
{
var companies = await connection.QueryAsync<Company>(query);
return companies.ToList();
}
}
public async Task<Company> GetCompany(int? id)
{
var query = "SELECT * FROM Companies WHERE Id = @Id";
using (var connection = context.CreateConnection())
{
var company = await connection.QuerySingleOrDefaultAsync<Company>(query, new { id });
return company;
}
}
public async Task CreateCompany(Company company)
{
var query = "INSERT INTO Companies (CompanyName, CompanyAddress, Country,GlassdoorRating) VALUES (@CompanyName, @CompanyAddress, @Country, @GlassdoorRating)";
var parameters = new DynamicParameters();
parameters.Add("Name", company.CompanyName, DbType.String);
parameters.Add("Address", company.CompanyAddress, DbType.String);
parameters.Add("Country", company.Country, DbType.String);
parameters.Add("Country", company.GlassdoorRating, DbType.Int32);
using (var connection = context.CreateConnection())
{
await connection.ExecuteAsync(query, parameters);
}
}
public async Task UpdateCompany(int id, Company company)
{
var query = "INSERT INTO Companies (CompanyName, CompanyAddress, Country,GlassdoorRating) VALUES (@CompanyName, @CompanyAddress, @Country, @GlassdoorRating WHERE Id = @Id)";
var parameters = new DynamicParameters();
parameters.Add("Name", company.CompanyName, DbType.String);
parameters.Add("Address", company.CompanyAddress, DbType.String);
parameters.Add("Country", company.Country, DbType.String);
parameters.Add("Country", company.GlassdoorRating, DbType.Int32);
using (var connection = context.CreateConnection())
{
await connection.ExecuteAsync(query, parameters);
}
}
public async Task DeleteCompany(int id)
{
var query = "DELETE FROM Companies WHERE Id = @Id";
using (var connection = context.CreateConnection())
{
await connection.ExecuteAsync(query, new { id });
}
}
}
}
Add a controller
In Solution Explorer, right-click Controllers > Add > Controller.
In the Add New Scaffolded Item dialog box, select MVC Controller – MVC Controller with read/write actions > Add.
In the Add New Item - Companies dialog, enter CompaniesController.cs and select Add.
Replace the contents of Controllers/ CompaniesController.cs with the following code:
Add a view
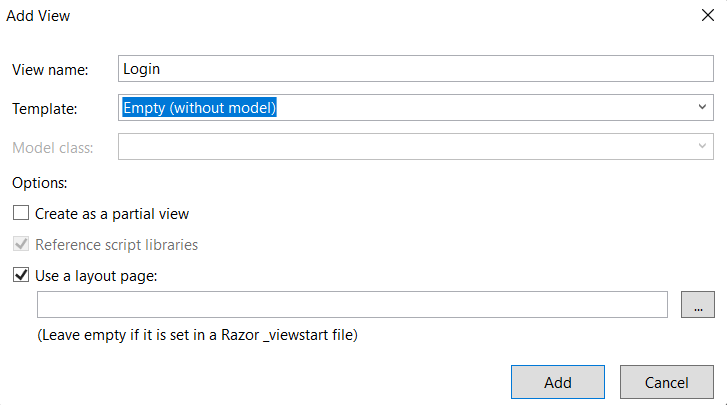
Right-click on the Action in CompaniesController, and then Add View.
In the Add New Scaffolded Item dialog:
Select Razor View Select Add
View Name: Index
Template: List
Model Class: Company
Select Add
Replace the contents of the Views/Companies/Index.cshtml Razor view file with the following:
@model IEnumerable<CURDWithDapperCore6MVC_Demo.Models.Company>
@{
ViewData["Title"] = "Index";
}
<h2 class="text-capilization text-center">List of Companies</h2>
<p>
<a asp-action="Create" class="btn btn-primary"> <i class="fa-solid fa-circle-plus"></i> Add New</a>
</p>
<table class="table table-bordered">
<thead>
<tr>
<th>
@Html.DisplayNameFor(model => model.Id)
</th>
<th>
@Html.DisplayNameFor(model => model.CompanyName)
</th>
<th>
@Html.DisplayNameFor(model => model.CompanyAddress)
</th>
<th>
@Html.DisplayNameFor(model => model.Country)
</th>
<th>
@Html.DisplayNameFor(model => model.GlassdoorRating)
</th>
<th>Action(s)</th>
</tr>
</thead>
<tbody>
@foreach (var item in Model) {
<tr>
<td>
@Html.DisplayFor(modelItem => item.Id)
</td>
<td>
@Html.DisplayFor(modelItem => item.CompanyName)
</td>
<td>
@Html.DisplayFor(modelItem => item.CompanyAddress)
</td>
<td>
@Html.DisplayFor(modelItem => item.Country)
</td>
<td>
@Html.DisplayFor(modelItem => item.GlassdoorRating)
</td>
<td>
<a href="@Url.Action("Details",new { id=item.Id})" class="btn btn-sm btn-primary"><i class="fa-solid fa-eye"></i></a>
<a href="@Url.Action("Edit",new { id=item.Id})" class="btn btn-sm btn-info"><i class="fa-solid fa-pen-to-square"></i></a>
<a href="@Url.Action("Delete",new { id=item.Id})" class="btn btn-sm btn-danger"><i class="fa-solid fa-trash"></i></a>
</td>
</tr>
}
</tbody>
</table>
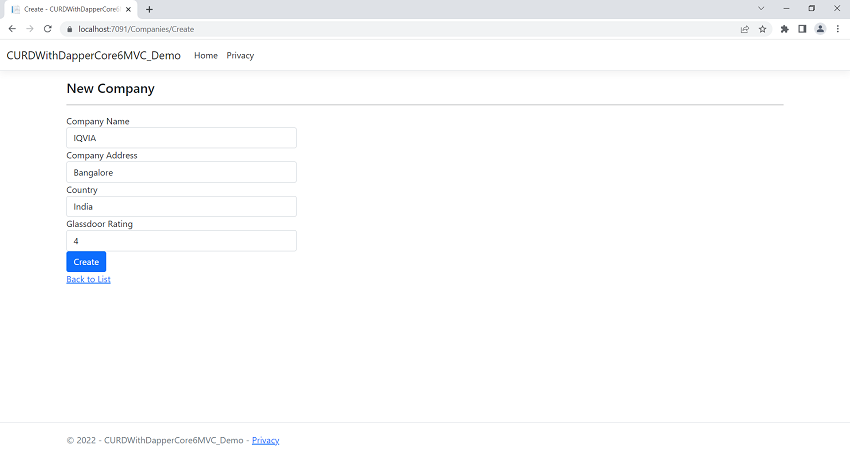
Note: Similarly Add all action view like Details, Create, Edit and Delete
Now its time to build and run your application Ctrl+F5

The above article has taught us. How we can use dapper with repository pattern. Dapper is Micro ORM whereas Entity Framework is ORM. Dapper is faster than entity framework. Hope you enjoyed the article. Happy Coding.