The primary purpose of areas in MVC is to separate and manage Model, View, Controller, Themes and routing registration file into separate sections. In other words, areas serve as a technique for dividing and managing a large Application into well managed smaller modules with the separate M-V-C in each module.

Why to use areas in MVC Application?
If you are building a CRM Application for a small Educational Consultancy with multiple business units such as Registration on Arrival, Information Gathering by Receptionist, Updates by Consular, Documentation Management, Interview Preparation, Billing, and Report Generation by different departments etc. Each of these units have their own logical components views, controllers and models. In this scenario, you can use ASP.NET MVC areas to physically partition the business components in the same project.
It is also possible that we can have large projects that uses MVC, then we need to split the Application into smaller units called areas that isolates the larger MVC Application into smaller functional groupings. A MVC Application can contain several MVC structures (areas).
Areas are the small functional units with its own set of Model, View and Controller
MVC Application can have any number of areas.
Each area has its own controllers, models and views.
Areas are put under separate folders called areas.
Today, we will be creating a new ASP.NET MVC Application and define a new area inside the project.
Creating new MVC Application
Step 1
Open Visual Studio.
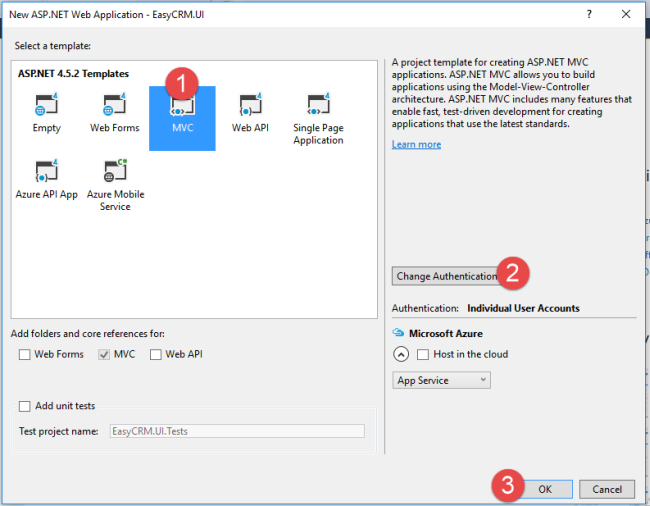
Step 2
Create an ASP.NET Web Application with MVC template, as shown below.
Step 3
In Solution Explorer, right-click on the project and click Add. Select areas to add an area.
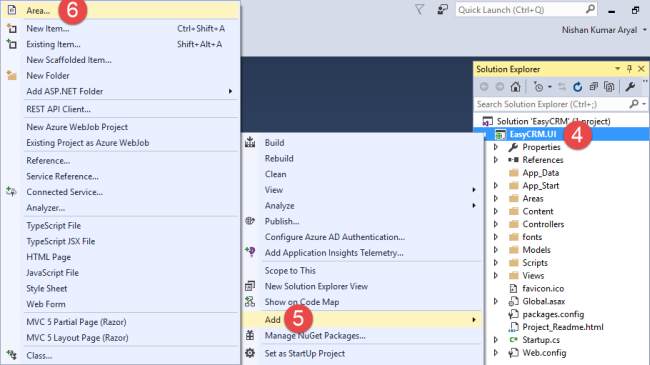
Step 4
Enter the name for the area, such as "Consular" or “SuperAdmin”.

Adding Controller for Area
Now, let’s add a controller in Area.
Step 1
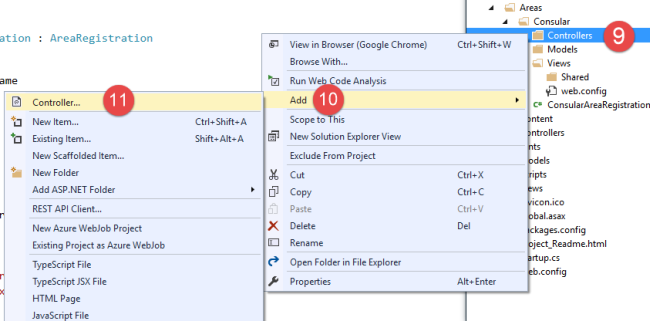
Right-click on the Controller in your article area to add a controller.
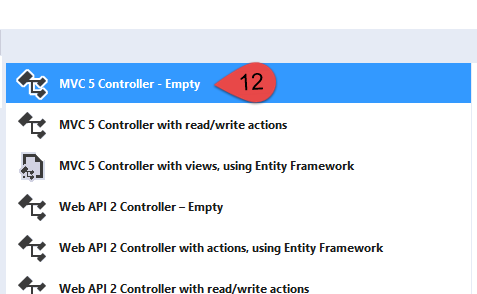
Step 2
Select "MVC 5 Empty Controller.
Step 3Provide controller name as "ManageInterviewController”. Now, your Area folder should look, as shown below.

Adding Views for Area
We have successfully added a controller for our area. Now, let’s add a view for the area.
Step 1
Right-click on the "Index" method of ManageInterviewConsular Controller and click on Add View.
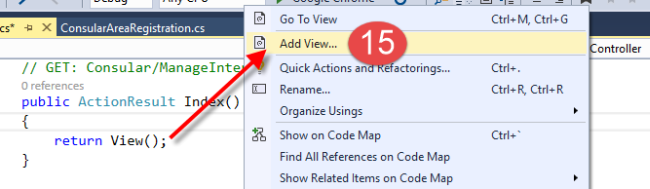
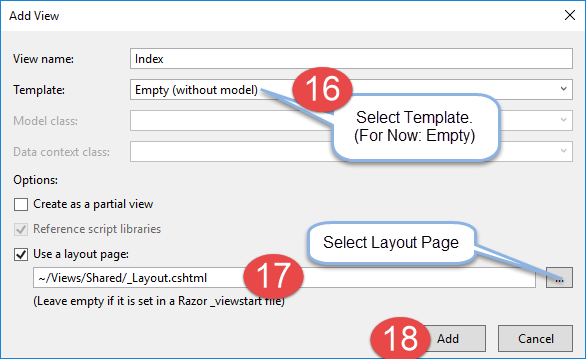
Step 2
Enter the view name and select Layout page.
Step 3
Generate some content in the View of Index method, as shown below.
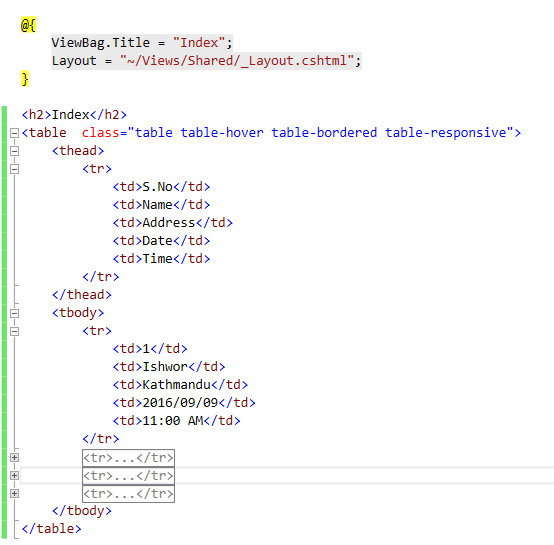
Index g (table table-hover table-bordered table-responsive" >Time< /tr>Kathmandu< /tr> " "picture_x0020_6"="">
Area Registration
Step 1
Open the "Global.asax" file.
Step 2
Add the code given below in your Application_Start() method.
AreaRegistration.RegisterAllAreas();
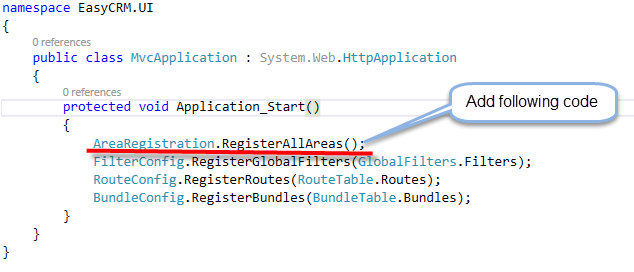
Till here, we have successfully added an area. Inside Area is the one, where we have added aController and a View for Index method.
Now, let’s add a link in Navbar of an Application to navigate to the view, which we created just now.
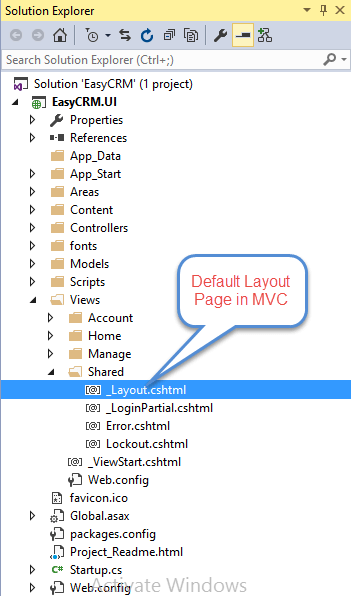
Step 1
Open the project view Layout file.
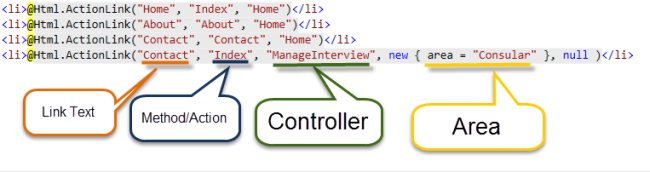
Step 2
Modify the <ul> </ul> in the layout file, as shown in the code given below.
Step 3
Debug the Application and open List Interview link, as shown below.
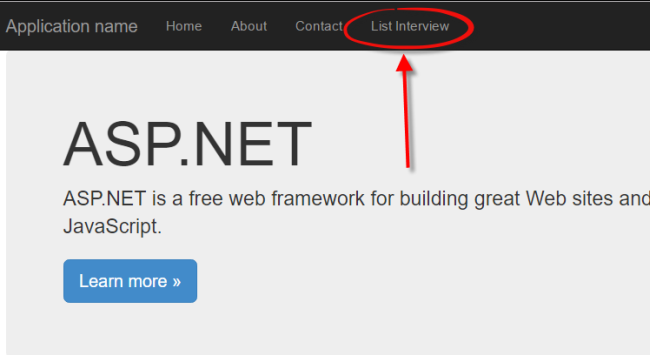
Let’s notice the URL
As highlighted, to invoke the controller of the area, we need to use
Baseurl/Areaname/Controller/{actionname}