
December 12, 2024 07:30 by
 Peter
PeterHello everyone, in this post I will describe how to use MVC to implement remote validation. The technique of remote validation involves publishing data to a server without uploading all of the form data in order to verify particular data. Let's look at a real-world example. I had to verify whether an email address was already in the database for one of my projects. For that, remote validation was helpful; we could validate just the user-provided email address without publishing all the data.

Practical explanation
Let's make an MVC project and give it the appropriate name—in my case, "TestingRemoteValidation." Let's make a model called UserModel that will resemble the project once it has been created.
public class UserModel
{
[Required]
public string UserName { get; set; }
[Remote("CheckExistingEmail","Home",ErrorMessage = "Email already exists!")]
public string UserEmailAddress { get; set; }
}
Let's get some understanding of the remote attribute used, so the very first parameter “CheckExistingEmail” is the name of the action. The second parameter “Home” is referred to as the controller so to validate the input for the UserEmailAddress the “CheckExistingEmail” action of the “Home” controller is called and the third parameter is the error message. Let's implement the “CheckExistingEmail” action result in our home controller.
public ActionResult CheckExistingEmail(string UserEmailAddress)
{
bool ifEmailExist = false;
try
{
ifEmailExist = UserEmailAddress.Equals("[email protected]") ? true : false;
return Json(!ifEmailExist, JsonRequestBehavior.AllowGet);
}
catch (Exception ex)
{
return Json(false, JsonRequestBehavior.AllowGet);
}
}
For simplicity, I am just validating the user input with a hard-coded value ([email protected]) but we can call the database and determine whether or not the given input exists in the database.
Let's create the view using the defined “UserModel” and using the create scaffold template; the UI will look like this.
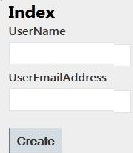
I hope this will help.