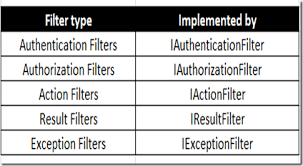
Extra logic is injected at various MVC Framework request processing levels using ASP.NET MVC Filters. Cross-cutting issues (logging, authorization, and caching) can be addressed via filters. The various types of filters that the MVC Framework offers, how to manage their execution, and how to develop and utilize filters are all covered in this article. We are able to design our own unique filters. Every time a request is made, the controller's action method must determine whether the user was authorized to carry out the action and examine its outcome. Four different kinds of filters are supported by the ASP.NET MVC Framework. ASP.NET MVC 5 introduces Authentication Filters. Each enables you to add logic at various stages of the request processing process.

| Filter Type |
Interface |
Description |
| Authentication |
IAuthenticationFilter |
These are Runs, before any other filters or the action method. |
| Authorization |
IAuthorizationFilter |
These Runs first, before any other filters or the action method. |
| Action |
IActionFilter |
These Runs before and after the action method. |
| Result |
IResultFilter |
Runs before and after the action result are executed. |
| Exception |
IExceptionFilter |
Runs only if another filter, the action method, or the action resultthrows an exception. |
Types of Filters in ASP.NET MVC and their Sequence of Execution
There are five types of Filters in ASP.NET MVC 5,
- Authentication Filters
Authentication filter runs before any other filter or action method. Authentication confirms that you are a valid or invalid user. Action filters implement the IAuthenticationFilter interface.
- Authorization Filters
The AuthorizeAttribute and RequireHttpsAttribute are examples of Authorization Filters. Authorization Filters are responsible for checking User Access; these implement the IAuthorizationFilterinterface in the framework. These filters used to implement authentication and authorization for controller actions. For example, the Authorize filter is an example of an Authorization filter.
- Action Filters
Action Filter is an attribute that you can apply to a controller action or an entire controller. This filter will be called before and after the action starts executing and after the action has executed. Action filters implement the IActionFilter interface that has two methods OnActionExecuting andOnActionExecuted. OnActionExecuting runs before the Action and gives an opportunity to cancel the Action call. These filters contain logic that is executed before and after a controller action executes, you can use an action filter, for instance, to modify the view data that a controller action returns.
- Result Filters
The OutputCacheAttribute class is an example of Result Filters. These implement the IResultFilter interface which like the IActionFilter has OnResultExecuting and OnResultExecuted. These filters contain logic that is executed before and after a view result is executed. Like if you want to modify a view result right before the view is rendered to the browser.
- ExceptionFilters
The HandleErrorAttribute class is an example of ExceptionFilters. These implement the IExceptionFilter interface and they execute if there are any unhandled exceptions thrown during the execution pipeline. These filters can be used as an exception filter to handle errors raised by either your controller actions or controller action results.
You can override the methods in your controller class if you want.
Creating a new custom Authentication Filter with ASP.NET MVC 5
Note.The ActionFilterAttribute class implements both the IActionFilter and IResultFilter interfaces. This class is abstract, which forces you to provide an implementation. The other classes, Authorize Attribute and HandleErrorAttribute, contain useful features and can be used without creating a derived class.
I’m going to use a custom Authentication filter to set the new principal for the current request, a custom authentication filter that will simply redirect the user back to the login page if they're not authenticated.

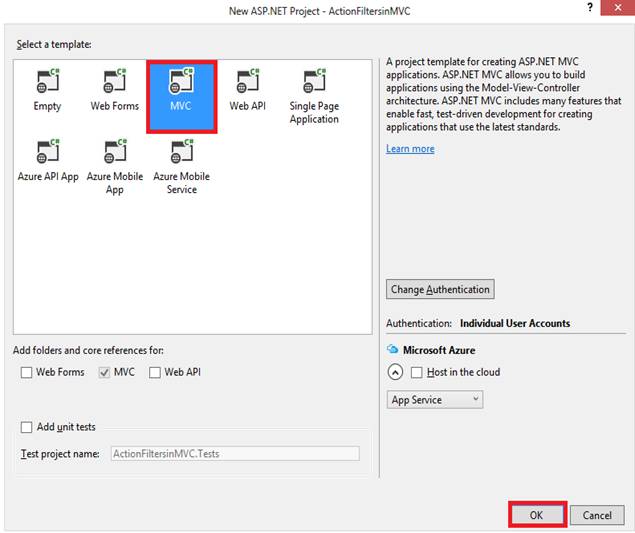
Choose MVC, and click on the “OK” button.
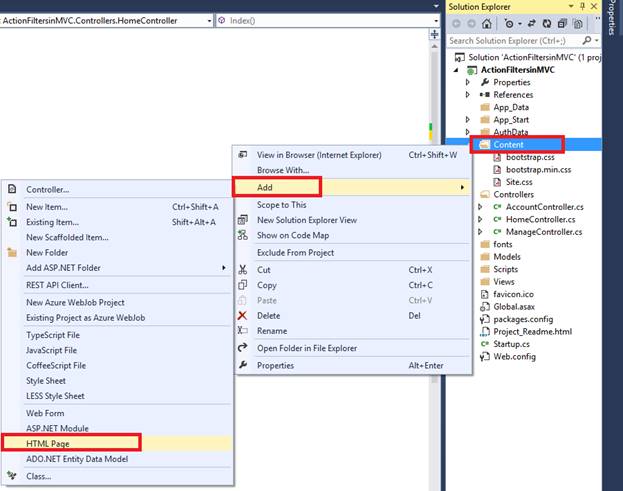
To create an Authentication filter, you must implement the IAuthenticationFilter. I need to create a new folder. Right-click on to your project and add a new folder.
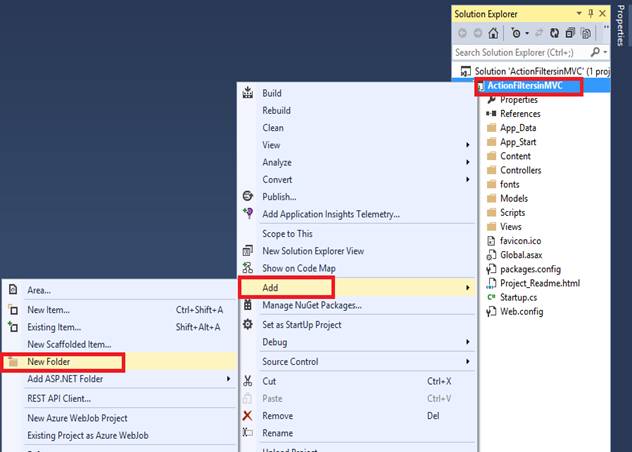
I named this folder “AuthData”. I need to add a class inside this folder. So right-click on to this folder and add a class.
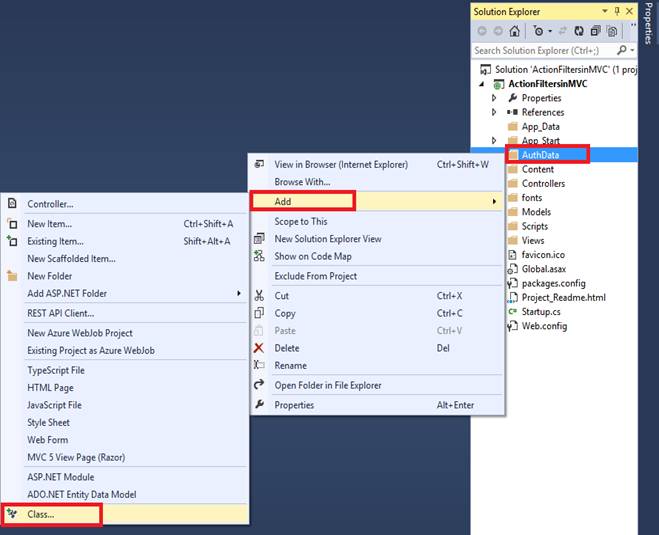
I have given “AuthAttribute” name to my class. Click on to “Add” button.

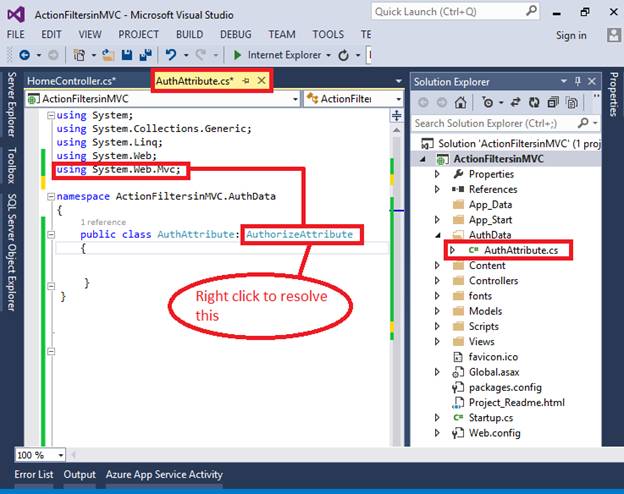
Here, we have derived the AuthAttributeclass from theActionFilterAttribute, IAuthenticationFilter class. I need to resolve it from the “ActionFiltersinMVC.AuthData” namespace.
public class AuthAttribute : ActionFilterAttribute, IAuthenticationFilter
{
// Implementation here
}
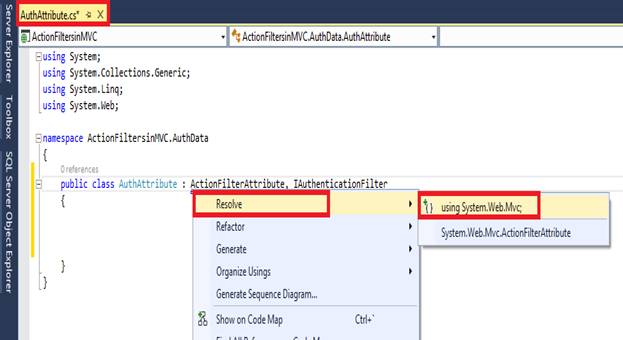
You can see the following screenshot.

The IAuthenticationFilter interface defines two methods: OnAuthentication and OnAuthenhenticationChallenge. The OnAuthentication method is executed first and can be used to perform any needed authentication. The OnAuthenticationChallengemethod is used to restrict access based upon the authenticated user's principal.
ResloveActionFilterAttribute and IAuthenticationFilter form the “using System.Web.MVC.Filters;” namespace.
namespace ActionFiltersinMVC.AuthData
{
public class AuthAttribute : ActionFilterAttribute, IAuthenticationFilter
{
public void OnAuthentication(AuthenticationContext filterContext)
{
// Logic for authenticating a user
}
// Runs after the OnAuthentication method
public void OnAuthenticationChallenge(AuthenticationChallengeContext filterContext)
{
// TODO: Additional tasks on the request
}
}
}
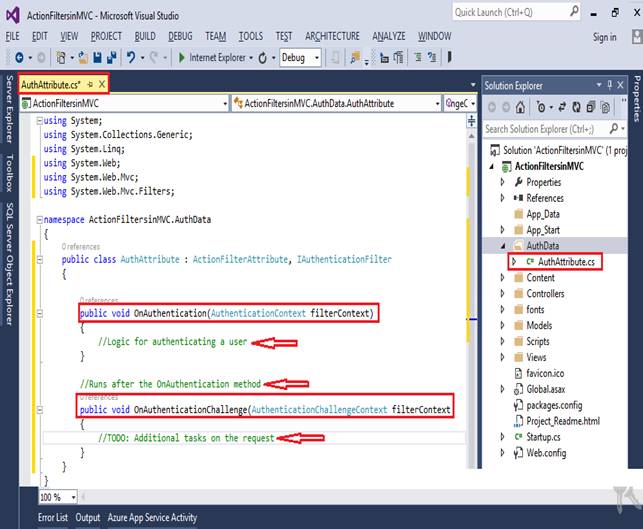
In OnAuthentication, I write code for user authentication and in OnAuthenticationChallenge, I write some code for the other tasks.

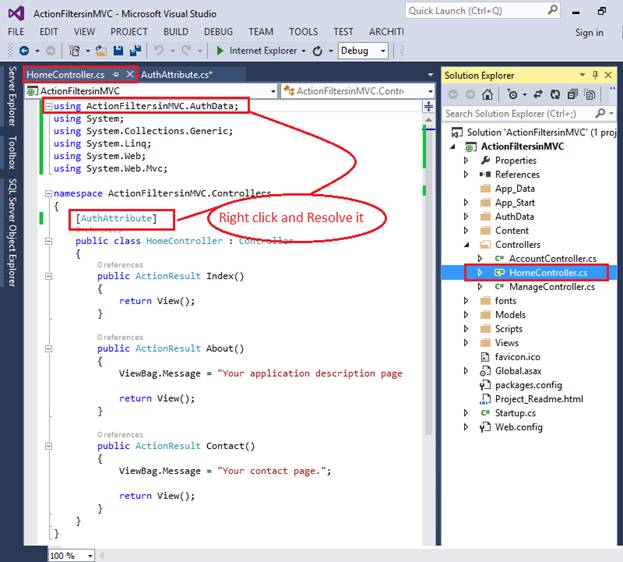
You can now test out the AuthAttribute by applying it to the HomeController class. Open up the HomeController class file, then add using statement for your AuthData namespace.
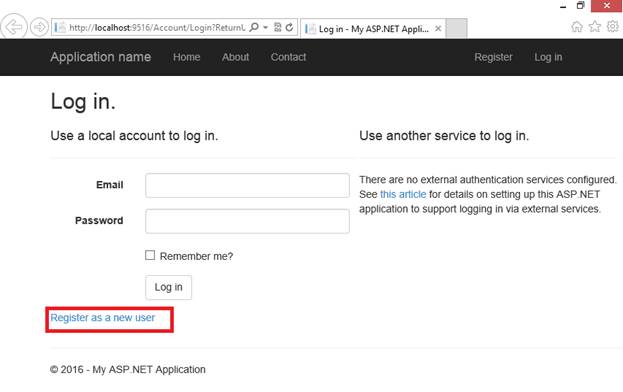
Here is my Login page, go for the new user registration.
I have used my email address to create a new password and clicked on to “Register” button.

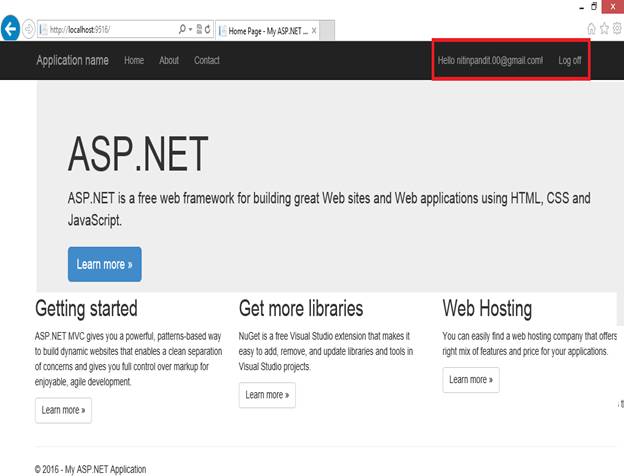
You can see, I’m logged in with my email.

You can also manage your account setting as in the following screenshot.

Authorization Filter
These filters enforce your authorization policy ensuring that action methods can be invoked only by approved users. These filters are the filters that run before the action method is invoked. These filters implement the IAuthorizationFilter interface,
namespace system.Web.MVC
{
public interface IAuthorizationFilter
{
void OnAuthorization(AuthorizationContext filterContext);
}
}
For the Authorization, let’s make some changes in the “AuthAttribute” class.
This “AuthAttribute” class should inherit by “AuthorizeAttribute” classes. For using the AuthorizeAttribute” class, we need to add the namespace:
using System.Web.Mvc
using System;
using System.Collections.Generic;
using System.Linq;
using System.Web;
using System.Web.Mvc;
namespace ActionFiltersinMVC.AuthData
{
public class AuthAttribute : AuthorizeAttribute {}
}
We override the AuthorizeCore(HttpContextBasehttpContext) method, this ensures that I benefit from the feature build in Authorize attribute. The constructor of the filter AuthAttribute (boolallowedParam), takes the bool value indicating whether local requests are permitted by taking advantage of the building feature of authorization attribute base class, I only have to focus the authorization logic and return true from the authorize core method.
using System;
using System.Collections.Generic;
using System.Linq;
using System.Web;
using System.Web.Mvc;
namespace ActionFiltersinMVC.AuthData
{
public class AuthAttribute : AuthorizeAttribute
{
private bool localAllowed;
public AuthAttribute(bool allowedParam)
{
localAllowed = allowedParam;
}
protected override bool AuthorizeCore(HttpContextBase httpContext)
{
if (httpContext.Request.IsLocal)
{
return localAllowed;
}
else
{
return true;
}
}
}
}

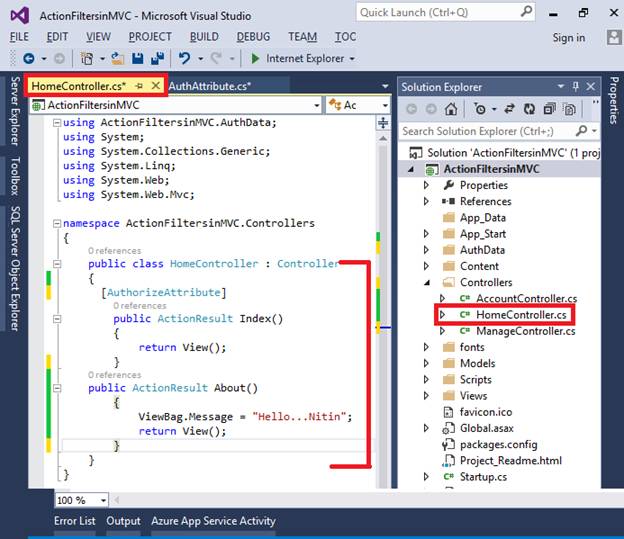
Now open the “Home Controller” and apply some code, In this, I have applied the Authorize attribute filterover the Index() method. For using the [AuthorizeAttribute] we need to add the namespace “using ActionFiltersinMVC.AuthData;”.
using ActionFiltersinMVC.AuthData;
public class HomeController : Controller
{
[AuthorizeAttribute]
public ActionResult Index()
{
return View();
}
}

And in the About action method, we simply print a message.
using ActionFiltersinMVC.AuthData;
using System;
using System.Collections.Generic;
using System.Linq;
using System.Web;
using System.Web.Mvc;
namespace ActionFiltersinMVC.Controllers
{
public class HomeController : Controller
{
[AuthorizeAttribute]
public ActionResult Index()
{
return View();
}
public ActionResult About()
{
ViewBag.Message = "Hello...Peter";
return View();
}
}
}
Here is the screenshot of Controller.
Now save the project and run the project by pressing F5. You’ll redirect on to the login page. Enter the Email and password to login to the account; I have registered myself in the Authentication filters part, so there is no need for the new registration.
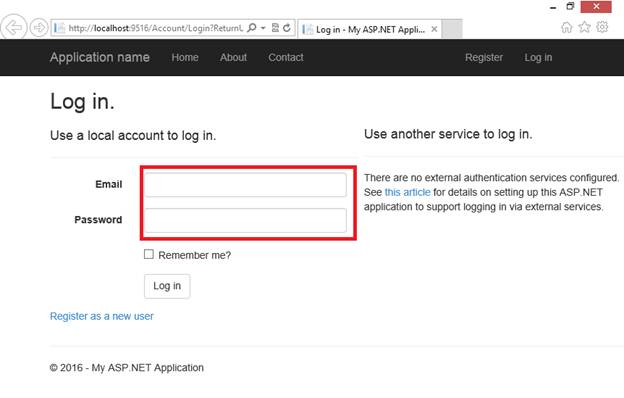
Click on to the “Log in” button.
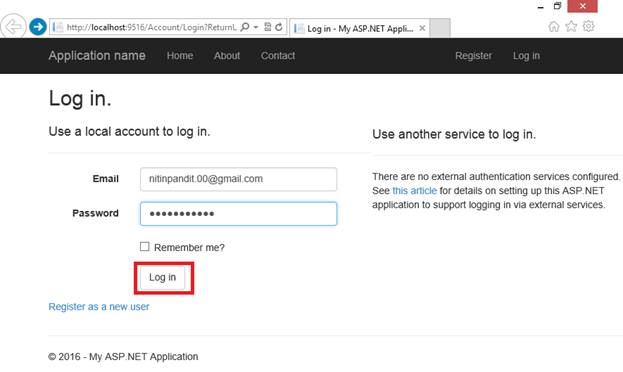
After login, you will be redirected on to the home page.
I’m going to use Authorize filter, if I’m using Authorize attribute, only authenticated users can access About() method.
using ActionFiltersinMVC.AuthData;
using System;
using System.Collections.Generic;
using System.Linq;
using System.Web;
using System.Web.Mvc;
namespace ActionFiltersinMVC.Controllers
{
public class HomeController : Controller
{
//[AuthorizeAttribute]
public ActionResult Index()
{
return View();
}
[Authorize]
public ActionResult About()
{
ViewBag.Message = "Hello...Peter";
return View();
}
}
}
Now build the application and run it and try to access the about page, here you can see if I log in to About page.
You can see About page.

Here in the below screenshot, I have accessed the About action method.
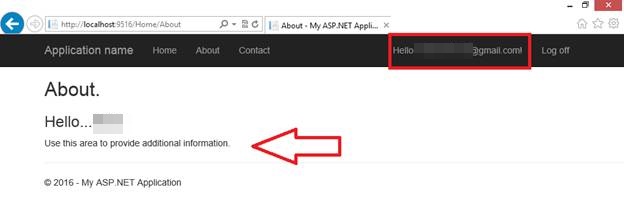
As shown in the screenshot below, you can designate users who can only view the About page.
For the approved users, I am sending two email addresses here.
Now, create a new user, it must be a new user and create a password for the new user.
Click on to “Register” button.
You can see it’s automatically logged in to the application.
Now I’m trying to access the “About” page.

So, we are unable to access the “About” page because you have to authorize access to the about page by only two ids, which is authorized for the About action.
Action Filters
There are the following action filters,
Output Cache: This action filter caches the output of a controller action.
Handle Error: This action filter handles errors raised when a controller action executes.
Authorize: This action filter enables you to restrict access to a particular user or role.
Output Cache
Example. Specifies the return value to be cached for 5 seconds.
public class ActionFilterDemoController : Controller
{
[HttpGet]
[OutputCache(Duration = 5)]
public string Index()
{
return DateTime.Now.ToString("T");
}
}


Handle Error
If any error occurs during the action execution, it will find a view named Error in the Views folder and render that page to the user.
Example.Redirect application to a custom error page when an error is triggered by the controller.
[HandleError]
public class ActionFilterDemoController : Controller
{
public ActionResult Index()
{
throw new NullReferenceException();
}
public ActionResult About()
{
return View();
}
}
Authorize
Example. Allowing only authorized users to log in the application.
public class ActionFilterDemoController : Controller
{
[Authorize]
public ActionResult Index()
{
ViewBag.Message = "This can be viewed only by authenticated users";
return View();
}
[Authorize(Users = "[email protected]")]
public ActionResult MyIndex()
{
ViewBag.Message = "Only Nitin Pandit can view";
return View();
}
}
Result Filters
Result filters are executed before or after generating the result for an action. The Action Result type can be ViewResult, PartialViewResult, RedirectToRouteResult, which derives from the ActionResult class.
Example
public interface IResultFilter
{
void OnResultExecuted(ResultExecutedContext filterContext);
void OnResultExecuting(ResultExecutingContext filterContext);
}
Exception Filters
Exception filters are run only if an unhandled exception has been thrown when invoking an action method. An exception may be for the following reasons,
- Action method itself.
- When the Action result is executed.
- Another kind of filter.
Example
public interface IExceptionFilter
{
void OnException(ExceptionContext filterContext);
}
First, you need to create a RangeError.html page file within the “Content” folder in our application; we will use this file to display a simple message.
Give the name to the page, and click on to the “OK” button.

Here's the screenshot:

Here, we have derived the AuthAttribute class from the FilterAttribute class, in addition to implementing the IExceptionFilter. For using the FilterAttribute and IExceptionFilter you need to use “using System.Web.Mvc;” namespace in your MVC Application.
This exception filter is handling the instance by redirecting the user browser to a file called RangError.html in the content folder, In the ExceptionHandled method we checked the exception is not properly handled and Exception type is ArgumentOutOfRangeException then,
filterContext.Result = new RedirectResult("~/Content/RangeError.html");
filterContext.ExceptionHandled = true;
The page will be redirected to a custom error page which we have created in RangeError.html page in the content folder.
using System;
using System.Collections.Generic;
using System.Linq;
using System.Web;
using System.Web.Mvc;
namespace ActionFiltersinMVC.AuthData
{
public class AuthAttribute : FilterAttribute, IExceptionFilter
{
public void OnException(ExceptionContext filterContext)
{
if (!filterContext.ExceptionHandled && filterContext.Exception is ArgumentOutOfRangeException)
{
filterContext.Result = new RedirectResult("~/Content/RangeErrorPage.html");
filterContext.ExceptionHandled = true;
}
}
}
}
attribute
In the home controller I have written down a method TestRange, this method throws ArgumentOutOfRangeException.

controller
Now, I am going to run the application, we can see the default exception handling.