January 17, 2023 07:46 by
 Peter
PeterWe know how to use Code First Migration in SQL Server. But in most cases, a customer will think we can use it for the open source database. So that’s the reason we pick the “MySQL” database, and we can follow the same steps we follow in the “SQL” database. In this article, we are going to explain Code First Migration in ASP.NET MVC 5 with Entity FrameWork & MySQL.

Create a Web Application using MVC 5
Click on File -> New -> Project -> Visual C# -> Web -> ASP.Net Web Application ( .Net Framework ).
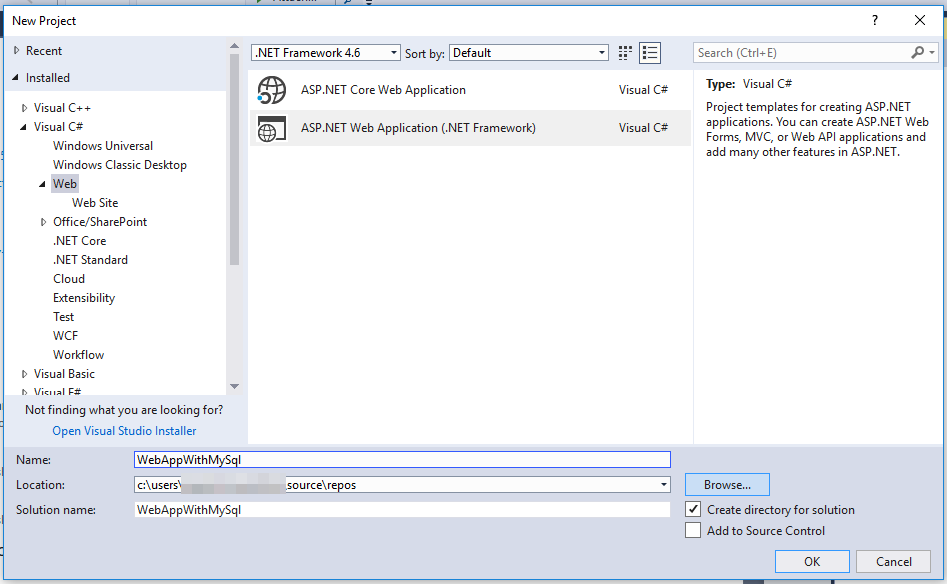
Click on “OK” then click on “MVC”.
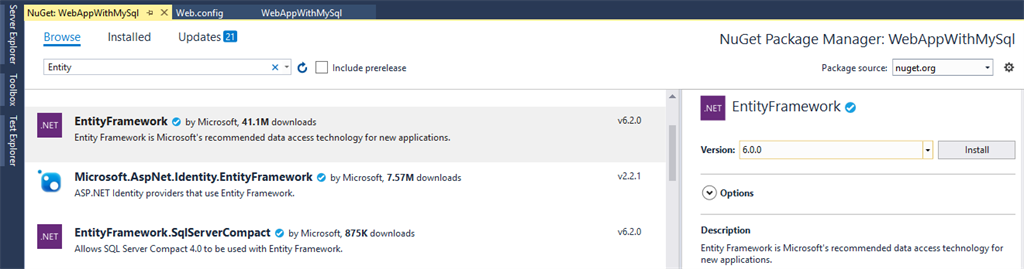
Install Entity Framework & MySQL Entity
Go to Visual Studio “Tools -> NuGet Package Manager -> Manage Nuget Packages for Solution” or right click on your web application then click on “Manage NuGet Packages”.
EntityFramework
Search EntityFramework in the “Browse” Section.
Once we installed EntityFramework & MySql Entity in our application then it will generate a SQL and MySQL Provider inside the EntityFramework Section in Web.Config.
<entityFramework>
<defaultConnectionFactory type="System.Data.Entity.Infrastructure.SqlConnectionFactory, EntityFramework" />
<providers>
<provider invariantName="System.Data.SqlClient" type="System.Data.Entity.SqlServer.SqlProviderServices, EntityFramework.SqlServer" />
<provider invariantName="MySql.Data.MySqlClient" type="MySql.Data.MySqlClient.MySqlProviderServices, MySql.Data.Entity.EF6, Version=6.8.8.0, Culture=neutral, PublicKeyToken=c5687fc88969c44d"></provider></providers>
</entityFramework>
Model Class
We just created a sample model class for demo purposes.
using System;
using System.Collections.Generic;
using System.Linq;
using System.Web;
namespace WebAppWithMySql.Models
{
public class Student
{
public int Id { get; set; }
public string Name { get; set; }
public string Password { get; set; }
}
}
Creation of DBContext
Create a db context class in our application. The following dbcontext will point out our connection string in WebConfig.
using MySql.Data.Entity;
using System.Data.Entity;
using WebAppWithMySql.Models;
namespace WebAppWithMySql
{
[DbConfigurationType(typeof(MySqlEFConfiguration))]
public class WebAppContext : DbContext
{
public DbSet<Student> Products
{
get;
set;
}
public WebAppContext()
//Reference the name of your connection string ( WebAppCon )
: base("WebAppCon") { }
}
}
Connection String
We added the same connection string name that we added in the dbcontext class. The following connection string represents “MySql” Db.
<connectionStrings>
<add name="WebAppCon" providerName="MySql.Data.MySqlClient" connectionString="server=localhost;userid=root;password=peter123;database=WebAppMySql;persistsecurityinfo=True" />
</connectionStrings>
Migration Steps
Go to Visual Studio "Tools -> NuGet Package Manager -> Package Manager Console". Then execute the following command.
Enable-Migrations – ( We need to enable the migration, only then can we do the EF Code First Migration ).
Add-Migration IntialDb (migration name) – ( Add a migration name and run the command ).
Update-Database -Verbose — if it is successful then we can see this message (Running Seed method).
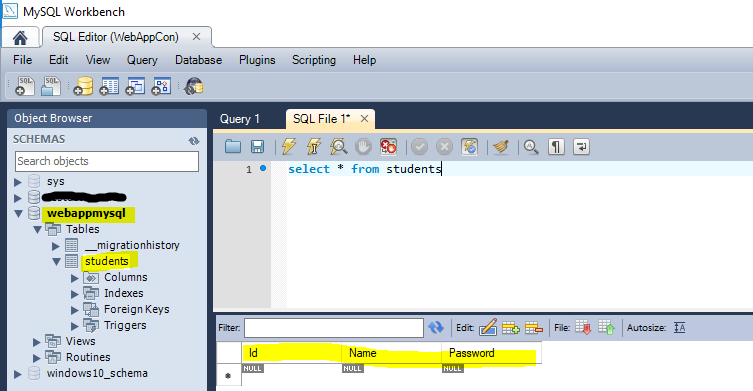
Once Migration is done; then, we can see that the respective files are auto-generated under the “Migrations” folder.
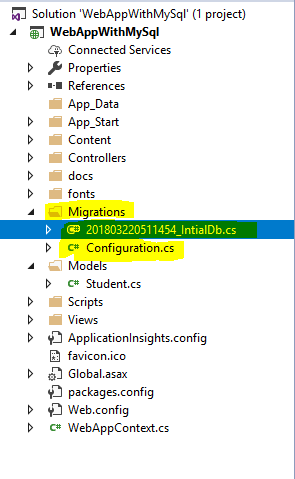
Output