Today, this article will discuss how we can design or develop any dependent or cascading dropdown control in Asp.net Core MVC Application. While developing any application using any language, sometimes we must define dropdown control that populates data from the backend part, i.e., from the database section. So, control directly fetches data from the database by using APIs and displays it in the dropdown control. But, sometimes, we need to implement the dependent dropdown control. It means the value of the dependent dropdown control depends on another. So, as per the selected value of the first dropdown control, we need to pass that value to the database side with the help of a parameter, and then as per that value, it will return the corresponding values to bind the second control. In this article, we will demonstrate this function with the help of the Asp.Net Core MVC Application.

Pre-Requisites
We must create a sample application using Asp.Net Core to demonstrate the functionality. For that purpose, we will use the .Net 7.0 framework. So, we need the below tools as a pre-requisite.
Visual Studio 2022 Community Edition / Visual Studio Code
.Net 7.0 SDK (only required if we use Visual Studio Code as Code Editor).
Also, we are not using any database tools for the database-related part. For the time-saving part, we are using the In-Memory database features of the Asp.Net Core application. We must use database tools like SQL, Oracle, MySQL, etc. In that case, we can need to replace the In-Memory database connection part with the actual database connection details.
In this example, we will use two models: Category and Product. Every product information is tagged with an existing category. So, finally, in the view part, once we select any Category value from the dropdown, it will populate related product items accordingly.
Steps to Develop Cascading Dropdown in Asp.Net Core MVC
Step 1
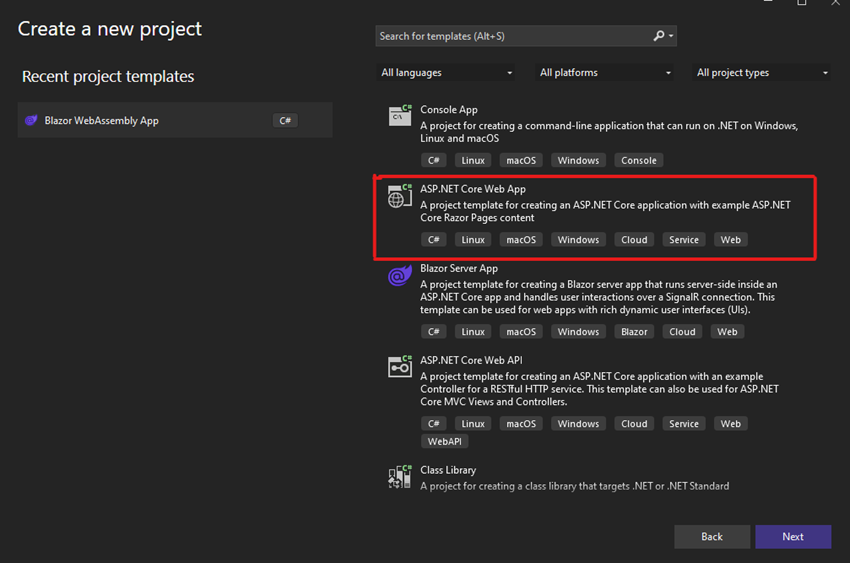
Open Visual Studio 2022 and click on Create New Project with the template "Asp.Net Core Web App (Model-View-Controller)."
Step 2
Then click on the Next Button and provide the Project Name.
Step 3
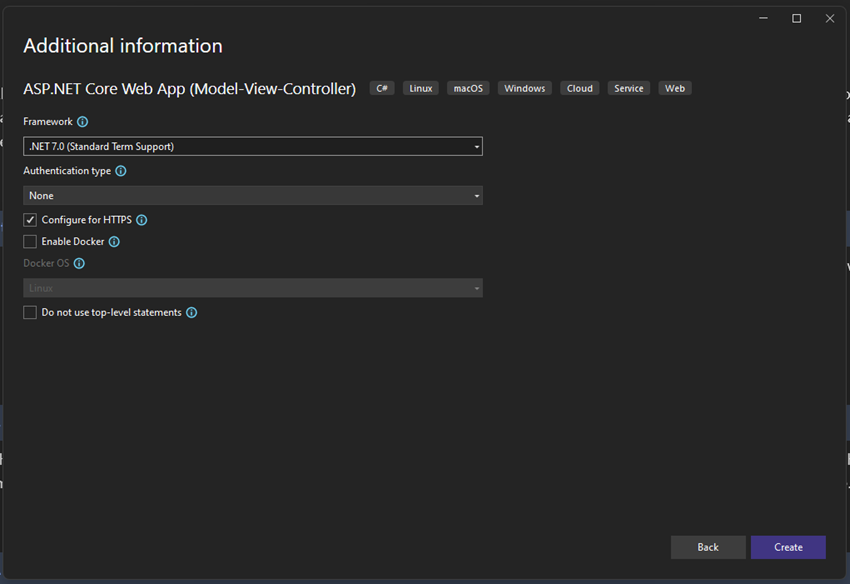
Then click on the Next Button and select .Net 7.0 as the Framework version. (If anyone is using VS 2019, then also select .Net 5.0 or .Net 6.0)
Step 6
Select the Model folder, create a new class file called Category.cs, and add the code below.
public class Category {
public int Id {
get;
set;
}
public string Name {
get;
set;
}
public virtual List < Product > Products {
get;
set;
}
}
Step 7
Again, add another new file called Product.cs and add the below code –
public class Product {
public int Id {
get;
set;
}
public string Code {
get;
set;
}
[Required]
public string Name {
get;
set;
}
[MaxLength(255)]
public string ? Description {
get;
set;
}
public decimal Price {
get;
set;
}
public bool IsAvailable {
get;
set;
}
public int CategoryId {
get;
set;
}
[JsonIgnore]
public virtual Category Category {
get;
set;
}
}
Step 8
Now, we need to create the DBContext File. So, we need to add a new file called InMemoryDBContext.cs file and the below code in that file.
public class InMemoryDBContext: DbContext {
public InMemoryDBContext(DbContextOptions < InMemoryDBContext > options): base(options) {}
protected override void OnModelCreating(ModelBuilder modelBuilder) {
modelBuilder.Entity < Category > ().HasMany(c => c.Products).WithOne(a => a.Category).HasForeignKey(a => a.CategoryId);
modelBuilder.Seed();
}
public DbSet < Product > Products {
get;
set;
}
public DbSet < Category > Categories {
get;
set;
}
}
Step 9
In the above code, we invoke the Seed() of the ModelBuilder. This method is responsible for initiating the base data related to the Category and Product. For that purpose, we have created a static call called ModelBuilderExtensions and implemented the Seed() method in that class with some sample data. So, we call the Category or Product list from the View Part; it populates the data from this list.
Step 10
After that, we need to open the Program.cs File and add the below code in that File.
builder.Services.AddDbContext<InMemoryDBContext>(options => options.UseInMemoryDatabase("Shop"));
builder.Services.AddControllers()
.ConfigureApiBehaviorOptions(options =>
{
// options.SuppressModelStateInvalidFilter = true;
}
);
Step 11
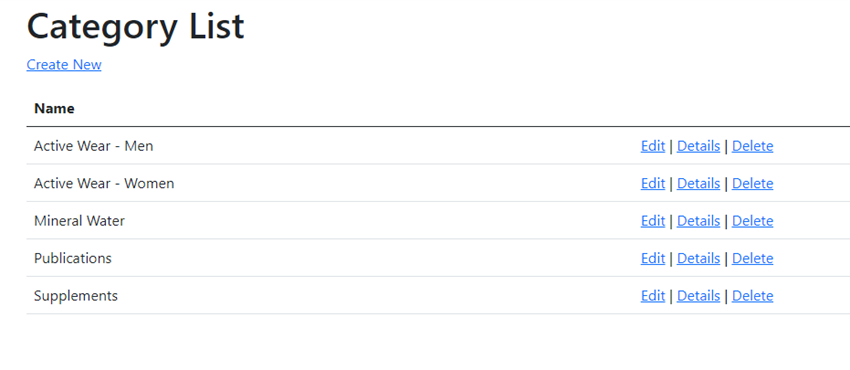
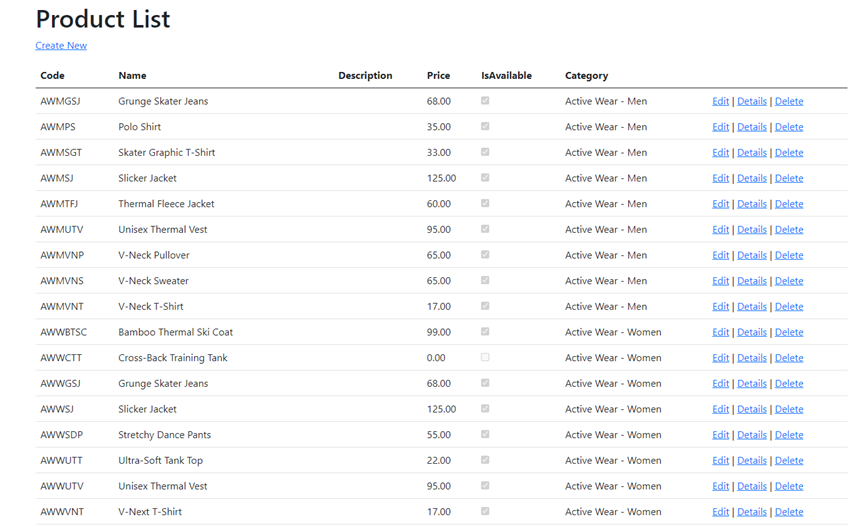
Now, we can perform the scaffold function of the Asp.Net Core MVC Application to generate the entire View & Controller layer related to the Category and Products. Once the scaffold files are created, we can execute the application and display just like below for both category and product parts.
Step 12
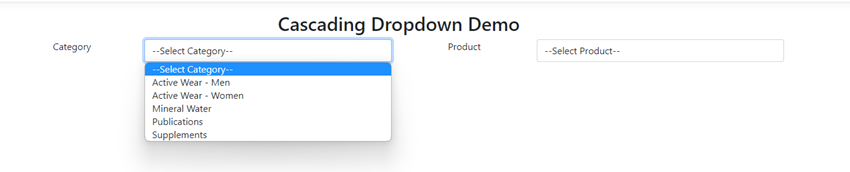
Now, open the Index.cshtml view under the Home folder. There add the below code to populate two different dropdown control related to the Category and Product list.
@{
ViewData["Title"] = "Home Page";
var baseurl = ViewBag.BaseUrl;
}
<div class="text-center">
<h2>Cascading Dropdown Demo</h2>
<div class="row form-group">
<div class="col-md-2">
<label asp-for="CategoryId" class="control-label"></label>
</div>
<div class="col-md-4">
<select asp-for="CategoryId" class="form-control"
asp-items="ViewBag.CategoryData"
id="CategoryId"></select>
</div>
<div class="col-md-2">
<label asp-for="ProductId" class="control-label"></label>
</div>
<div class="col-md-4">
<select asp-for="ProductId" class="form-control" asp-items="ViewBag.ProductData" id="ddlProductId"></select>
</div>
</div>
</div>
Step 13
Now, open the HomeController.cs file under the controller folder and add the below code in the Index Action method. This code will fetch the Category and the Product list and return it as a view bag object. Initially, it does not produce any list value of the Product, as it will only populate if we pass any category id value to filter the product list.
public class HomeController: Controller {
private readonly ILogger < HomeController > _logger;
private readonly InMemoryDBContext _context;
public HomeController(ILogger < HomeController > logger, InMemoryDBContext context) {
_logger = logger;
_context = context;
_context.Database.EnsureCreated();
}
public IActionResult Index() {
var _categories = _context.Categories.ToList();
var _products = new List < Product > ();
_categories.Add(new Category() {
Id = 0, Name = "--Select Category--"
});
_products.Add(new Product() {
Id = 0, Name = "--Select Product--"
});
ViewData["CategoryData"] = new SelectList(_categories.OrderBy(s => s.Id), "Id", "Name");
ViewData["ProductData"] = new SelectList(_products.OrderBy(s => s.Id), "Id", "Name");
string host = $ "{Request.Scheme}://{Request.Host}{Request.PathBase}/";
ViewData["BaseUrl"] = host;
return View();
}
public IActionResult Privacy() {
return View();
}
[ResponseCache(Duration = 0, Location = ResponseCacheLocation.None, NoStore = true)]
public IActionResult Error() {
return View(new ErrorViewModel {
RequestId = Activity.Current?.Id ?? HttpContext.TraceIdentifier
});
}
}
Step 14
Now, we can run the application and check that the category dropdown already binds with the existing category data. But, the product dropdown does secure any data.
Step 15
We need to add a new action method to return the filtered product list as per the selected category id. This method accepts one input value called categoryId from the View part, and as per that categoryId, it will filter the product list and return the data in a JSON format. For that, open the ProductController.cs file and add the code below.
[HttpPost, ActionName("GetProductsByCategoryId")]
public JsonResult GetProductsByCategoryId(string categoryId) {
int catId;
List < Product > productLists = new List < Product > ();
if (!string.IsNullOrEmpty(categoryId)) {
catId = Convert.ToInt32(categoryId);
productLists = _context.Products.Where(s => s.CategoryId.Equals(catId)).ToList();
}
return Json(productLists);
}
Step 16
We must consume the above action method from the view to retrieve the JSON data and bind it with the product dropdown. For that, we will take the help of JQuery code. Now, return to the Index.cshtml file under the home folder and add the below code there under script sections –
@section scripts
{
<script type="text/javascript">
$(document).ready(function () {
var a = 0;
});
function loadProduct(obj) {
var value = obj.value;
var url = "@baseurl";
$.post(url + "Products/GetProductsByCategoryId", { categoryId: value }, function (data) {
debugger;
PopulateDropDown("#ddlProductId", data);
});
}
function PopulateDropDown(dropDownId, list, selectedId) {
$(dropDownId).empty();
$(dropDownId).append("<option>--Please Product--</option>")
$.each(list, function (index, row) {
$(dropDownId).append("<option value='" + row.id + "'>" + row.name + "</option>")
});
}
</script>
}
Step 17
Now, invoke the loadProduct() method from the HTML part related to the Product dropdown. For that, change the code related to the product dropdown as below –
<select asp-for="CategoryId" class="form-control"
asp-items="ViewBag.CategoryData"
id="CategoryId" onchange="loadProduct(this)"></select>
Step 18
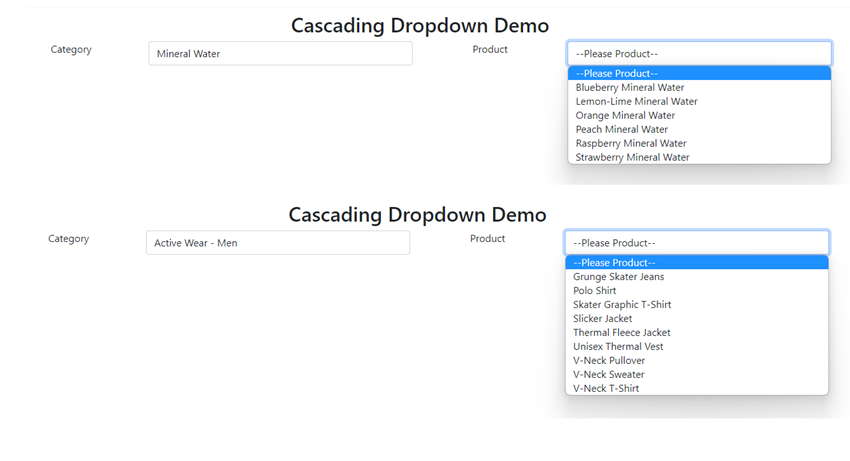
Now, run the application, select any category from the dropdown, and check related products populated within the product dropdown.
This article discusses cascading dropdown generation using the Asp.Net Core MVC application. Also, we discussed the steps related to implementing the In-Memory database concept. Any suggestions, feedback, or queries related to this article are appreciated.