European ASP.NET MVC Hosting

BLOG about Latest ASP.NET MVC Hosting and Its Technology - Dedicated to European Windows Hosting Customer

ASP.NET MVC Hosting - HostForLIFEASP.NET :: Validation Message and Validation Summary Tag Helper in ASP.NET MVC Core 3.1

clock October 4, 2021 07:26 by author Peter

This blog will explain validation messages and the validation summary tag helper in ASP.NET MVC core. Validation messages and the validation tag helper are similar to ValidationMessage and ValidationMessageFor in asp.net MVC.


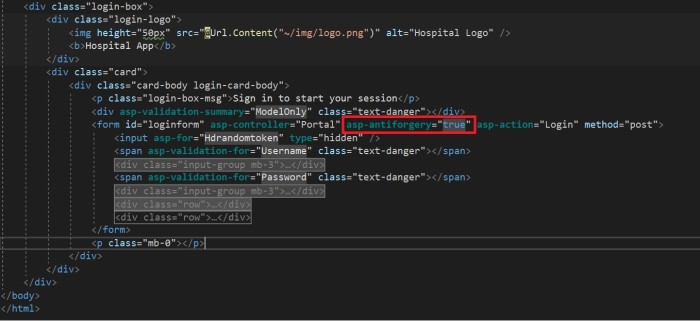
ValidationMessage TagHelper: validation message tag helper targets span element with asp-validation-for attribute which display validation message from modal class validation property.

Validation Summary TagHelper: Validation Summary tag helper target the div element. It has asp-validation-sammary attribute which display model validation summary on browser client.

ValidationMessage: It is an extension method that is a loosely typed method. It displays a validation message if an error exists for the specified field in the ModelStateDictionary object.

ValidationMessageFor: This method will only display an error if you have configured Data Annotations attribute to the specified property in the model class.

ValidationSummary: This ValidationSummary helper method generates an unordered list (ul element) of validation messages that are in the ModelStateDictionary object.
Steps:
Step 1: Create asp.net MVC core project in visual studio 2019 with MVC (Model-View-Controller) template.
Step 2: Right-click on models folder and “Add” class with name student.
using System;  
using System.ComponentModel.DataAnnotations;  
 
namespace ValidationMessageValidationSummaryTagHelper_Demo.Models  
{  
    public class Student  
    {  
        [Key]  
        public int Id { get; set; }  
 
        [Required(ErrorMessage = "Please enter name")]  
        public string Name { get; set; }  
 
        [Required(ErrorMessage = "Please choose gender")]  
        public string Gender { get; set; }  
 
        [Required(ErrorMessage = "Please choose date of birth")]  
        [Display(Name = "Date of Birth")]  
        [DataType(DataType.Date)]  
        public DateTime DateofBirth { get; set; }  
 
        [Required(ErrorMessage = "Please enter address")]  
        [StringLength(255)]  
        public string Address { get; set; }  
    }  
}  


Step 3: Open HomeController or add HomeController if you don’t have it. Add the action method Create in controller class.
using System;  
using System.Collections.Generic;  
using System.Diagnostics;  
using System.Linq;  
using System.Threading.Tasks;  
using Microsoft.AspNetCore.Mvc;  
using Microsoft.Extensions.Logging;  
using ValidationMessageValidationSummaryTagHelper_Demo.Models;  
 
namespace ValidationMessageValidationSummaryTagHelper_Demo.Controllers  
{  
    public class HomeController : Controller  
    {  
        public IActionResult Index()  
        {  
            return View();  
        }  
 
        public IActionResult Create()  
        {  
            return View();  
        }  
 
        [HttpPost]  
        public IActionResult Create(Student student)  
        {  
            if (ModelState.IsValid)  
            {  
 
            }  
            return View();  
        }  
    }  
}  

Step 4 Right click on create action method and “Add” create view and write following code.
@model ValidationMessageValidationSummaryTagHelper_Demo.Models.Student  
@{  
    ViewData["Title"] = "Create";  
}  
 
<div class="card">  
    <div class="card-header">  
        <h4>Student Details</h4>  
    </div>  
    <div class="card-body">  
        <div asp-validation-summary="All"></div>  
        <form asp-action="Create">  
            <div class="form-group">  
                <label asp-for="Name" class="label-control"></label>  
                <input asp-for="Name" class="form-control" />  
                <span asp-validation-for="Name" class="text-danger"></span>  
            </div>  
            <div class="form-group">  
                <label asp-for="Gender" class="label-control"></label>  
                <select asp-for="Gender" class="custom-select">  
                    <option value="">Choose Geneder</option>  
                    <option value="Male">Male</option>  
                    <option value="Female">Female</option>  
                </select>  
                <span asp-validation-for="Gender" class="text-danger"></span>  
            </div>  
            <div class="form-group">  
                <label asp-for="DateofBirth" class="label-control"></label>  
                <input asp-for="DateofBirth" class="form-control" />  
                <span asp-validation-for="DateofBirth" class="text-danger"></span>  
            </div>  
            <div class="form-group">  
                <label asp-for="Address" class="label-control"></label>  
                <textarea asp-for="Address" class="form-control"></textarea>  
                <span asp-validation-for="Address" class="text-danger"></span>  
            </div>  
            <div>  
                <button type="submit" class="btn btn-sm btn-primary rounded-0">Submit</button>  
            </div>  
        </form>  
    </div>  
</div>  

The Validation Summary Tag Helper is used to display a summary of validation messages. The asp-validation-summary attribute value can be any of the following:

asp-validation-summary

Validation messages displayed

ValidationSummary.All

Property and model level

ValidationSummary.ModelOnly

Model

ValidationSummary.None

None

    <div asp-validation-summary="All"></div>  
    <div asp-validation-summary="ModelOnly"></div>  
    <div asp-validation-summary="None"></div>  


Step 5: Add the following CSS in site.css file under wwwroot folder.

    .field-validation-error {  
        color: #e80c4d;  
        font-weight: bold;  
    }  
    .field-validation-valid {  
        display: none;  
    }  
    input.input-validation-error {  
        border: 1px solid #e80c4d;  
    }  
    .validation-summary-errors {  
        color: #e80c4d;  
        font-weight: bold;  
        font-size: 1.1em;  
    }  
    .validation-summary-valid {  
        display: none;  
    } 

Step 6: Build and run your application Ctrl+F5


ASP.NET MVC Hosting - HostForLIFEASP.NET :: Routing In MVC Application ( Types And Implementation Methods )

clock September 22, 2021 07:47 by author Peter

Introduction
This article will summarize adjusting routing configurations in an MVC project
The aim of the adjustments was to trace a problem that a certain action was hit multiple times
The problem had nothing to do with routing, but I investigated routing configuration in my search for the cause

The rest of the article will describe different types of routing supported and the configurations needed in the levels of,

  • Application execution pipeline (middleware)
  • The controllers and action

Definitions
Routing is responsible for matching incoming HTTP requests and dispatching those requests to the app's executable endpoints
Endpoints are the app's units of executable request-handling code. Endpoints are defined in the app and configured when the app starts

Types of routing
Conventional Based Routing

It is the basic routing type implemented by default.
You will find the middleware pipeline configured to implement this type through the following code in the startup.cs.
app.UseEndpoints(endpoints => {
endpoints.MapControllerRoute(name: "default", pattern: "{controller=Home}/{action=Index}/{id?}");
})


The HTTP request with a URL of format /Home/Index or Home/Index/1 will be processed by the action method Index n Home Controller or By Z Action method in the Y controller if the URL was http://abc.com/Y/Z.

Area Conventional Based Routing

  • Areas provide a way to partition an ASP.NET Core Web app into smaller functional groups
  • Each group has its own set of Razor Pages, controllers, views, and models

Controller level

View Level


Application execution pipeline can be configured to enable area-based routing in either one of the following two ways.
Using a code similar to the previous one as follows,
endpoints.MapControllerRoute(name: "Area", pattern: "{area:exists}/{controller=Home}/{action=Index}/{id?}", defaults: new {
    area = "Home"
});


Using MapAreaControllerRoute method IEndpointRouteBuilderInterface as in the following example,

endpoints.MapAreaControllerRoute(pattern: "{area}/{controller}/{action}/{id?}", name: "areas", areaName: "Home", defaults: new {
    controller = "Home", action = "Index"
});

Mixed Conventional Based Routing
    In Mixed Conventional Based Routing
    The URL specified in the HTTP request is checked against the patterns specified in both routing types
    Default routing is determined by finding a match against the patterns specified in each routing type in order

Attribute routing
Hopefully, we will discuss this in a later article.

Examples
Default routing type (conventional without area support).
configuration in the startup.cs
app.UseEndpoints(endpoints => {
    endpoints.MapControllerRoute(name: "default", pattern: "{controller=Home}/{action=Index}/{id?}");
})

Result

Conventional with area support
Configuration in the startup.cs either,
endpoints.MapAreaControllerRoute(pattern: "{area}/{controller}/{action}/{id?}", name: "areas", areaName: "Home", defaults: new {
    controller = "Home", action = "Index"
});


or,
endpoints.MapControllerRoute(name: "Area", pattern: "{area:exists}/{controller=Home}/{action=Index}/{id?}", defaults: new {
    area = "Home"
});

Result

Mixed conventional

Example 1 - configuration

endpoints.MapControllerRoute(name: "default", pattern: "{controller=Home}/{action=Index}/{id?}");
endpoints.MapAreaControllerRoute(pattern: "{area}/{controller}/{action}/{id?}", name: "areas", areaName: "Home", defaults: new {
    controller = "Home", action = "Index"
});

Result

Example 2 - Configuration
endpoints.MapAreaControllerRoute(pattern: "{area}/{controller}/{action}/{id?}", name: "areas", areaName: "Home", defaults: new {
    controller = "Home", action = "Index"
});
endpoints.MapControllerRoute(name: "default", pattern: "{controller=Home}/{action=Index}/{id?}");

Result

Redirecting from an action in a controller not belonging to an area to an action belonging to an area.

From Controller this will work only if area conventional routing comes first in the startup.cs file as follows,
endpoints.MapAreaControllerRoute(pattern: "{area}/{controller}/{action}/{id?}", name: "areas", areaName: "Home", defaults: new {
    controller = "Home", action = "Index"
});
endpoints.MapControllerRoute(name: "default", pattern: "{controller=Home}/{action=Index}/{id?}");

Otherwise, errors of too many directions will occur.


Through a hyperlink.

Example


Result

This article summarized different conventional routing implementation methods as well as ways to navigate between routes.


ASP.NET MVC Hosting - HostForLIFEASP.NET :: Simple Blazor Components In .NET CORE MVC 3.1

clock September 16, 2021 10:05 by author Peter

In this article, we will add a Razor component to our existing .NET Core MVC project.
 
Blazor is a framework for building interactive client-side web UI with .NET. With it, you can:

    Create rich interactive UIs using C# instead of JavaScript.
    Share server-side and client-side app logic written in .NET.
    Render the UI as HTML and CSS for wide browser support, including mobile browsers.

Blazor apps are based on components. A component in Blazor is an element of UI, such as a page, dialog, or data entry form.
 
Let's start with a few simple steps.

Step 1

Step 2


Step 3
Add a Microsoft.AspNetCore.Components reference to your project if not available.

Step 4
Add a Component folder inside the view/shared folder, then add a Razor component.


Step 5
For the Razor component we have written a simple method named "GetData", which you can see below. Also, I have made 2 public properties for getting data from the view and decorating it with the attribute name as Parameter.

    <div class="card-header">  
      
        <h3>DataComponent</h3>  
        <button @onclick="Getdata" class="btn btn-dark">Click to GetData    </button>  
    </div>  
    <div class="card-body">  
        <br />  
        <div class="@style">@Data </div>  
    </div>  
      
    @code {  
        [Parameter]  
        public string Data { get; set; } = string.Empty;  
        [Parameter]  
        public string style { get; set; }  
        private void Getdata()  
        {  
            Data = "I am Working";  
            style = "badge-success";  
      
        }  
      
    }  


Step 6
The below code you need to add to your _Layout.cshtml  
This is for registering Blazor to your web application:
    <base href="~/" />  
    <script src="_framework/blazor.server.js"></script>


Step 7
Add simple _Imports.razor file to your root of the project which consists of the below code. These namespaces are required to access the component features over your components.

    @using System.Net.Http  
    @using Microsoft.AspNetCore.Authorization  
    @using Microsoft.AspNetCore.Components.Authorization  
    @using Microsoft.AspNetCore.Components.Forms  
    @using Microsoft.AspNetCore.Components.Routing  
    @using Microsoft.AspNetCore.Components.Web  
    @using Microsoft.JSInterop  
      
    @using System.IO   

Step 8
Add services.AddServerSideBlazor(); to your startup file method name ConfigureServices.
Add endpoints.MapBlazorHub(); to your Configure method.

    public void ConfigureServices(IServiceCollection services)  
        {   
            services.AddServerSideBlazor();  
            services.AddControllersWithViews();  
        }  
      
        // This method gets called by the runtime. Use this method to configure the HTTP request pipeline.  
        public void Configure(IApplicationBuilder app, IWebHostEnvironment env)  
        {  
            if (env.IsDevelopment())  
            {  
                app.UseDeveloperExceptionPage();  
            }  
            else  
            {  
                app.UseExceptionHandler("/Home/Error");  
                // The default HSTS value is 30 days. You may want to change this for production scenarios, see https://aka.ms/aspnetcore-hsts.  
                app.UseHsts();  
            }  
            app.UseHttpsRedirection();  
            app.UseStaticFiles();  
      
            app.UseRouting();  
      
            app.UseAuthorization();  
      
            app.UseEndpoints(endpoints =>  
            {  
                endpoints.MapControllerRoute(  
                    name: "default",  
                    pattern: "{controller=Home}/{action=Index}/{id?}");   
                endpoints.MapBlazorHub();  
            });  
      
        }  

Step 9
The last step is to render components on your View page.
You can see that I am passing 2 parameters as requested in our DataViewComponent.razor file

    @{  
        ViewData["Title"] = "Home Page";  
    }  
    <div class="text-center">  
        <h1 class="display-4">Welcome</h1>  
          
    </div>  
      
    <div class="card">  
         
            @(await Html.RenderComponentAsync<BlazorComponentProject.Views.Shared.Components.DataViewComponent>(RenderMode.ServerPrerendered,new {  Data="I came from Index",style= "badge-danger" }))  
               
          
    </div>   

Our main focus in this article was to help you to integrate your existing Web application build in .NET Core MVC 3.1 with Blazor and use the Blazor components in it. Please refer to the project and debug the process for more understanding. I hope it helps!


ASP.NET MVC Hosting - HostForLIFEASP.NET :: Scheduling In ASP.NET MVC Core

clock September 6, 2021 07:22 by author Peter

In this blog, we will learn how to use the Quartz scheduler in ASP.NET Core. We may perform jobs in the background using this scheduler. We can use Quartz scheduling to perform a job every 5 minutes.


Step 1
To begin, make a project with the ASP.NET core web application template. Choose Asp.net MVC for your online application.

Step 2
There are two ways to install the Quartz package.

Search for Quartz in the Nuget package manager and install it.

Using NuGet package manager console.


Step 3
Now we'll make a folder under the models and call it anything we want. We'll make a task and a scheduler in this folder.

Create Task
The objective is to create a basic class where you can write your logic.

We'll add a task in the schedule folder and call it task1. We shall save the current time in a text file in this task.

The class code is shown below,
using Quartz;
using System;
using System.Collections.Generic;
using System.IO;
using System.Linq;
using System.Threading.Tasks;
namespace QuartzSchduling.Models.Schedule {
    public class Task1: IJob {
        public Task Execute(IJobExecutionContext context) {
            var task = Task.Run(() => logfile(DateTime.Now));;
            return task;
        }
        public void logfile(DateTime time) {
            string path = "C:\\log\\sample.txt";
            using(StreamWriter writer = new StreamWriter(path, true)) {
                writer.WriteLine(time);
                writer.Close();
            }
        }
    }
}

Now, beneath the c drive, make a folder and call it to log. In this folder, we'll make a text file with the name sample.txt.

Scheduler task
We'll now construct a new class that will handle the trigger task. This class's job is to start the task that I've already established. Set the frequency at which it runs.

Below is the code of the class,
using Quartz;
using Quartz.Impl;
using System;
using System.Collections.Generic;
using System.Linq;
using System.Threading.Tasks;
namespace QuartzSchduling.Models.Schedule {
    public class SchedulerTask {
        private static readonly string ScheduleCronExpression = "* * * ? * *";
        public static async System.Threading.Tasks.Task StartAsync() {
            try {
                var scheduler = await StdSchedulerFactory.GetDefaultScheduler();
                if (!scheduler.IsStarted) {
                    await scheduler.Start();
                }
                var job1 = JobBuilder.Create < Task1 > ().WithIdentity("ExecuteTaskServiceCallJob1", "group1").Build();
                var trigger1 = TriggerBuilder.Create().WithIdentity("ExecuteTaskServiceCallTrigger1", "group1").WithCronSchedule(ScheduleCronExpression).Build();
                await scheduler.ScheduleJob(job1, trigger1);
            } catch (Exception ex) {}
        }
    }
}

You've only completed one job in the code above. If you wish to execute more than one job, just create a new class, as we did with task1.

We will now add this job to taskscheduler.
//First Task
var job1 = JobBuilder.Create < Task1 > ().WithIdentity("ExecuteTaskServiceCallJob1", "group1").Build();
var trigger1 = TriggerBuilder.Create().WithIdentity("ExecuteTaskServiceCallTrigger1", "group1").WithCronSchedule(ScheduleCronExpression).Build();
//  Second Task
var job2 = JobBuilder.Create < Task2 > ().WithIdentity("ExecuteTaskServiceCallJob2", "group2").Build();
var trigger2 = TriggerBuilder.Create().WithIdentity("ExecuteTaskServiceCallTrigger2", "group2").WithCronSchedule(ScheduleCronExpression).Build();
await scheduler.ScheduleJob(job1, trigger1);
await scheduler.ScheduleJob(job2, trigger2);

You've just seen the ScheduleCronExpression in the code above. The cron expression is a format that specifies how often your task will be performed.

Below I give you some examples,

Every Second : * * * ? * *
Every Minute : 0 * * ? * *
Every Day noon 12 pm : 0 0 12 * * ?

Final Step
Now register your scheduler task to startup.

public Startup(IConfiguration configuration) {
    //The Schedular Class
    SchedulerTask.StartAsync().GetAwaiter().GetResult();
    Configuration = configuration;
}


All you have to do now is run your code and check your text file, which is often running at the time you set in the cron expression.

In this blog, we learned how to schedule a task in asp.net core, which we can use to perform any operation, such as sending mail at a certain time. As a result, we can perform any operation with this, and it's quite easy to set up.


ASP.NET MVC Hosting - HostForLIFEASP.NET :: ASP.NET MVC Model Binder And Custom Binder

clock September 1, 2021 08:26 by author Peter

ASP.NET MVC Model binding is one of the best features in ASP.NET MVC Framework. It is a bridge between HTTP request and action methods. It helps GET and POST to get automatically transferred into the data model.

MVC Model Binder uses Default Model Binder for building model parameter for MVC runtime.

Now,  before this we would like to first explain simple model binding.

Now, we have created a new MVC Web application project by File- New Project- Web Application – MVC.
Now, we will add a new strongly typed View which we will bind to the model, as shown below.
    @model ModelBinding.Models.Client  
    @ {  
        ViewBag.Title = "GetClient";  
    } < h3 Details < /h3>   
      < h2 >   
      Cleint Code: @Model.ClientCode   
        < br / >   
        Cleint Name: @Model.ClientName   
    < /h2> 

Now, add a Client Model in Models folder, as shown below.
    public class Client {  
        public string ClientCode {  
            get;  
            set;  
        }  
        public string ClientName {  
            get;  
            set;  
        }  
    } 

Add ClientController which is shown below.
    public class ClientController: Controller {  
        // GET: Client  
        public ActionResult GetClient() {  
            Client cnt = new Client {  
                ClientCode = "1001",  
                    ClientName = "Peter"  
            };  
            return View(cnt);  
        }  
    }  


Now, add another action method as EnterClient which will allow the users to enter client details, as shown below.
    public ActionResult EnterCleint() {  
        return View();  
    }  


As shown below, it is having two textboxes and Submit button. Along with it, the form is using POST method for the action Submit.
    @ {  
        ViewBag.Title = "EnterCleint";  
    } < h2 > EnterCleint < /h2> < form action = "Submit"  
    method = "post" > Cleint Code: < input type = "text"  
    name = "ClientCode " / > < br / > Cleint Name: < input type = "text"  
    name = "ClientName " / > < br / > < input type = "submit"  
    value = "Submit"  
    id = "Submit" / > < /form>  
 Now, we will create Submit action methond in the Controller.
    public ActionResult Submit() {  
        Client cnt = new Client {  
            ClientCode = Request.Form["CleintCode"],  
                ClientName = Request.Form["CleintName"]  
        };  
        return View("GetClient", cnt);  
    }  


In the above code, we are fetching the values on the basis of textbox name and assigning it to Client and passing to GetCleint View.

Now, you can improve your code by adding parameter of type model in action method as shown below,
    public ActionResult Submit(Client cnt) {  
        return View("GetClient", cnt);  
    }  


Here, we have to take care textboxes name must be same in above example.

Now, if we will take a real-life example - the designing team works on design and developers work on development i.e. property name of the model and control names are different. In this case, it is very difficult to maintain the name on both sides or we can say lots of efforts is required for the same.

To overcome such a scenario, we can take the help of Model Binders, we can say Model Binder has mapping code which connects your user interface with your Model. It acts like a bridge between the Model and View.

Now, let’s see the same with example.

Lets add a View having two textboxes and Submit button. Along with it, the form is using post method to action Submit.
    @ {  
        ViewBag.Title = "EnterCleint";  
    } < h2 > EnterCleint < /h2> < form action = "Submit"  
    method = "post" > Cleint Code: < input type = "text"  
    name = "txtClientCode" / > < br / > Cleint Name: < input type = "text"  
    name = "txtClientName" / > < br / > < input type = "submit"  
    value = "Submit"  
    id = "Submit" / > < /form>  


In the above example, the View is having two textboxes, i.e., txtClientCode and txtClientName which are not same as property names of Client model.

Now, add a new folder as Utilities.
Now, add a class, ClientBinder class, which will implement the System.Web.Mvc.IModelBinder as shown below.
    public class ClientBinder: IModelBinder {  
        public object BindModel(ControllerContext controllerContext, ModelBindingContext bindingContext) {  
            HttpContextBase context = controllerContext.HttpContext;  
            string clientCode = context.Request.Form["txtClientCode"];  
            string clientName = context.Request.Form["txtClientName"];  
            return new Client {  
                ClientCode = clientCode,  
                    ClientName = clientName  
            };  
        }  
    }  

In the above code, we are accessing the form object from the request object with the help of context object and converting it into Model, i.e., Client.

Now, we need to use the above ClientBinder and map it to our Client object which we will do in below.
    ActionResult Submit([ModelBinder(typeof(ClientBinder))] Client cnt)  

In the above code, we are using ClientBinder.

Now, add/modify the action method.
    public ActionResult Submit([ModelBinder(typeof(ClientBinder))] Client cnt) {  
        return View("GetClient", cnt);  
    }  


That's it. We are done here.


ASP.NET MVC Hosting - HostForLIFEASP.NET :: Route Constraints in MVC

clock August 24, 2021 07:10 by author Peter

A few extra concepts of MVC routing. Routing is a great feature of MVC, it provides a REST based URL that is very easy to remember and improves page ranking in search engines.

This article is not an introduction to Routing in MVC, but we will learn a few features of routing and by implementing them we can develop a very flexible and user-friendly application. So, let's start without wasting valuable time.

Add constraint to URL
This is very necessary for when we want to add a specific constraint to our URL. Say, for example we want a URL like this.
http://www.myhost/myconstraint/controller/action

So, we want to set some constraint string after our host name. Fine, let's see how to implement it.

It's very simple to implement, just open the RouteConfig.cs file and you will find the routing definition in that. And modify the routing entry as in the following. We will see that we have added “abc” before.

Controller name, now when we browse we need to specify the string in the URL, as in the following:

Allow only Integer parameter in controller
Sometimes it is necessary to allow only an integer parameter in an application, to do that we can make a little modification in the routing. Have a look at the following routing entry.

We have specified a pattern for the “id” entry. And the pattern will only allow an integer parameter, not a string or other data type. In that manner we are specifying the URL.

And it's hitting our targeted action. If we define any other action with some other type id and try to execute that action then it will not call it at all. I am leaving this part for your R&D.

Allow only specific controller or Action

If we wish , we can allow a specific controller or specific action to execute. Again, we need to make a small change in the Route entry. Here is the modified root entry.

We will allow only those controllers whose name starts with “H” and only “index” or “Contact” actions are allowed to execute.

So, only the following combination will satisfy.
http://www.hostname/Hone/Index
or
http://www.hostname/Hone/Contact

I hope this article will provide a little extra knowledge of routing of MVC applications. It may provide a little more flexibility in your next applications. Happy reading.


ASP.NET MVC Hosting - HostForLIFEASP.NET :: Capture Video From ASP.NET Core 3.1 MVC Using WebRTC

clock August 9, 2021 07:07 by author Peter

This article introduces how to capture video with a webcam from an ASP.NET Core 3.1 MVC Application using WebRTC.

WebRTC (Web Real-Time Communication) is a free and open-source project which enables web applications and sites to capture and optionally stream audio and/or video media, as well as to exchange arbitrary data between browsers without requiring an intermediary. The technologies behind WebRTC are implemented as an open web standard and available as regular JavaScript APIs in all major browsers.

Let's follow the steps mentioned below to capture a video from a simple ASP.NET Core 3.1 MVC application.

Step 1
Create an ASP.NET Core 3.1 MVC Web Application.

Step 2
Now go to the Solution Explorer to add a new controller, right-click Controllers > Add > Controller, and give a suitable name like this.

The following is the code snippet for VideoController.cs.

public class VideoController : Controller
{

    [HttpGet]
    public IActionResult Index()
    {
        return View();
    }

    [HttpPost]
    public async Task<IActionResult> SaveRecoredFile()
    {
        if( Request.Form.Files.Any())
        {
            var file = Request.Form.Files["video-blob"];
            string UploadFolder = Path.Combine(Directory.GetCurrentDirectory(), "wwwroot", "UploadedFiles");
            string UniqueFileName = Guid.NewGuid().ToString() + "_" + file.FileName+ ".webm";
            string UploadPath = Path.Combine(UploadFolder, UniqueFileName);
            await file.CopyToAsync(new FileStream(UploadPath, FileMode.Create));
        }
        return Json(HttpStatusCode.OK);
    }
}

Please note that SaveRecoredFile() action method will be used to store the recorded video into a folder and handle post requests.

Now Open the VideoController.cs > Set cursor inside the Index Action Method and right-click on inside the Index action method > click on Add View as follows and make sure to check the Use a Layout page option

After adding the view, let's add some HTML code and scripts. The following is the code snippet for the Index.cshtml View.

@{
    ViewData["Title"] = "Index";
    Layout = "~/Views/Shared/_Layout.cshtml";
}

<div id="container">

      <h1>
            <a href="//webrtc.github.io/samples/" title="WebRTC samples homepage">ASP.NET Core 3.1 samples</a>
            <span>Audio/Video Recording</span>
      </h1>
      <p>
            For more information see the MediaStream Recording API <a href="http://w3c.github.io/mediacapture-record/MediaRecorder.html"
                                                                      title="W3C MediaStream Recording API Editor's Draft">Editor's&nbsp;Draft</a>.
        </p>
      <video id="gum" playsinline autoplay muted style="border: 1px solid rgb(15, 158, 238); height: 240px; width: 320px;"></video>
      <video id="recorded" playsinline loop style="border: 1px solid rgb(15, 158, 238); height: 240px; width: 320px;"></video>
      <div>
          <button id="start" class="btn btn-success">Start camera</button>
          <button id="record" disabled class="btn btn-info">Start Recording</button>
          <button id="play" disabled class="btn btn-warning">Play</button>
          <button id="download" disabled class="btn btn-dark">Download</button>
          <button id="stop" class="btn btn-danger">Stop camera</button>
      </div>
      <div> Recording format: <select id="codecPreferences" disabled></select> </div>
      <div>
            <h4>Media Stream Constraints options</h4>
            <p>Echo cancellation: <input type="checkbox" id="echoCancellation"></p>
      </div>
      <div><span id="errorMsg"></span></div>
</div>

Step 3
Now create a folder where the captured video files will be stored and add the below Video.css and Video.js file also in css and js folder under wwwroot folder like this.

The following is the code snippet for Video.css

p.borderBelow {
    margin: 0 0 20px 0;
    padding: 0 0 20px 0;
}

video {
    vertical-align: top;
    --width: 25vw;
    width: var(--width);
    height: calc(var(--width) * 0.5625);
}

video:last-of-type {
    margin: 0 0 20px 0;
}

video#gumVideo {
    margin: 0 20px 20px 0;
}

Here is the code snippet of Video.js. This script is used to capture the video and store it in the folder.
'use strict';

/* globals MediaRecorder */

let mediaRecorder;
let recordedBlobs;

const codecPreferences = document.querySelector('#codecPreferences');

const errorMsgElement = document.querySelector('span#errorMsg');
const recordedVideo = document.querySelector('video#recorded');
const recordButton = document.querySelector('button#record');
recordButton.addEventListener('click', () => {
    if (recordButton.textContent === 'Start Recording') {
        startRecording();
    } else {
        stopRecording();
        recordButton.textContent = 'Start Recording';
        playButton.disabled = false;
        downloadButton.disabled = false;
        codecPreferences.disabled = false;
    }
});

const playButton = document.querySelector('button#play');
playButton.addEventListener('click', () => {
    const mimeType = codecPreferences.options[codecPreferences.selectedIndex].value.split(';', 1)[0];
    const superBuffer = new Blob(recordedBlobs, { type: mimeType });
    recordedVideo.src = null;
    recordedVideo.srcObject = null;
    recordedVideo.src = window.URL.createObjectURL(superBuffer);
    recordedVideo.controls = true;
    recordedVideo.play();
});

const downloadButton = document.querySelector('button#download');
downloadButton.addEventListener('click', () => {
    const blob = new Blob(recordedBlobs, { type: 'video/webm' });
    const url = window.URL.createObjectURL(blob);
    const a = document.createElement('a');
    a.style.display = 'none';
    a.href = url;
    a.download = 'test.webm';
    document.body.appendChild(a);
    a.click();
    PostBlob(blob);
    setTimeout(() => {
        document.body.removeChild(a);
        window.URL.revokeObjectURL(url);
    }, 100);

});

function handleDataAvailable(event) {
    console.log('handleDataAvailable', event);
    if (event.data && event.data.size > 0) {
        recordedBlobs.push(event.data);
    }
}

function getSupportedMimeTypes() {
    const possibleTypes = [
        'video/webm;codecs=vp9,opus',
        'video/webm;codecs=vp8,opus',
        'video/webm;codecs=h264,opus',
        'video/mp4;codecs=h264,aac',
    ];
    return possibleTypes.filter(mimeType => {
        return MediaRecorder.isTypeSupported(mimeType);
    });
}

function startRecording() {
    recordedBlobs = [];
    const mimeType = codecPreferences.options[codecPreferences.selectedIndex].value;
    const options = { mimeType };

    try {
        mediaRecorder = new MediaRecorder(window.stream, options);
    } catch (e) {
        console.error('Exception while creating MediaRecorder:', e);
        errorMsgElement.innerHTML = `Exception while creating MediaRecorder: ${JSON.stringify(e)}`;
        return;
    }

    console.log('Created MediaRecorder', mediaRecorder, 'with options', options);
    recordButton.textContent = 'Stop Recording';
    playButton.disabled = true;
    downloadButton.disabled = true;
    codecPreferences.disabled = true;
    mediaRecorder.onstop = (event) => {
        console.log('Recorder stopped: ', event);
        console.log('Recorded Blobs: ', recordedBlobs);
    };
    mediaRecorder.ondataavailable = handleDataAvailable;
    mediaRecorder.start();
    console.log('MediaRecorder started', mediaRecorder);
}

function stopRecording() {
    mediaRecorder.stop();
}

function handleSuccess(stream) {
    recordButton.disabled = false;
    console.log('getUserMedia() got stream:', stream);
    window.stream = stream;

    const gumVideo = document.querySelector('video#gum');
    gumVideo.srcObject = stream;

    getSupportedMimeTypes().forEach(mimeType => {
        const option = document.createElement('option');
        option.value = mimeType;
        option.innerText = option.value;
        codecPreferences.appendChild(option);
    });
    codecPreferences.disabled = false;
}

function PostBlob(blob) {
    //FormData
    var formData = new FormData();
    formData.append('video-blob', blob);

    // POST the Blob
    $.ajax({
        type: 'POST',
        url: "Video/SaveRecoredFile",
        data: formData,
        cache: false,
        contentType: false,
        processData: false,
        success: function (result) {
            if (result) {
                console.log('Success');
            }
        },
        error: function (result) {
            console.log(result);
        }
    })
}

async function init(constraints) {
    try {
        const stream = await navigator.mediaDevices.getUserMedia(constraints);
        handleSuccess(stream);
    } catch (e) {
        console.error('navigator.getUserMedia error:', e);
        errorMsgElement.innerHTML = `navigator.getUserMedia error:${e.toString()}`;
    }
}

document.querySelector('button#start').addEventListener('click', async () => {
    document.querySelector('button#start').disabled = true;
    document.querySelector('button#stop').disabled = false;
    const hasEchoCancellation = document.querySelector('#echoCancellation').checked;
    const constraints = {
        audio: {
            echoCancellation: { exact: hasEchoCancellation }
        },
        video: {
            width: 1280, height: 720
        }
    };
    console.log('Using media constraints:', constraints);
    await init(constraints);
});

document.querySelector('button#stop').addEventListener('click',async () => {
    document.querySelector('button#stop').disabled = true;
    document.querySelector('button#start').disabled = false;
    const video = document.querySelector('video#gum');
    const mediaStream = video.srcObject;
    await mediaStream.getTracks().forEach(track => track.stop());
    video.srcObject = null;
});

Step 4
Now add the below lines in _Layout.cshtml.

<link rel="stylesheet" href="~/css/Video.css" />
<script src="https://webrtc.github.io/adapter/adapter-latest.js"></script>
<script src="~/js/Video.js" asp-append-version="true" async></script>

The following is the complete code snippet of _Layout.cshtml.
<!DOCTYPE html>
<html lang="en">
<head>
    <meta charset="utf-8" />
    <meta name="viewport" content="width=device-width, initial-scale=1.0" />
    <title>@ViewData["Title"] - Sample_Code</title>
    <link rel="stylesheet" href="~/lib/bootstrap/dist/css/bootstrap.min.css" />
    <link rel="stylesheet" href="~/css/site.css" />
    <link rel="stylesheet" href="~/css/Video.css" />
</head>
<body>
    <header>
        <nav class="navbar navbar-expand-sm navbar-toggleable-sm navbar-light bg-white border-bottom box-shadow mb-3">
            <div class="container">
                <a class="navbar-brand" asp-area="" asp-controller="Home" asp-action="Index">Sample_Code</a>
                <button class="navbar-toggler" type="button" data-toggle="collapse" data-target=".navbar-collapse" aria-controls="navbarSupportedContent"
                        aria-expanded="false" aria-label="Toggle navigation">
                    <span class="navbar-toggler-icon"></span>
                </button>
                <div class="navbar-collapse collapse d-sm-inline-flex flex-sm-row-reverse">
                    <ul class="navbar-nav flex-grow-1">
                        <li class="nav-item">
                            <a class="nav-link text-dark" asp-area="" asp-controller="Home" asp-action="Index">Home</a>
                        </li>
                        <li class="nav-item">
                            <a class="nav-link text-dark" asp-area="" asp-controller="Home" asp-action="Privacy">Privacy</a>
                        </li>
                    </ul>
                </div>
            </div>
        </nav>
    </header>
    <div class="container">
        <main role="main" class="pb-3">
            @RenderBody()
        </main>
    </div>

    <footer class="border-top footer text-muted">
        <div class="container">
            &copy; 2021 - Sample_Code - <a asp-area="" asp-controller="Home" asp-action="Privacy">Privacy</a>
        </div>
    </footer>

    <script src="https://webrtc.github.io/adapter/adapter-latest.js"></script>
    <script src="~/js/Video.js" asp-append-version="true" async></script>
    <script src="~/lib/jquery/dist/jquery.min.js"></script>
    <script src="~/lib/bootstrap/dist/js/bootstrap.bundle.min.js"></script>
    <script src="~/js/site.js" asp-append-version="true" ></script>

    @RenderSection("Scripts", required: false)

</body>
</html>

Now let's build and run the application to see the output.


ASP.NET MVC Hosting - HostForLIFEASP.NET :: ASP.NET ZXing.Net Implementation In ASP.NET MVC

clock July 28, 2021 07:54 by author Peter

ZXing.NET is a library that supports decoding and generating of barcodes (like QR Code, PDF 417, EAN, UPC, Aztec, Data Matrix, Codabar) within images. In this repository, I will implement it in ASP.NET MVC 5 application.

I create the following things with ZXing.NET,

Create QR Codes for any text entered by the user.
Create QR Codes Code Files for any text which the user enters. I will save these QR Code files in ‘qrr’ folder which is placed at the root of the application.
Read all the QR Code files and Decoding them.

Installation

To use the ZXing.NET library you need to install the ZXing.Net package from NuGet.

PM> Install-Package ZXing.Net

Create QR Creating QR Codes

In your controller import the following namespaces,
using System;
using System.Collections.Generic;
using System.IO;
using ZXing;
using ZXing.QrCode;
using System.Web.Mvc;
using System.Drawing;

Next, add 2 Index Action methods in your controller whose code is given below,
public ActionResult Index()
{
return View();
}

[HttpPost]
public ActionResult Index(string qrText)
{
Byte[] byteArray;
var width = 250; // width of the Qr Code   
var height = 250; // height of the Qr Code   
var margin = 0;
var qrCodeWriter = new ZXing.BarcodeWriterPixelData
{
    Format = ZXing.BarcodeFormat.QR_CODE,
    Options = new QrCodeEncodingOptions
    {
        Height = height,
        Width = width,
        Margin = margin
    }
};
var pixelData = qrCodeWriter.Write(qrText);

// creating a bitmap from the raw pixel data; if only black and white colors are used it makes no difference   
// that the pixel data ist BGRA oriented and the bitmap is initialized with RGB   
using (var bitmap = new System.Drawing.Bitmap(pixelData.Width, pixelData.Height, System.Drawing.Imaging.PixelFormat.Format32bppRgb))
{
    using (var ms = new MemoryStream())
    {
        var bitmapData = bitmap.LockBits(new System.Drawing.Rectangle(0, 0, pixelData.Width, pixelData.Height), System.Drawing.Imaging.ImageLockMode.WriteOnly, System.Drawing.Imaging.PixelFormat.Format32bppRgb);
        try
        {
            // we assume that the row stride of the bitmap is aligned to 4 byte multiplied by the width of the image   
            System.Runtime.InteropServices.Marshal.Copy(pixelData.Pixels, 0, bitmapData.Scan0, pixelData.Pixels.Length);
        }
        finally
        {
            bitmap.UnlockBits(bitmapData);
        }
        // save to stream as PNG   
        bitmap.Save(ms, System.Drawing.Imaging.ImageFormat.Png);
        byteArray = ms.ToArray();
    }
}
return View(byteArray);
}


Explanation
The [HttpPost] version of the Index Action method gets the text (for which the QR Code has to be generated) in the ‘qrText’ string variable defined in its parameter. This implementation remains the same for versions like Web Forms, Blazor and .NET Core also. I have checked this thing myself, so if you wish to implement ZXing.NET on these frameworks then the codes will remain the same.

The QR Code is generated for the text and its byte array is returned to the View where the bitmap code is displayed from this byte[] array value.

Create the Index View and add the following code to it,
@model Byte[]
@using (Html.BeginForm(null, null, FormMethod.Post))
{
<table>
    <tbody>
        <tr>
            <td>
                <label>Enter text for creating QR Code</label>
            </td>
            <td>
                <input type="text" name="qrText" />
            </td>
        </tr>
        <tr>
            <td colspan="2">
                <button>Submit</button>
            </td>
        </tr>
    </tbody>
</table>
}
@{
if (Model != null)
{
    <h3>QR Code Successfully Generated</h3>
    <img src="@String.Format("data:image/png;base64,{0}", Convert.ToBase64String(Model))" />
}
}


Explanation
The View has a form where the user enters the string in the text box. The generated QR Code is displayed as an image by the img tag as shown below,
<img src="@String.Format("data:image/png;base64,{0}", Convert.ToBase64String(Model))" />

Testing
Run your application and enter any text in the text box. On clicking the submit button the QR Code will be created and displayed. See the below video where I am generating the QR Code,

Create QR Creating QR Codes
You can also create QR Code files. These QR Code files will be stored inside the ‘qrr’ folder on the root of your application.

First, create a new folder called ‘qrr’ inside the application root folder.

Next create ‘GenerateFile()’ index methods inside the Controller, as shown below,
public ActionResult GenerateFile()
{
return View();
}

[HttpPost]
public ActionResult GenerateFile(string qrText)
{
Byte[] byteArray;
var width = 250; // width of the Qr Code   
var height = 250; // height of the Qr Code   
var margin = 0;
var qrCodeWriter = new ZXing.BarcodeWriterPixelData
{
    Format = ZXing.BarcodeFormat.QR_CODE,
    Options = new QrCodeEncodingOptions
    {
        Height = height,
        Width = width,
        Margin = margin
    }
};
var pixelData = qrCodeWriter.Write(qrText);

// creating a bitmap from the raw pixel data; if only black and white colors are used it makes no difference   
// that the pixel data ist BGRA oriented and the bitmap is initialized with RGB   
using (var bitmap = new System.Drawing.Bitmap(pixelData.Width, pixelData.Height, System.Drawing.Imaging.PixelFormat.Format32bppRgb))
{
    using (var ms = new MemoryStream())
    {
        var bitmapData = bitmap.LockBits(new System.Drawing.Rectangle(0, 0, pixelData.Width, pixelData.Height), System.Drawing.Imaging.ImageLockMode.WriteOnly, System.Drawing.Imaging.PixelFormat.Format32bppRgb);
        try
        {
            // we assume that the row stride of the bitmap is aligned to 4 byte multiplied by the width of the image   
            System.Runtime.InteropServices.Marshal.Copy(pixelData.Pixels, 0, bitmapData.Scan0, pixelData.Pixels.Length);
        }
        finally
        {
            bitmap.UnlockBits(bitmapData);
        }

        // save to folder
        string fileGuid = Guid.NewGuid().ToString().Substring(0, 4);
        bitmap.Save(Server.MapPath("~/qrr") + "/file-" + fileGuid + ".png", System.Drawing.Imaging.ImageFormat.Png);

        // save to stream as PNG   
        bitmap.Save(ms, System.Drawing.Imaging.ImageFormat.Png);
        byteArray = ms.ToArray();
    }
}
return View(byteArray);
}

The ‘GenerateFile’ action method is very much similar to the earlier Index Action method. Only one change remains, which is the saving of the QR Code file inside the ‘qrr’ folder. The below 2 code lines do this saving work,
string fileGuid = Guid.NewGuid().ToString().Substring(0, 4);
bitmap.Save(Server.MapPath("~/qrr") + "/file-" + fileGuid + ".png", System.Drawing.Imaging.ImageFormat.Png);


Also, you need to create the GenerateFile View and add the following code to it. The GenerateFile View is totally the same as the Index View,
@model Byte[]
@using (Html.BeginForm(null, null, FormMethod.Post))
{
<table>
    <tbody>
        <tr>
            <td>
                <label>Enter text for creating QR Code</label>
            </td>
            <td>
                <input type="text" name="qrText" />
            </td>
        </tr>
        <tr>
            <td colspan="2">
                <button>Submit</button>
            </td>
        </tr>
    </tbody>
</table>
}
@{
if (Model != null)
{
    <h3>QR Code Successfully Generated</h3>
    <img src="@String.Format("data:image/png;base64,{0}", Convert.ToBase64String(Model))" />
}
}

Testing
open the URL of the GenerateFile Action method and enter any value in the text box and click the ‘Submit button. You will see the QR Code gets created and saved in a .png file inside the ‘qrr’ folder.
Reading all the QR Code files and Decoding their QR Code

Now let us read all the QR Code files and decode their QR Code values.

Create ViewFile Action method in your controller whose code is given below,
public ActionResult ViewFile()
{
List<KeyValuePair<string, string>> fileData = new List<KeyValuePair<string, string>>();
KeyValuePair<string, string> data;

string[] files = Directory.GetFiles(Server.MapPath("~/qrr"));
foreach (string file in files)
{
    // create a barcode reader instance
    IBarcodeReader reader = new BarcodeReader();
    // load a bitmap
    var barcodeBitmap = (Bitmap)Image.FromFile(Server.MapPath("~/qrr") + "/" + Path.GetFileName(file));
    // detect and decode the barcode inside the bitmap
    var result = reader.Decode(barcodeBitmap);
    // do something with the result
    data = new KeyValuePair<string, string>(result.ToString(), "/qrr/" + Path.GetFileName(file));
    fileData.Add(data);
}
return View(fileData);
}


Explanation
Get all the files inside the ‘qrr’ folder by using the Directory.GetFiles() method. Then loop through each of these files using the foreach() loop and decode their QR Codes.

The decoding is done using the .Decode() method,

var result = reader.Decode(barcodeBitmap);


I have used an object of List<KeyValuePair<string, string>> type to store all the file's path and their decode values of QR Code. The object is returned to the View.

Finally, create a View called ‘ViewFile’ and add the following code to it,
@model List<KeyValuePair<string, string>>
<table>
<thead>
    <tr>
        <td>
            QR Code File
        </td>
        <td>
            QR Code File Decoded Text
        </td>
    </tr>
</thead>
<tbody>
    @foreach (KeyValuePair<string, string> k in Model)
    {
        <tr>
            <td>
                <img src="@k.Value" />
            </td>
            <td>
                @k.Key
            </td>
        </tr>
    }
</tbody>
</table>


The View takes a model of List<KeyValuePair<type and displays all the QR Code files and their decode text.

Testing
Create some QR Code files and then visit the URL of the ViewFile view. You will see the QR Code files displayed as shown by the below image,


ASP.NET MVC Hosting - HostForLIFEASP.NET :: Integrate Facebook Ads Using ASP.NET MVC

clock July 21, 2021 07:12 by author Peter

This is a sample article to integrate Facebook login using MVC and after creating a login you can fetch data from Facebook Ads accounts. So I used this to collect data for insight, reports, etc.

Step 1
You need to start with Sign in to the Facebook developer.

Step 2
Then you need to create an app. In the Facebook developer account go to the app dashboard then click on my apps and then create an app.

Step 3
When the app is created. Click on the app and go to the settings then copy the app id and app secret for future use.

Step 4
Now let's start the coding part. First, just create a simple MVC project then add a controller to it. In the Index Method, I have added the scope, App Id, redirect URL. This method will return a URL that will redirect us to the Facebook login page.
public ActionResult Index() {
dynamic parameters = new ExpandoObject();
parameters.client_id = "enter the client id here"; //app id
parameters.redirect_uri = "enter the redirect url here";
parameters.response_type = "code";
parameters.display = "popup";
//scopes
var extendedPermissions = "ads_management,ads_read,instagram_basic,business_management,email,pages_messaging,publish_to_groups,pages_manage_metadata,pages_read_user_content,leads_retrieval,pages_read_engagement,pages_manage_posts,publish_to_groups,pages_manage_ads,instagram_basic,pages_show_list,pages_manage_engagement,read_insights"; {
    parameters.scope = extendedPermissions;
}
var _fb = new FacebookClient();
var url = _fb.GetLoginUrl(parameters);
return Redirect(url.ToString());
}


Don't forget to add this redirect URL in the Facebook developer app also, go to your app then Facebook login then settings, you'll see this screen now add the URL in the redirect URL text box and save the changes.

Now we have to retrieve user profile details.
public ActionResult Login_success() {

var _fb = new FacebookClient();
List < object > oList = new List < object > ();
FacebookOAuthResult oauthResult;
if (!_fb.TryParseOAuthCallbackUrl(Request.Url, out oauthResult)) {}
if (oauthResult.IsSuccess) {
    var WebClient = new WebClient();
    Dictionary < string, object > parameters = new Dictionary < string, object > ();
    parameters.Add("client_id", "enter client id here");
    parameters.Add("redirect_uri", "enter redirect uri here");
    parameters.Add("client_secret", "enter client secret here");
    parameters.Add("code", oauthResult.Code);
    dynamic result = _fb.Get("/oauth/access_token", parameters);
    var accessToken = result.access_token;
    _fb.AccessToken = Session["AccessToken"].ToString();
    dynamic me = _fb.Get("me?fields=first_name,middle_name,last_name,id,email");
    string email = me.email;
    string firstname = me.first_name;
    string middlename = me.middle_name;
    string lastname = me.last_name;
    string name = firstname + " " + middlename + " " + lastname;
    string id = me.id;
    FbHelper db = new FbHelper();
    db.save_User_Info(id, name, email, accessToken);
    FormsAuthentication.SetAuthCookie(email, false);
} else {}
return View();
}


That's it. I have used the same user info method to save the id, name, email, and access token of the current user in my database.
public long save_User_Info(string strUserGuid, string strName, string strEmail, string accessToken) {
long nResult = 0;
try {
    SqlParameter[] sq = {
        new SqlParameter("@user_guid", strUserGuid),
        new SqlParameter("@user_name", strName),
        new SqlParameter("@user_email", strEmail),
        new SqlParameter("@user_token", accessToken)
    };
    nResult = _helper.ExecuteStoredProcedure("usp_insert_facebook_user_Information", sq);
} catch (Exception ex) {}
return nResult;
}


At first, Facebook gives us basic permission to access profiles, email, etc. To get Facebook ads details like campaign details we need to go to the app review and then permissions and features. There you will see all the permissions, you can take permissions from there for your app. And use the below API requests to retrieve campaigns.
public ActionResult CampaignData() {
string page_Token = "enter page token here";
string page_Id = "enter page id here";
string page_post_id = "enter page post id here";
string act_ad_id = "enter account act id here";
string user_Token = "enter user token here";
string ad_Set_Id = "enter ad set id here";
var WebClient = new WebClient();
string user_url = string.Format("https://graph.facebook.com/v10.0/" + ad_Set_Id + "/insights?fields=clicks%2Cspend%2Cimpressions%2Creach&access_token=" + user_Token);
string post_url = string.Format("https://graph.facebook.com/v10.0/" + page_Id + "?fields=posts%2Cads_posts&access_token=" + page_Token);
string post_like_url = string.Format("https://graph.facebook.com/v10.0/" + page_post_id + "?fields=likes%2Ccomments%2Cshares%2Creactions%2Ctargeting%2Ctarget&access_token=" + page_Token);
string page_tagret_url = string.Format("https://graph.facebook.com/v10.0/" + act_ad_id + "/adsets?fields=name%2Ctargeting&access_token=" + page_Token);
string getPostData = WebClient.DownloadString(post_url);
string getPostActivity = WebClient.DownloadString(post_like_url);
string getPageTarget = WebClient.DownloadString(page_tagret_url);
string getUserData = WebClient.DownloadString(user_url);
DataTable dtPostData = ConvertJsonToDatatableLinq(getPostData);
var userDataList = JsonConvert.DeserializeObject < FacebookJsonConversion.Root > (getUserData);
var pageActivity = JsonConvert.DeserializeObject < PostActivityJsonConversion.Root > (getPostActivity);
var pageTarget = JsonConvert.DeserializeObject < PageTargetJsonConversion.Root > (getPageTarget);
List < object > postData = new List < object > ();
postData.Add(dtPostData);
postData.Add(pageActivity);
postData.Add(pageTarget);
postData.Add(userDataList);
return View(postData);
}


ASP.NET MVC 6 Hosting - HostForLIFEASP.NET :: Exception Filters in MVC

clock July 16, 2021 08:10 by author Peter

Exceptions are part and parcel of an application. They are a boon and a ban for an application too. Isn't it? This would be controversial, for developers it helps them track minor and major defects in an application and sometimes they are frustrating when it lets users land on the Yellow screen of death each time. This would make the users mundane to the application. Thus to avoid this, developers handle the exceptions. But still sometimes there are a few unhandled exceptions.


Now what is to be done for them? MVC provides us with built-in "Exception Filters" about which we will explain here.

Let's start!
 
A Yellow screen of Death can be said is as a wardrobe malfunction of our application.
 
Get Started
Exception filters run when some of the exceptions are unhandled and thrown from an invoked action. The reason for the exception can be anything and so is the source of the exception.
 
Creating an Exception Filter
Custom Exception Filters must implement the builtin IExceptionFilter interface. The interface looks as in the following:
    public interface IExceptionFilter
    {  
       void OnException(ExceptionContext filterContext)  
    }  


Whenever an unhandled exception is encountered, the OnException method gets invoked. The parameter as we can see, ExceptionContext is derived from the ControllerContext and has a number of built-in properties that can be used to get the information about the request causing the exception. Their property's ExceptionContext passess are shown in the following table: 

Name Type Detail
Result ActionResult The result returned by the action being invoked.
Exception Exception The unhandled exceptions caused from the actions in the applications.
ExceptionHandled BOOL This is a very handy property that returns a bool value (true/false) based on if the exception is handled by any of the filters in the applicaiton or not.

The exception being thrown from the action is detailed by the Exception property and once handled (if), then the property ExceptionHandled can be toggled, so that the other filters would know if the exception has been already handled and cancel the other filter requests to handle. The problem is that if the exceptions are not handled, then the default MVC behavior shows the dreaded yellow screen of death. To the users, that makes a very impression on the users and more importantly, it exposes the application's handy and secure information to the outside world that may have hackers and then the application gets into the road to hell. Thus, the exceptions need to be dealt with very carefully. Let's show one small custom exception filter. This filter can be stored inside the Filters folder in the web project of the solution. Let's add a file/class called CustomExceptionFilter.cs.
    public class CustomExceptionFilter: FilterAttribute,  
    IExceptionFilter   
    {  
        public void OnException(ExceptionContext filterContext)   
        {  
            if (!filterContext.ExceptionHandled && filterContext.Exception is NullReferenceException)   
            {  
                filterContext.Result = new RedirectResult("customErrorPage.html");  
                filterContext.ExceptionHandled = true;  
            }  
        }  
    }  

Now let us understand what this actually does. As we can see, this implements the interface as said earlier and thus implements the method, OnException. This method has the parameter ExceptionContext, the properties of which is specified in the table. In this custom filter we have handled the most common and neglected exception "Null Reference Exception" that arises when a value returning null is not handled/checked and used in further implementations. The custom filter derives the FilterAttribute so as to be used as an Attribute over the action or the controller directly like [CustomExceptionFilter]. In this implementation above, we have used nearly all the important properties of the ExceptionContext. First, the check is used for the ExceptionHandled that returns a Boolean value if the exception has been handled or not. If not then Check for the type of exception that has arisen.
 
Since here we have used the NullReferenceException, we check for that exception. Then if the conditions are satisfied/passed we manipulate the result and return the RedirectResult (ActionResult type) and let the users land on a custom error page created in the application, to avoid the yellow dreaded screen. The use of the filter is pretty simple since this custom filter extends from the FilterAttribute. So based on the usage, this can be used as [CustomExceptionFilter] on the Controller Level or the individual Action level, whichever is relevant.
    //Over controller  
    [CustomExceptionFilter]  
    public class HomeController:Controller
    {  
       //......  
    }
    //Over the Action  
    [CustomExceptionFilter]  
    public ActionResult Index()
    {  
       //.......  
    }  


Now, let's explain the builtin HandleAttribute. This is a built-in class used in a similar way as a filter attribute in MVC applications. The most important thing is this attribute works only when the custom errors in the web.config is enabled or set to true.
 
The default mode for this element is RemoteOnly that will only work out when the application is deployed and the request is made from some other systems. Let's look at the properties of the HandleError Attribute.

    ExceptionType: This property, as the name suggests, indictes the attribute of the type of exception it needs to handle.

    View: This is the property that we need to specify to let the attribute land the end users after handling the exception.

    Master: If we have a special layout for the error page then this master can be set to that layout path. If left empty, this will take the default layout of the application for the error pages.

Thus, the following code snippet shows how to use the HandleError attribute.
    [HandleError(ExceptionType = typeof(NullReferenceException), View = "CustomErrorPage")]
    {  
       public Action Result
       {  
          //........  
          var testVal = null;  
          //Unhandled and used..  
       }
    }

Caution
While reading through the Adam Freeman, a very interesting note of caution was said for when using the HandleError attribute. In the custom error page, we would be using the HandleError Info like the Stack Trace, the exception message and so on. Since we would not like to show this to the end user, we need to put the stack trace inside a hidden field or make the HTML tag invisible because The view is not displayed to the user unless the Exception.StackTrace is included in the View.
 
Thus, we learned the creation of custom exception filters as well as the built-in filters in MVC applications. There are various ways/tools now to handle exceptions, but still we can make use of these filters to avoid detrimental effects on our applications.
 
I hope this would help developers and beginners. The concept is interesting when we use them. So start using and enjoy coding.


About HostForLIFE

HostForLIFE is European Windows Hosting Provider which focuses on Windows Platform only. We deliver on-demand hosting solutions including Shared hosting, Reseller Hosting, Cloud Hosting, Dedicated Servers, and IT as a Service for companies of all sizes.

We have offered the latest Windows 2019 Hosting, ASP.NET 5 Hosting, ASP.NET MVC 6 Hosting and SQL 2019 Hosting.


Month List

Tag cloud

Sign in