This article shows how to bind a dropdownlist in various ways with a database.
I know you have seen many articles regarding dropdownlist but no one is showing binding with a database.

I saw most developers coming from webform development and not find it easy to use this HTML control. There are server controls in ASP.NET webforms that are easy to bind.
And in the same way in an Edit Form this shows how to dropdownlist selected.
I am using dapper to access the data from the database. Please do not be shocked, its an ORM and easy to use compared to Entity Framework.
But it is the same as Entity Framework. Do not worry, in the same way you can use this in Entity Framework.
Various ways to do the binding
Using @html.DropDownList Model
@Html.DropDownList("Mobiledropdown1", Model.MobileList)
Using @html.DropDownList with Viewbag
@Html.DropDownList("Mobiledropdown2", ViewBag.VBMobileList as SelectList)
Using @html.DropDownListFor With Model
@Html.DropDownListFor(M => M.MobileList, new SelectList(Model.MobileList,"Value", "Text"))
Using @html.DropDownList With hardcode values on View / with ViewBag.
1. @Html.DropDownList("Mobiledropdown3", new List<SelectListItem>
{ new SelectListItem { Text = "HTC DESIRE", Value = "1", Selected=true},
new SelectListItem { Text = "Moto G", Value = "2"},
new SelectListItem { Text = "GO mobiles", Value = "3"}
}, "Select Mobile")
2. @Html.DropDownList("Dr",ViewData["MyhardcodeValue"] as List<SelectListItem>)
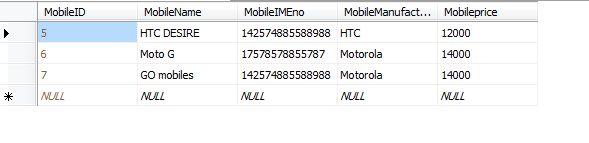
Here is a table snapshot . I am also providing to you the table script in an attachment.
SET ANSI_NULLS ON
GO
SET QUOTED_IDENTIFIER ON
GO
SET ANSI_PADDING ON
GO
CREATE TABLE [dbo].[Mobiledata](
[MobileID] [int] IDENTITY(1,1) NOT NULL,
[MobileName] [varchar](50) NULL,
[MobileIMEno] [varchar](16) NULL,
[MobileManufactured] [varchar](50) NULL,
[Mobileprice] [decimal](18, 0) NULL,
CONSTRAINT [PK_Mobiledata] PRIMARY KEY CLUSTERED
(
[MobileID] ASC
)WITH (PAD_INDEX = OFF, STATISTICS_NORECOMPUTE = OFF, IGNORE_DUP_KEY = OFF, ALLOW_ROW_LOCKS = ON, ALLOW_PAGE_LOCKS = ON) ON [PRIMARY]
) ON [PRIMARY]
GO
SET ANSI_PADDING OFF
GO
Let's start by creating the Model first.
I am adding the model with the name Mobiledata.
Adding all the fields that are present in the SQL Table and SelectList to get the data in the Collection.
[Table("Mobiledata")]
public class Mobiledata
{
[Key]
public int MobileID { get; set; }
public string MobileName { get; set; }
public string MobileIMEno { get; set; }
public string MobileManufactured { get; set; }
public Nullable<decimal> Mobileprice { get; set; }
[NotMapped]
public SelectList MobileList { get; set; }
}
For a Dapper User I am adding another class with the name MobileContext.
public class MobileContext
{
SqlConnection con = new SqlConnection(ConfigurationManager.ConnectionStrings["MYConnector"].ToString());
public IEnumerable<Mobiledata> GetMobileList()
{
string query = "SELECT [MobileID],[MobileName]FROM [MobileDB].[dbo].[Mobiledata]";
var result = con.Query<Mobiledata>(query);
return result;
}
}
This class will return an Enumerable list of MobileData.
We are complete with the Model part. I will now show you the Controller part.
I am adding the Controller with the name MobileDisplayController.
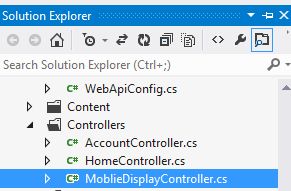
After adding the Controller you will see a similar view.
I have also added a Mobilecontext class; you can view it here.
MobileDisplayController.cs
using System;
using System.Collections.Generic;
using System.Linq;
using System.Web;
using System.Web.Mvc;
using BindingDropdownListandSavingIT.Models;
namespace BindingDropdownListandSavingIT.Controllers
{
public class MoblieDisplayController : Controller
{
MobileContext MCon = new MobileContext();
public ActionResult Index()
{
return View(MD);
}
}
}
After adding the Controller now the main purpose is to pass a value to the view from the Controller.
Let's pass values.
MobileContext MCon = new MobileContext();
The following is the MobileContext class for getting the Enumerable List .
Mobiledata MD = new Mobiledata();
Mobiledata is the model that I am passing to the View.
In that Model you can see MobileList that is Enumerable.
MD.MobileList = new SelectList(MCon.GetMobileList(), "MobileID", "MobileName");
Now to that MobileList I am passing SelectList with Enumerable List from MobileContext Class and also value and Text that I want to display.
First way to Binding Dropdownlist.
MobileDisplayController.cs
using System;
using System.Collections.Generic;
using System.Linq;
using System.Web;
using System.Web.Mvc;
using BindingDropdownListandSavingIT.Models;
namespace BindingDropdownListandSavingIT.Controllers
{
public class MoblieDisplayController : Controller
{
MobileContext MCon = new MobileContext();
public ActionResult Index()
{
Mobiledata MD = new Mobiledata();
MD.MobileList = new SelectList(MCon.GetMobileList(), "MobileID", "MobileName"); // model binding
return View(MD);
}
}
}
After passing the data now to display it in the View.
For that add a View by right-clicking inside ActionResult and select AddView and provide its name as Index.
After adding the View add a Namespace to the Model as shown below.
@model BindingDropdownListandSavingIT.Models.Mobiledata
@{
ViewBag.Title = "ALL DROPDOWNLIST FUN AND LEARN";
}
<h2>ALL DROPDOWNLIST FUN AND LEARN</h2
<tr>
<td>
<div>
@Html.Label("Normal Dropdownlist Binding")
</div>
</td>
<td>
<div class="editor-label">
@Html.Label("Select Mobile Name")
</div>
</td>
<td>
<div class="editor-field">
@Html.DropDownList("Mobiledropdown1", Model.MobileList, "Select Mobile")
</div>
</td>
</tr>
Here we can directly access the MobileList from the Model.
Now just run the application and just check it.
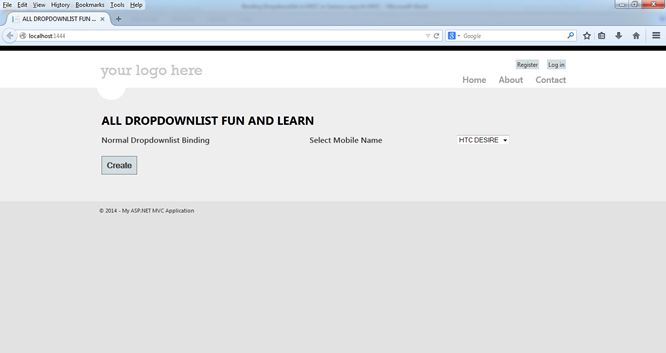
It's done.
Second way to Bind Dropdownlist
Now in the second way we just need to pass the same list to the Viewbag.
As in the first way we have passed a value to the model now in the same way we would pass a list to the Viewbag.
<tr>
<td>
<div>
@Html.Label("Dropdownlist Binding Using ViewBag")
</div>
</td>
<td>
<div class="editor-label">
@Html.Label("Select Mobile Name")
</div>
</td>
<td>
<div class="editor-field">
@Html.DropDownList("Mobiledropdown2", ViewBag.VBMobileList as SelectList, "Select Mobile")
</div>
</td>
</tr>
ViewBag.VBMobileList = new SelectList(MCon.GetMobileList(), "MobileID", "MobileName");
// Viewbag
For your reference you can run and check it.
Third way to Binding Dropdownlist
In the third way everything will be the same but the binding to the DropdownlistFor is different.
Using the same model that was used for the first way to do the binding .
MD.MobileList = new SelectList(MCon.GetMobileList(), "MobileID", "MobileName");
Here is a snapshot to show how to bind.
<tr>
<td>
<div>
@Html.Label("Dropdownlist Binding Using Model (Lamda Expression)")
</div>
</td>
<td>
<div class="editor-label">
@Html.Label("Select Mobile Name")
</div>
</td>
<td>
<div class="editor-field">
@Html.DropDownListFor(M => M.MobileID, new SelectList(Model.MobileList, "Value", "Text"), "Select Mobile")
</div>
</td>
</tr>
JavaScript
For binding the dropdownlist we require a LINQ expression and IEnumreable list.
As you have seen if you are creating a view directly using the scafffloding technique then you can see a LINQ lamda expression.
For example. @Html.TextboxFor(m => m.MobileName)
Fourth way to Binding Dropdownlist
In the last way we can pass hardcoded values to the dropdownlist on the View only.
1. Directly View
<tr>
<td>
<div>
@Html.Label("Dropdownlist Binding on View Directly")
</div>
</td>
<td>
<div class="editor-label">
@Html.Label("Select Mobile Name")
</div>
</td>
<td>
<div class="editor-field">
@Html.DropDownList("Mobiledropdown3", new List<SelectListItem>
{
new SelectListItem { Text = "HTC DESIRE", Value = "1"},
new SelectListItem { Text = "Moto G", Value = "2"},
new SelectListItem { Text = "GO mobiles", Value = "3"}
}, "Select Mobile")
</div>
</td>
</tr>
2. Binding directly using ViewBag
The same List<SelectListItem> that we pass in the view directly can also be sent from the Controller and bound directly using a ViewBag.
<tr>
<td>
<div>
@Html.Label("Dropdownlist Binding using SelectListitem and Viewbag")
</div>
</td>
<td>
<div class="editor-label">
@Html.Label("Select Mobile Name")
</div>
</td>
<td>
@Html.DropDownList("Dr", ViewData["MyhardcodeVal"] as List<SelectListItem>)
</td>
</tr>
Now we completed the binding of the Dropdownlist.
Now you may have a question of how to read the Dropdownlist values.
You can read using a FromCollection or Model.
Here you need to create a Post Method .
If you want to read all the values of the dropdownlist or any HTML control then you will get in FormCollection.
Post method from MobileDisplayController:
[HttpPost]
public ActionResult Index(FormCollection objfrm, Mobiledata objMd)
{
string mobile1 = objfrm["Mobiledropdown1"];
string mobile2 = objfrm["Mobiledropdown2"];
string mobile3 = objfrm["Mobiledropdown3"];
return View(objMd);
}
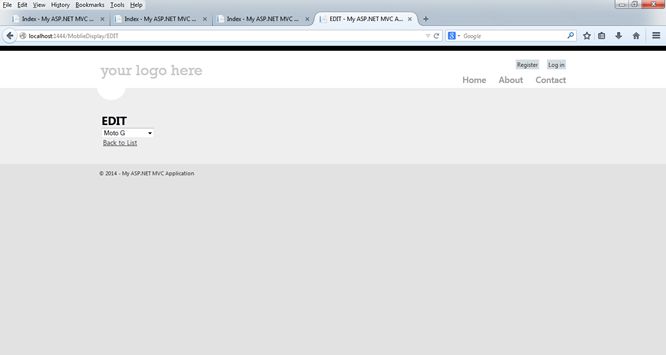
How to set a selected value of Dropdownlist on EditPage
Here I am showing how to show a selected dropdownlist value on Edit Page because this small thing will take time when you are new to this kind of technology.
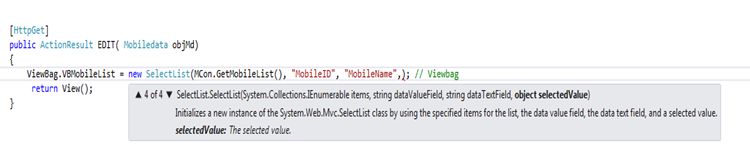
Get the method of the Edit page from MobileDisplayController.

Output after editing.
How to add a Select at the top of the selection list. Just add a String value at the end of the Dropdownlist.
<div class="editor-field">
@Html.DropDownList("Mobiledropdown1", Model.MobileList, "Select Mobile")
</div>
