Swagger (OpenAPI) is a language-agnostic specification for describing REST APIs. It allows both computers and humans to understand the capabilities of a REST API without direct access to the source code. Swagger UI offers a web-based UI that provides information about the service, using the generated OpenAPI specification. Swagger UI is an alternative to Postman.

I used Swagger more than several times in my articles, but just as a minor tool associated with different other major topics. When I tried to get info on Swagger, I had to search from these articles, which were not convenient. So, I rewrote these two articles, especially about Swagger for .NET MVC Web API or .NET Core MVC Web API.
This article is part of another article: Exception Handling (2), In ASP.NET MVC Web API, we got Swagger related part here. You can see details from there.
Step 1 - Create an ASP.NET MVC Web API app
We use the version of Visual Studio 2019 16.8 and .NET Framework 4.7.2 to build the app.
Start Visual Studio and select Create a new project.
In the Create a new project dialog, select ASP.NET Web Application (.NET Framework) > Next.
In the Configure your new project dialog, enter ErrorHandlingWebAPI for Project name > Create.
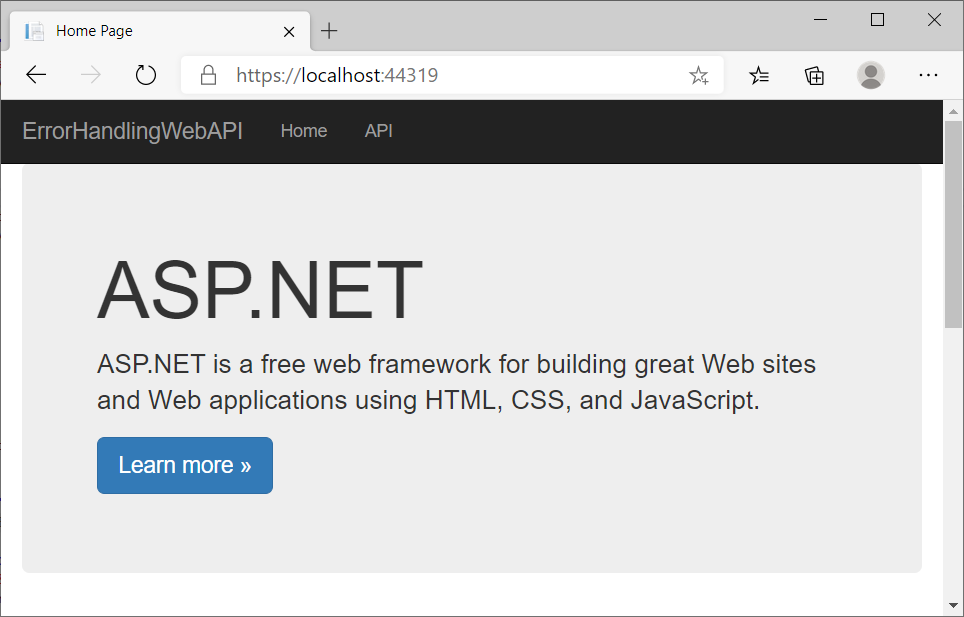
In the Create a new ASP.NET Web Application dialog, select Web API > Creat
Build and run the app, you will see the following image shows the app,
Step 2 - Add one empty ApiController
Add one empty apiController into the app, with the name as ErrorHandlingWebAPIController:
Right click Controllers > add > controller.
In the Add New Scaffolded Item dialog, select Web API in the left pane, and
Web API 2 Controller - Empty > Add.
In the Add Controller dialog, Change ErrorHandlingWebAPIController for controller name > Add.
Step 3 - Add code into the controller
We add the following code into the controller,
[Route("CheckId/{id}")]
[HttpGet]
public IHttpActionResult CheckId(int id)
{
if (id < 10) // No error hanbdling at all:
{
int a = 1;
int b = 0;
int c = 0;
c = a / b; //it would cause exception.
}
else if (id <20) // Error handling by HttpResponseException with HttpStatusCode
{
throw new HttpResponseException(HttpStatusCode.BadRequest);
}
else if (id < 30) // Error handling by HttpResponseException with HttpResponseMessage
{
var response = new HttpResponseMessage(HttpStatusCode.BadRequest)
{
Content = new StringContent(string.Format("No Employee found with ID = {0}", 10)),
ReasonPhrase = "Employee Not Found"
};
throw new HttpResponseException(response);
}
return Ok(id);
}
Step 4 - Add Swagger Client
Installing Swagger from NuGet Package Manager, from Visual Studio project,
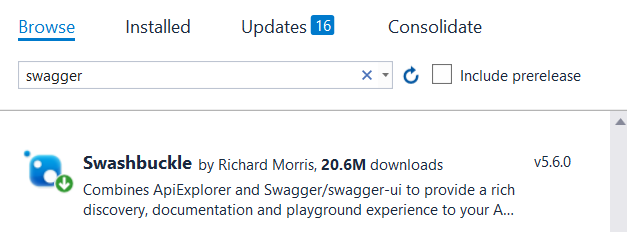
Right click Tools > NuGet Package Manager > Manage NuGet for Solution
In the opened NuGet-Solution dialog: Click Browse, then Search Swagger
Install Swashbuckle v5.6.0
Before installation of Swagger, MVC usually has four config files in folder App_Start,
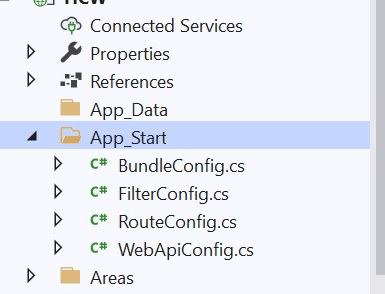
After installation, one more file, SwaggerConfig.cs, added,
with code,
public class SwaggerConfig
{
public static void Register()
{
var thisAssembly = typeof(SwaggerConfig).Assembly;
GlobalConfiguration.Configuration
.EnableSwagger(c => c.SingleApiVersion("v1", "ErrorHandlingWebAPI"))
.EnableSwaggerUi();
}
}
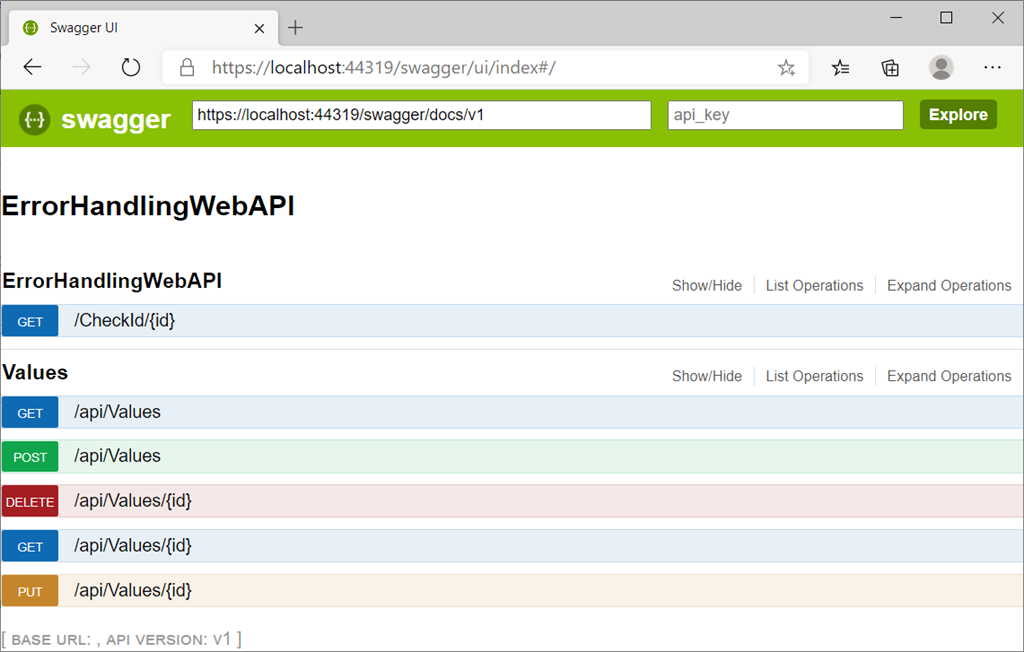
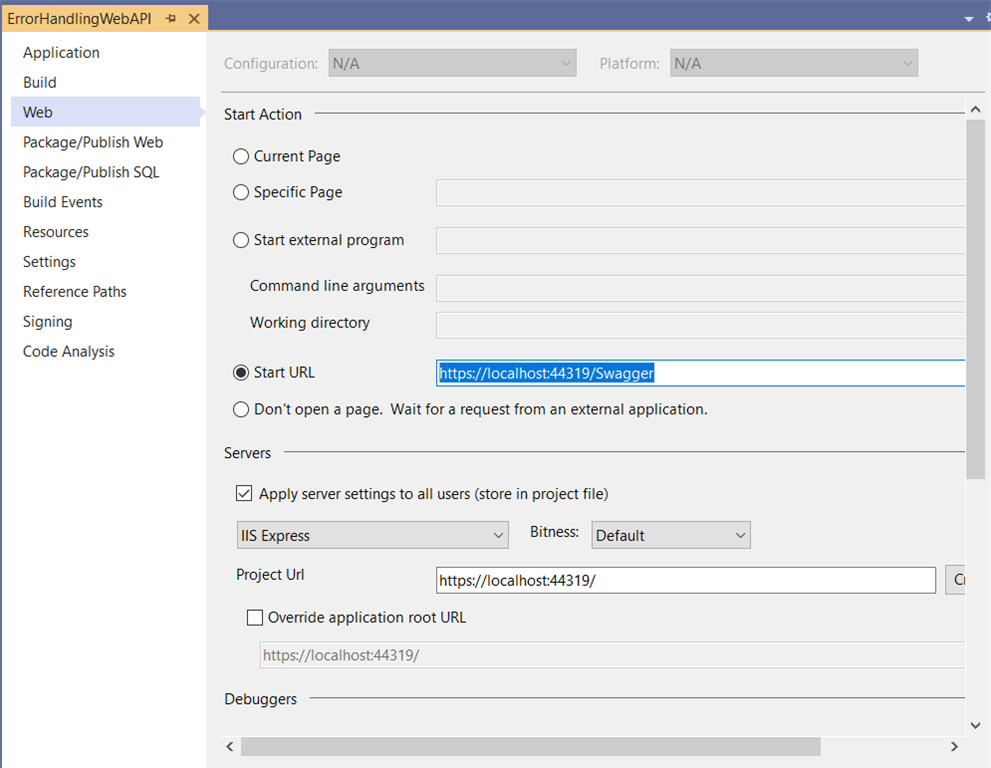
Step 5 - Change the default start page to the swagger
Right click Project > Properties to open the properties page, then choose Web, in Start URL, add /swagger,
Step 6 - Run the app