In this article, we will learn how to generate Barcode in ASP.NET MVC Core 6 by simply entering text, numbers, and a combination of both in the textbox and click on generate Barcode button. I found a very useful library for generating Barcode which is IronBarcode. You can install IronBarcode through the NuGet package. It supports .Net Core, Standard & Framework, and it has cross-platform support.

To use this library, we will create a demo project in Visual Studio. I am creating ASP.NET Core Web App (Model-View-Controller). I am going to use the Visual Studio 2022 version.
Creating a New Project in Visual Studio 2022
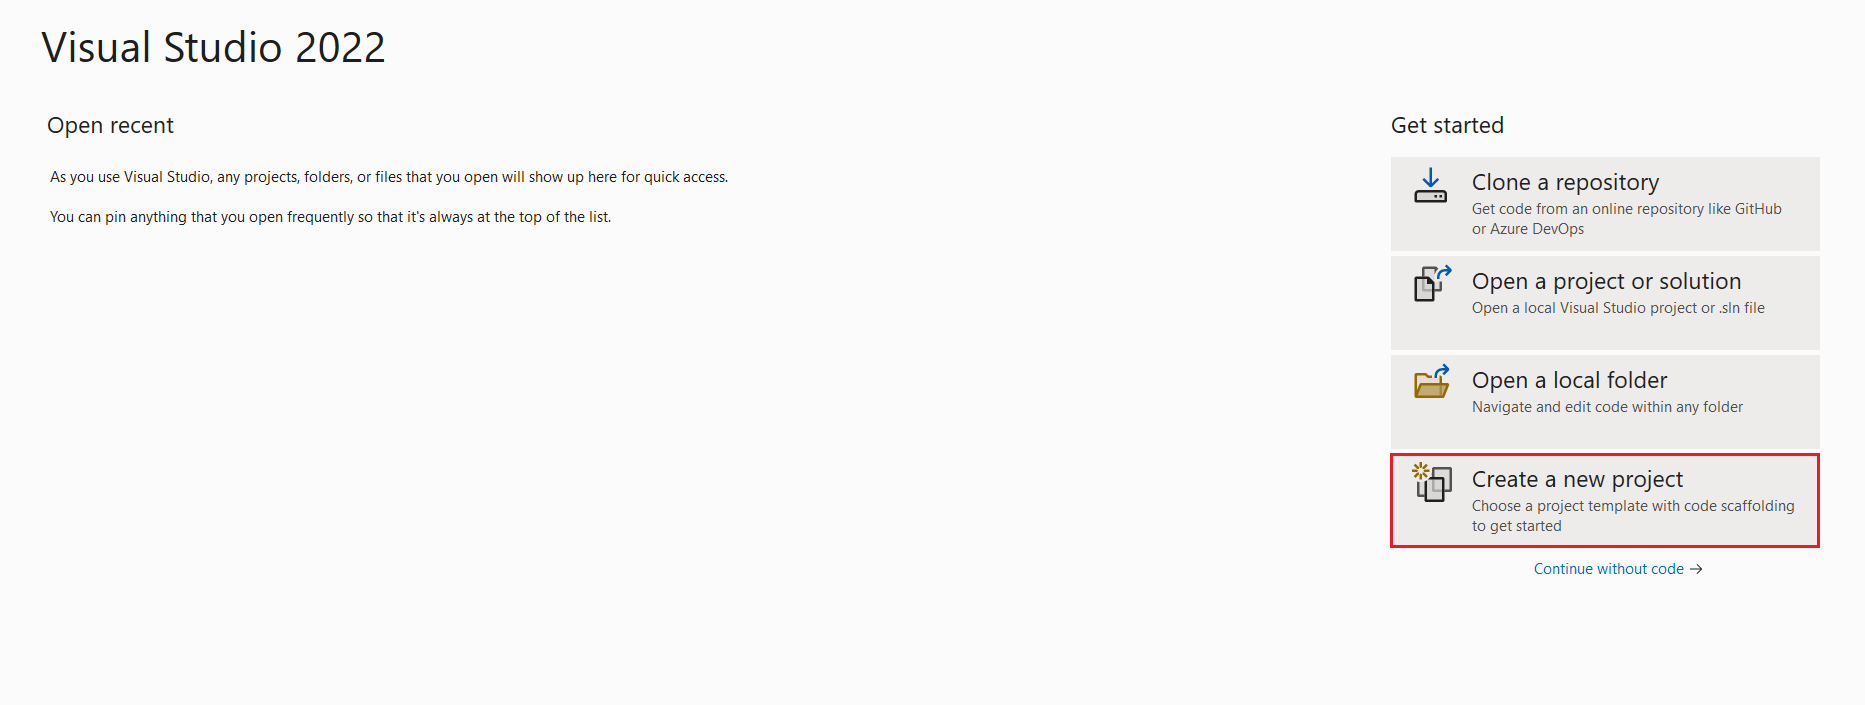
Start Visual Studio software and select Create a new project.
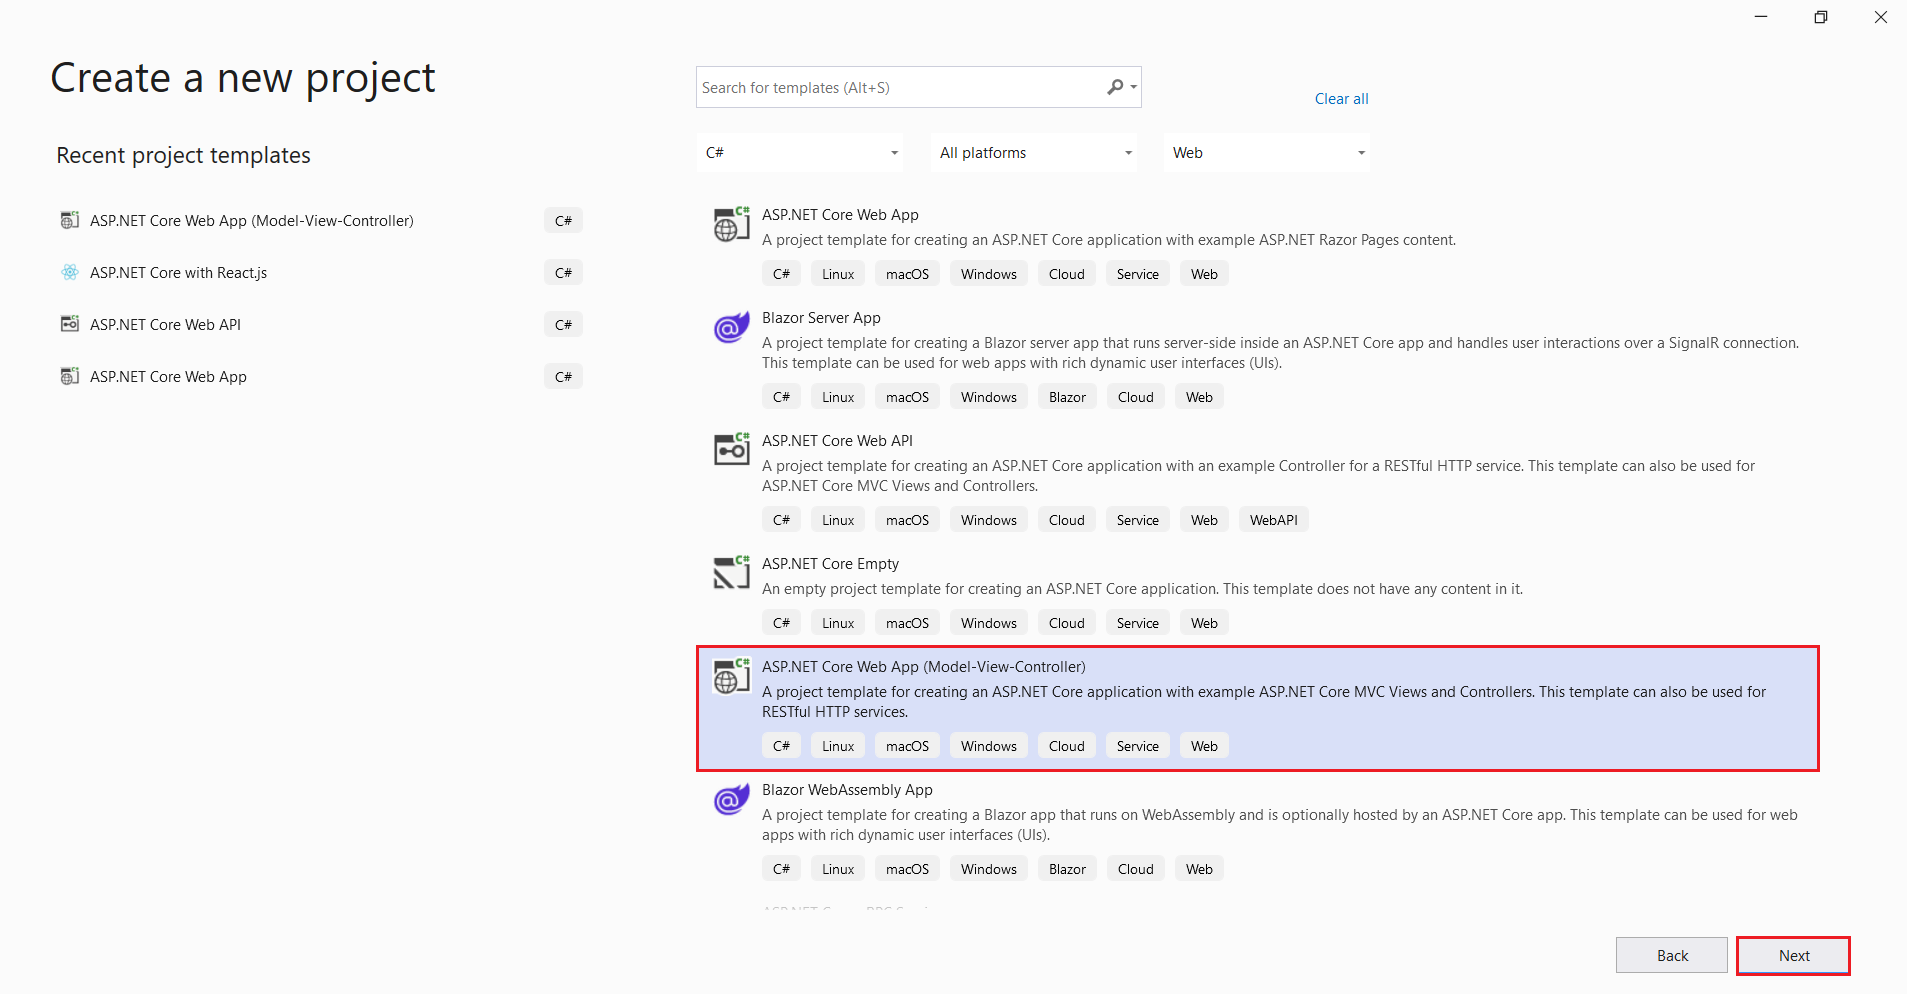
In the Create a new project dialog, select ASP.NET Core Web App (Model-View Controller) > Next.
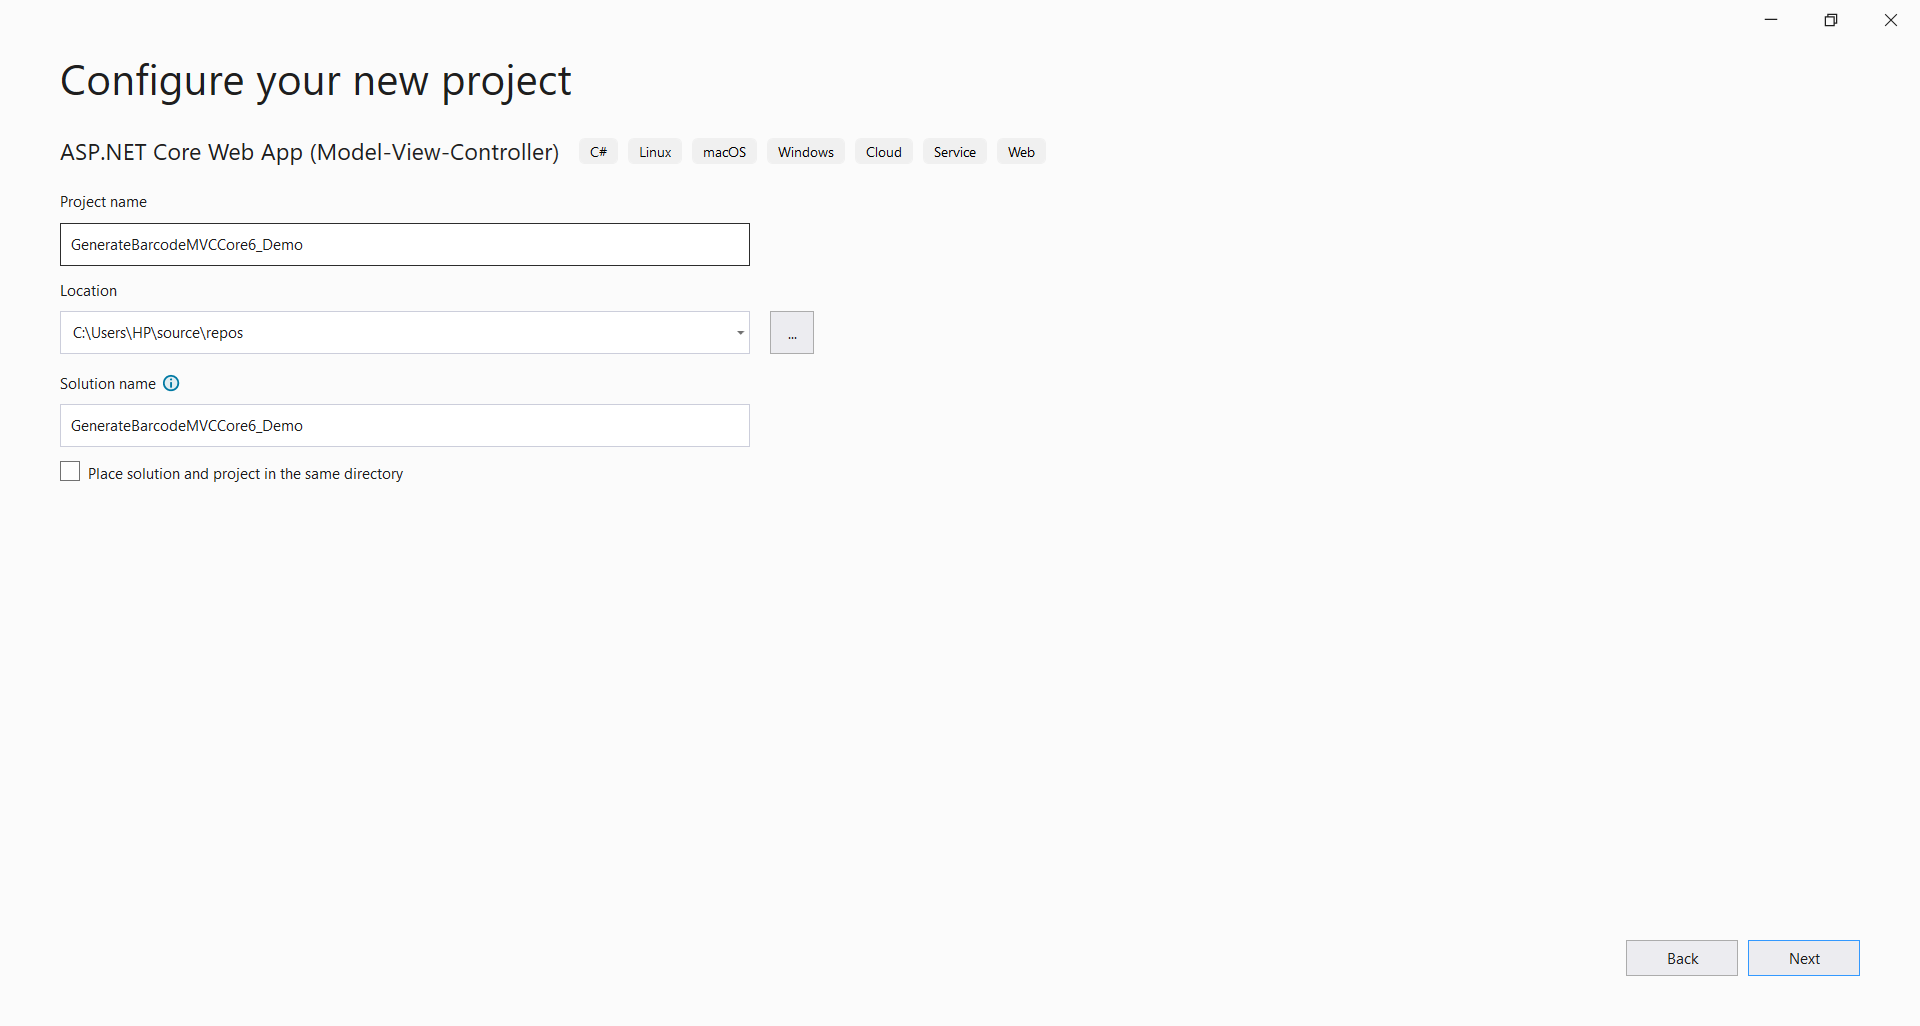
In the Configure your new project dialog, enter GenerateBarcodeMVCCore6_Demo for Project name. It's important to name the project GenerateBarcodeMVCCore6_Demo. The capitalization needs to match each namespace when code is copied. Select Next.
In the Additional information dialog, select .NET 6.0 (Long-term support). Select Create.

Next, we can add the library to test the code.
How to Install the Barcode Library through NuGet Package Manager
The Visual Studio software provides the Nuget Package manager option to install the package directly to the solution. In Visual Studio Select Tools > NuGet Package Manager > Manage NuGet Packages for the solution. The below screenshot shows how to open the Nuget Package Manager.
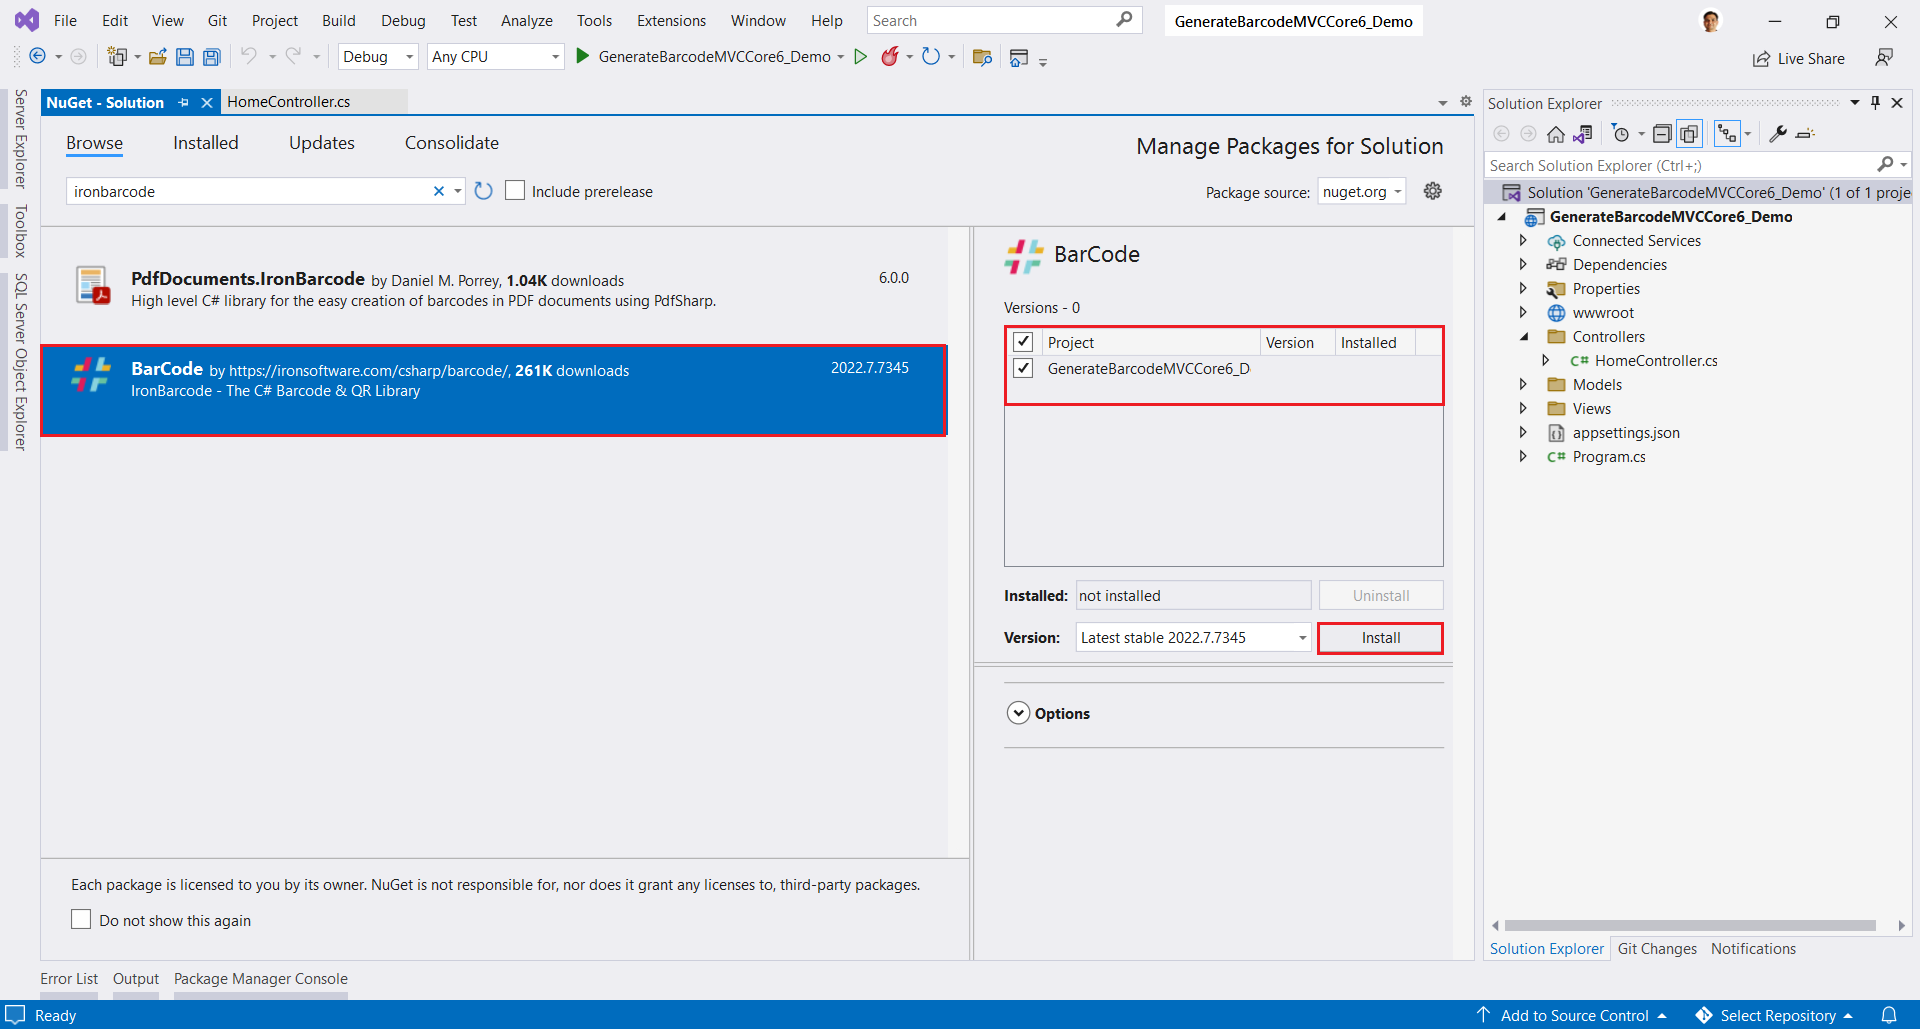
Search for the specific package IronBarcode using the search box on the upper left. Select a package from the list in order to display its information, enable the Install button and a version-selection drop-down, as shown in the below screenshot. The NuGet package will be installed for your project and reference will be added.
In the above image, we can see the list of the related search items. We need to select the required option to install the package to the solution.
Using the Visual Studio Command-Line
In Visual Studio, go to Tools-> Nuget Package Manager -> Package Manager Console
Enter the following line in the package manager console tab:
Install-Package IronBarCode
Now the package will download/install to the current project and be ready for use.

Add a class in the Models folder and write or copy-paste the below code.
using System.ComponentModel.DataAnnotations;
namespace GenerateBarcodeMVCCore6_Demo.Models
{
public class GenerateBarcodeModel
{
[Display(Name = "Enter Barcode Text")]
public string BarcodeText
{
get;
set;
}
}
}
We will use exiting HomeController to write the code.
using GenerateBarcodeMVCCore6_Demo.Models;
using IronBarCode;
using Microsoft.AspNetCore.Mvc;
using System.Diagnostics;
using System.Drawing;
namespace GenerateBarcodeMVCCore6_Demo.Controllers
{
public class HomeController : Controller
{
private readonly IWebHostEnvironment _environment;
public HomeController(IWebHostEnvironment environment)
{
_environment = environment;
}
public IActionResult CreateBarcode()
{
return View();
}
[HttpPost]
public IActionResult CreateBarcode(GenerateBarcodeModel generateBarcode)
{
try
{
GeneratedBarcode barcode = IronBarCode.BarcodeWriter.CreateBarcode(generateBarcode.BarcodeText, BarcodeWriterEncoding.Code128);
barcode.ResizeTo(400, 120);
barcode.AddBarcodeValueTextBelowBarcode();
// Styling a Barcode and adding annotation text
barcode.ChangeBarCodeColor(Color.BlueViolet);
barcode.SetMargins(10);
string path = Path.Combine(_environment.WebRootPath, "GeneratedBarcode");
if (!Directory.Exists(path))
{
Directory.CreateDirectory(path);
}
string filePath = Path.Combine(_environment.WebRootPath, "GeneratedBarcode/barcode.png");
barcode.SaveAsPng(filePath);
string fileName = Path.GetFileName(filePath);
string imageUrl = $"{this.Request.Scheme}://{this.Request.Host}{this.Request.PathBase}" + "/GeneratedBarcode/" + fileName;
ViewBag.QrCodeUri = imageUrl;
}
catch (Exception)
{
throw;
}
return View();
}
}
}
Next, "Add View" - right-click on the CreateBarcode action method in HomeController class. Select "Add View" then select "Razor View." Next, click on the "Add" button.
In the view name CreateBarcode default name as action method in HomeController.
Template "Create"
In the Model, class drop-down, select GenerateBarcodeModel(GenerateBarcodeMVCCore6_Demo.Models).
Select Add.
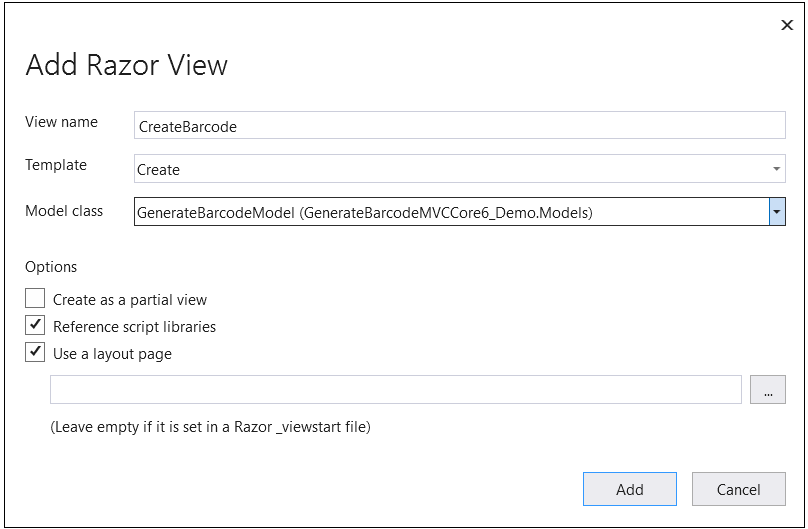
The following is the CreateBarcode View code.
@model GenerateBarcodeMVCCore6_Demo.Models.GenerateBarcodeModel
@{
ViewData["Title"] = "CreateBarcode";
}
<h4>Generate Barcode</h4>
<div class="row">
<div class="col-md-4">
<form asp-action="CreateBarcode">
<div asp-validation-summary="ModelOnly" class="text-danger"></div>
<div class="form-group">
<label asp-for="BarcodeText" class="control-label"></label>
<input asp-for="BarcodeText" class="form-control" />
<span asp-validation-for="BarcodeText" class="text-danger"></span>
</div>
<br />
<div class="form-group">
<input type="submit" value="Generate Barcode" class="btn btn-primary" />
</div>
<div class="form-group">
<img src="@ViewBag.QrCodeUri" class="img-thumbnail" />
</div>
</form>
</div>
</div>
@section Scripts {
@{await Html.RenderPartialAsync("_ValidationScriptsPartial");}
}
Run project Ctrl+F5.
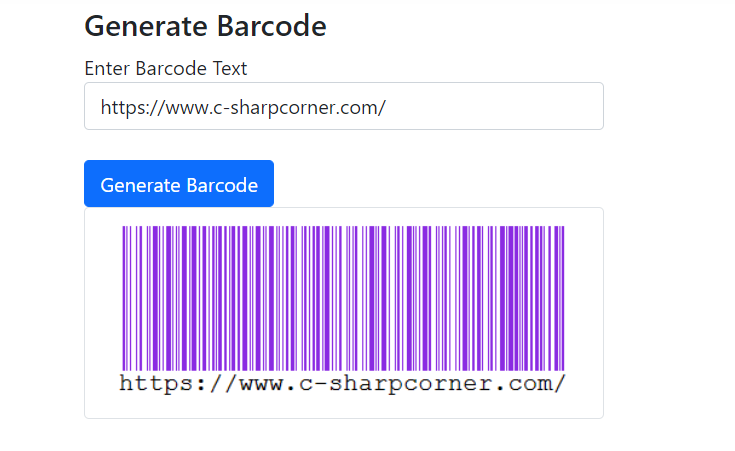
Finally, we can create Barcode using the IronBarcode library. We can save Barcode as jpg, png images, pdf, or HTML files. We can also add a logo to our Barcode file. With its high-performance levels and a vast range of capabilities available to developers working with the Portable Document Format, we prefer IronBarcode.