SignalR is an open library which can be used to integrate in real time in your applications. There are some areas where SignalR can come in handy to make your application integrated, and more responsive to the end user. Your server responds very quickly to the client when a request is made.

Description
SignalR gives two directional communication between server and client. SignalR can be used in faster notification message to the end user and in another sense if any problem exists in the server side then it can be notified by using signalR concept.
SignalR can be used in file uploading , file downloading and how much percentage it has completed, and how much time it will take. So, in these fields we can implement signalR concept for better results.
In more cases signalR is used for Chat application purposes and in the integration of Facebook, Google Plus etc.
Most Used Fields
SignalR can be used to show the result of current actions made in server controls.
For example
In webgrid of Asp.Net MVC when we perform Crud operations the signalR shows the task the record using the Id entered , updated or deleted.
It just shows like system task manager.

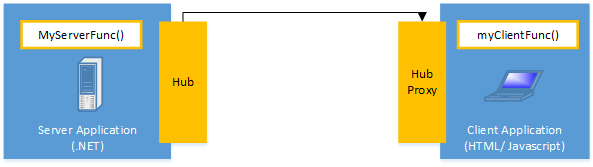
There are two sides -- One is Server Side and another one is Client Side. The Hub in server side invokes the client side function from Hub Proxy.
Here a response is made.
Here The Hub Proxy in Client Side invokes the server side function from Hub.
Here Request Is Made.
signalR can be hosted using Open Web Interface in .NET called OWIN in signalR In another sense it can be self-hosted. It has the ability to send the contents of a server to currently connected clients.
Remote Procedure Calls (RPC)
SignalR provides an API which helps in making the call between the server and the client. The server calls the functions on the client side and the client side calls the server side. That somehow is called "Server-Push".
SignalR Transport Medium
It is integrated with ASP.NET web applications, it can be implemented by other .NET Client side Application like Windows Phone or even Windows 8/10 application.
It has four transport mediums like
- WebSocket.
- Server-Sent Event.
- ForEver Frame.
- Long Polling.
Notes
SignalR initiates with HTTP and then upgrades to a WebSocket if the connection is available. An advantage of WebSocket is it can be used by both client and server applications. SignalR supports the transport based on the browser; i.e. which required transport the browser supports. Server Sent events are also called Event Source, which is not supported by only IE browser.
Create A SignalR Chat Based Application using MVC
Step 1
I have created one Asp.net mvc application using .Net Framework 4.5 and Visual Studio 2013 Edition.
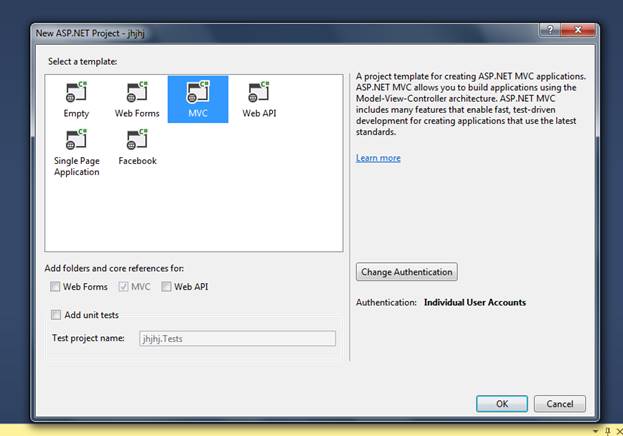
Then The MVC 5 signalR application is created and named “MVCsignalR”
You can Check mvc version Here in Second right side Pic.
Step 2
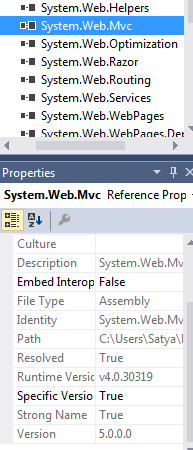
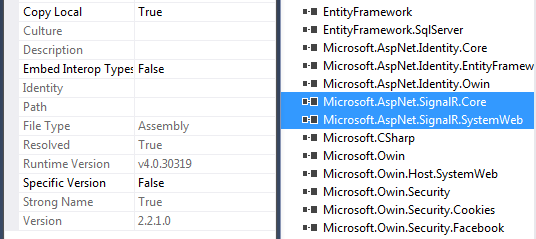
Then add signalR Related DLL reference files from NuGet Package Manager.
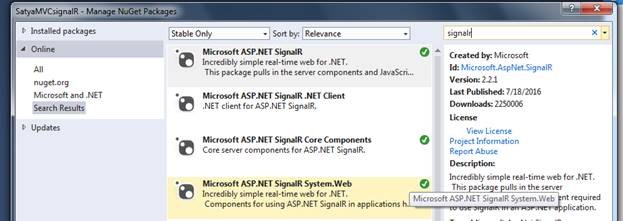
After installation of these three files from NuGet Package manager you can check these signalR DLL files. You can check also Open Web Interface in .NET called “OWIN” related DLL files which are responsible for sending the contents of a server to currently connected clients.
Also you can check signalR related javascript files which already have been added.
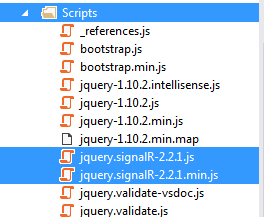
The version of signalR Javascript files are the same as signalR DLL files.
See as mentioned below.
Step 3
Then I created one OWIN Startup class named “Startup.cs”.
Image Ref,
Code ref
using Microsoft.Owin;
using Owin;
[assembly: OwinStartupAttribute(typeof(MVCsignalR.Startup))]
namespace MVCsignalR
{
public partial class Startup
{
public void Configuration(IAppBuilder app)
{
app.MapSignalR();
}
}
}
Code Description
To Enable signalR in the project we have to add StartUp Class.
OWIN Application has a startup class where you mention components for the application pipeline. There are various ways you can connect your startup class with the runtime, depending on the hosting models like (OwinHost, IIS, and IIS-Express).
OwinStartup Attribute is the most general class that is used by the developers to determine the Startup class.
[assembly: OwinStartupAttribute(typeof(MVCsignalR.Startup))]
Any connection or hub wire up and configuration should go here to this line of StartUp classes.
app.MapSignalR();
If you want to know all package related information including version and tergetFramework then go to packages.config file.
Step 4
Then add a controller named “HomeController.cs”.
Code Ref
using System;
using System.Collections.Generic;
using System.Linq;
using System.Web;
using System.Web.Mvc;
namespace MVCsignalR.Controllers
{
public class HomeController : Controller
{
public ActionResult Chat()
{
return View();
}
}
}
Code Description
Here I defined a controller action result method called Chat().
Step 5
In Solution Explorer, right-click the project, select Add > New Folder, and add a new folder named Hubs. Right-click the Hubs folder, click Add > New Item, select SignalR Hub Class (v2) from the center pane, and create a new hub named ChatHub.cs.
This class is used as a SignalR server hub that sends messages to all clients. You will use this class as a SignalR server hub that sends messages to all clients.
Code Ref
using System;
using System.Collections.Generic;
using System.Linq;
using System.Web;
using Microsoft.AspNet.SignalR;
namespace MVCsignalR.Hubs
{
public class ChatHub : Hub
{
public void Send(string name, string message)
{
Clients.All.addNewMessageToPage(name, message);
}
}
}
Code Description
Here I added one namespace to access methods for response to client requests.
using Microsoft.AspNet.SignalR;
ChatHub class is derived from Hub base class.
Hub base class provides methods that communicates with signalR connections that are connected to this Hub base class.
public class ChatHub : Hub
Here I defined a method called Send access two parameter values to take User Name and User Message and Show this User Name and User Message to other users and Vice Versa.
public void Send(string name, string message)
{
Clients.All.addNewMessageToPage(name, message);
}
SignalR chat application demonstrates two basic SignalR development things: Develop a hub as the main coordination object on the server, and using the SignalR jQuery library to send and receive messages.
You create public methods on your hub class and then access those methods by calling them from javascripts in a web page.
Clients call the method to send a new message.
ChatHub.Send
The hub in turn sends the name and message to all clients by calling.
Clients.All.addNewMessageToPage
Call a function on the client to update the clients.
Clients.All.addNewMessageToPage(name, message);
Use this property to access all clients connected to this hub.
Microsoft.AspNet.SignalR.Hub.Clients
This Send method of this ChatHub.cs class from the client with the parameters after the connection is fixed on the client side. Once the server receives that request from the client, it processes and sends that response to the client, using appendNewMessage. This appendNewMessage method is set on the client side to receive the response from server side and display it in the User Interface to the client side.
public void Send(string name, string message)
{
Clients.All.addNewMessageToPage(name, message);
}
Step 6
Then I have added a view named “Chat.cshtml” of Home Controller class.
Code Ref
@{
ViewBag.Title = "Chat";
}
<fieldset>
<legend style="color:orangered">Welcome To peter's signalR MVC Group Chat Club</legend>
</fieldset>
<div class="form-group col-xl-12">
<label style="color: blue; font-style: oblique;font-size: medium" id="label1">Write Your Message Here!</label><br />
<textarea class="form-control" rows="4" cols="40" id="message" placeholder="Share what's in your mind..."></textarea>
<br />
<input type="button" class="btn btn-primary" id="sendmessage" value="Send" />
<br />
<br />
<label style="color: blue;font-style:oblique;font-size:medium" id="label2">Group Chat Conversations History</label>
<div class="container chatArea">
<input type="hidden" id="displayname" />
<ul id="discussion"></ul>
</div>
</div>
@section scripts {
<script src="~/Scripts/jquery.signalR-2.2.1.min.js"></script>
<script src="~/signalr/hubs"></script>
<script>
$(function () {
var chat = $.connection.chatHub;
chat.client.addNewMessageToPage = function (name, message) {
$('#discussion').append('<ul style="list-style-type:square"><li><strong style="color:red;font-style:normal;font-size:medium;text-transform:uppercase">' + htmlEncode(name) + ' ' + '<strong style="color:black;font-style:normal;font-size:medium;text-transform:lowercase">said</strong>'
+ '</strong>: ' + '<strong style="color:blue;font-style:oblique;font-size:medium">' + htmlEncode(message) + '</strong>' + '</li></ul>');
};
$('#displayname').val(prompt('Your Good Name Please:', ''));
$('#message').focus();
$.connection.hub.start().done(function () {
$('#sendmessage').click(function () {
chat.server.send($('#displayname').val(), $('#message').val());
$('#message').val('').focus();
});
});
});
function htmlEncode(value) {
var encodedValue = $('<div />').text(value).html();
return encodedValue;
}
</script>
}
Code Description
@{
ViewBag.Title = "Chat";
}
This above part where I added some title text in the browser title bar with addition of title text of “_Layout.cshtml”.
<fieldset>
<legend style="color:orangered">Welcome To peter's signalR MVC Group Chat Club</legend>
</fieldset>
This above part is where I added some headline text of this chat application in signalR.
<label style="color: blue; font-style: oblique;font-size: medium" id="label1">Write Your Message Here!</label>
This above part is where I added one label control for message box.
<textarea class="form-control" rows="4" cols="40" id="message" placeholder="Share what's in your mind..."></textarea>
This above part is where I added multiline text box to let user enter messages.
<input type="button" class="btn btn-primary" id="sendmessage" value="Send" />
This above part is where I added one button control to send messages to other users after putting some messages in the multiline textbox.
<label style="color: blue;font-style:oblique;font-size:medium" id="label2">Group Chat Conversations History</label>
In the above part I added one label control for chat history area that means whatever messages are received and sent between receiver and sender.
<div class="container chatArea">
<input type="hidden" id="displayname" />
<ul id="discussion"></ul>
</div>
This above part is where I added one chat area box that will show whatever messages are received and sent between receiver and sender.
Then two ids, one “displayname” and “discussion,” will show the receiver and sender names along with their conversations in the current forum session in the chat history area box.
<script src="~/Scripts/jquery.signalR-2.2.1.min.js"></script>
<script src="~/signalr/hubs"></script>
This above part is where I added script file references to access some signalR based scripting functionalities and show to the end user.
<script src="~/Scripts/jquery.signalR-2.2.1.min.js"></script>
Script references. The jQuery library is required and is referenced by default in _Layout.cshtml Reference the SignalR library.
<script src="~/signalr/hubs"></script>
Reference the autogenerated SignalR hub script.
<script>
$(function () {
var chat = $.connection.chatHub;
chat.client.addNewMessageToPage = function (name, message) {
$('#discussion').append('<ul style="list-style-type:square"><li><strong style="color:red;font-style:normal;font-size:medium;text-transform:uppercase">' + htmlEncode(name) + ' ' + '<strong style="color:black;font-style:normal;font-size:medium;text-transform:lowercase">said</strong>'
+ '</strong>: ' + '<strong style="color:blue;font-style:oblique;font-size:medium">' + htmlEncode(message) + '</strong>' + '</li></ul>');
};
$('#displayname').val(prompt('Your Good Name Please:', ''));
$('#message').focus();
$.connection.hub.start().done(function () {
$('#sendmessage').click(function () {
chat.server.send($('#displayname').val(), $('#message').val());
$('#message').val('').focus();
});
});
});
function htmlEncode(value) {
var encodedValue = $('<div />').text(value).html();
return encodedValue;
}
</script>
This is the SignalR script to update the chat page and send messages.
The Chat.cshtml shows how to use the SignalR jQuery library to contact with a SignalR hub. The codes are creating a reference to the Self-generated proxy for the hub, declaring a function that the server can call to push content to clients, and starting a connection to send messages to the hubs.
It is a reference to a hub proxy.
var chat = $.connection.chatHub;
It references the auto-generated proxy for the hub.
Here “chatHub” is the Hub class to make connection related functionalities.
This shows howt to create a callback function in the script. The hub class on the server calls the function to push content updates to each client. The optional call to the htmlEncode function shows a path to HTML to encode the message content before displaying it in the page. As a result way it will prevent script injection.
chat.client.addNewMessageToPage = function (name, message)
It creates a function that the hub can call back to display messages.Here the addNewMessageToPage method to update clients as defined in ChatHub class.
$('#discussion').append('<ul style="list-style-type:square"><li><strong style="color:red;font-style:normal;font-size:medium;text-transform:uppercase">' + htmlEncode(name) + ' ' + '<strong style="color:black;font-style:normal;font-size:medium;text-transform:lowercase">said</strong>' + '</strong>: ' + '<strong style="color:blue;font-style:oblique;font-size:medium">' + htmlEncode(message) + '</strong>' + '</li></ul>');
Add the message to the chat area box.
This above mentioned code will show the name and messages of the users in chat area textbox by taking two parameter values defined in addNewMessageToPage method.
$('#displayname').val(prompt('Your Good Name Please:', ''));
Get the user name and store it to prepend to messages.
This part will ask your to mention your user name to process your valid message conversation part.
$('#message').focus();
It sets initial focus to message input box.
$.connection.hub.start().done(function () {
Here I added code to Start the connection.
$('#sendmessage').click(function () {
The “sendmessage” is the id of Button Send event.
chat.server.send($('#displayname').val(), $('#message').val());
Call the Send method on the hub.
$('#message').val('').focus();
Clear text box and reset focus for next comment.
function htmlEncode(value) {
var encodedValue = $('<div />').text(value).html();
return encodedValue;
}
This optional function html-encodes messages for displaying in the page.
This code shows a set to open a connection with the hubs. This code starts the connection and then transfers it to a function to handle the click event on the Send button in the Chat page.
$('#sendmessage').click(function () {
chat.server.send($('#displayname').val(), $('#message').val());
$('#message').val('').focus();
});
Step 7
Modify some code in “_Layout.cshtml” in Views > Shared folder
Code Ref
<!DOCTYPE html>
<html>
<head>
<meta charset="utf-8" />
<meta name="viewport" content="width=device-width, initial-scale=1.0">
<title>@ViewBag.Title - peter'S signalR Group Chat Application</title>
@Styles.Render("~/Content/css")
@Scripts.Render("~/bundles/modernizr")
</head>
<body>
<div class="container body-content">
@RenderBody()
<hr />
<footer>
<p>© @DateTime.Now.Year - peter'S signalR Group Chat Application</p>
</footer>
</div>
@Scripts.Render("~/bundles/jquery")
@Scripts.Render("~/bundles/bootstrap")
@RenderSection("scripts", required: false)
</body>
</html>
Code Description
<title>@ViewBag.Title - peter'S signalR Group Chat Application</title>
This title will be shown in “Chat.Cshtml” file.
@Styles.Render("~/Content/css")
Link to the css file to make styles able to View cshtml file.
@RenderBody()
In Layout Pages it renders the portion of content page that is not within the named section.
<footer>
<p>© @DateTime.Now.Year - peter'S signalR Group Chat Application</p>
</footer>
This part will be shown in footer part of View UI.
@Scripts.Render("~/bundles/jquery")
@Scripts.Render("~/bundles/bootstrap")
This part will show you the Jquery and Bootstrap versions used in this app.
@RenderSection("scripts", required: false)
In layout pages , renders the content of a named section and specifies whether the section is required.
This “_Layout.cshtml” acts as a MasterPage in “Chat.cshtml” file. This file should be put in “_ViewStart.cshtml” file.
Code Ref
@{
Layout = "~/Views/Shared/_Layout.cshtml";
}
Code Description
Here “_Layout.cshtml” file is used to add style format to UI of View Cshtml file.
Step 8
Then makes start page In “RouteConfig.cs” file.
Code ref
using System;
using System.Collections.Generic;
using System.Linq;
using System.Web;
using System.Web.Mvc;
using System.Web.Routing;
namespace SatyaMVCsignalR
{
public class RouteConfig
{
public static void RegisterRoutes(RouteCollection routes)
{
routes.IgnoreRoute("{resource}.axd/{*pathInfo}");
routes.MapRoute(
name: "Default",
url: "{controller}/{action}/{id}",
defaults: new { controller = "Home", action = "Chat", id = UrlParameter.Optional }
);
}
}
}
Code Description
defaults: new { controller = "Home", action = "Chat", id=UrlParameter.Optional }
Here Home the Controller Name and Chat the Controller Action Method Name.
Step 9
I have put my own C-Sharp Corner Profile icon file in this application as “favicon.ico”
Step 10
In “packages.config” you can check all versions of package files used in that application.
OUTPUT
The url is - http://localhost:56772/Home/Chat
Here Home the Controller Name and Chat the Controller Action Method Name.
When it loads the first time it asks for your user name.
I put my user name “peter” and clicked ok.
For “peter” I used Mozilla Firefox Browser
I put the same URL in Chrome browser and put another, New Names, to make chat conversations between “peter” names.
I opened three new tabs in Chrome browser and put the same url and put three different names, Like : KULU , KULU1 , KULU2
By using peter I sent some message like below.
In the Chat History area it is showing what the peter user sends.
From peter : Good Morning bro….
Then using KULU , KULU1 , KULU2 user names I will send messages see what happens.
From KULU : Hey peter
From KULU1 : Hey peter
From KULU2 : Hey peter
It will show peter user message as well as KULU , KULU1 , KULU2 user messages in Chrome browser.That way every user can see every one else's sent messages in the chat history area
In Mozilla Firefox browser I will check the KULU , KULU1 , KULU2 user messages in peter user’s chat history area.
Now PETER user can see KULU , KULU1 , KULU2 user’s messages In GROUP CHAT.
Here I will show you Browser title bar text as well as Profile Icon file.