We may programmatically generate HTML Controls by using the HTML Helper class. View renders HTML text using HTML Helpers. The method HTML Helpers (Mostly) yields a string. Using HTML Helper classes is not required when creating an ASP.NET MVC application. Although we don't need them to create an ASP.NET MVC application, HTML Helpers facilitate the quick building of a view. Because HTML Helpers don't use ViewState or have an event model, they are lighter than ASP.NET Web Form controls.

HTML Helpers are categorized into three types:
- Inline HTML Helpers
- Built-in HTML Helpers
- Custom HTML Helpers
In this Article, we will cover Built-In HTML Helpers. We will see Inline and Custom HTML Helpers in the upcoming article of this series.
Built-in HTML Helpers are further divided into three categories:
- Standard HTML Helpers
- Strongly Typed HTML Helpers
- Templated HTML Helpers
Standard HTML Helpers
Standard HTML Helpers use to render the most common type of HTML controls like TextBox, DropDown, Radio buttons, Checkbox etc. Extension methods of HTML Helper classes have several overloaded versions. We can use any one according to our requirement. Let’s see some of the Standard HTML Helpers:
Form: For creating Form element, we can use BeginForm() and EndForm() extension method.
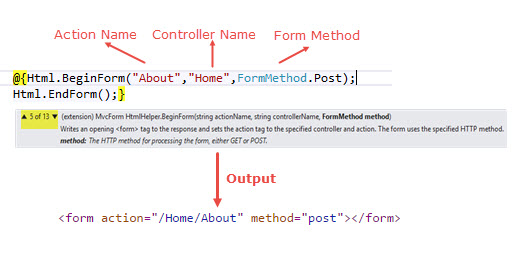
BeginForm helper implements the IDisposable interface, which enables us to use using keyword.

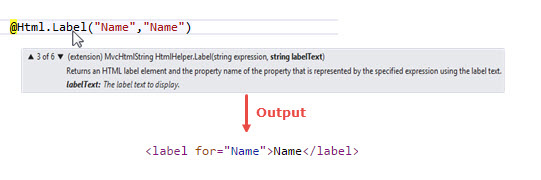
Label: Label method of HTML helper can use for generating label element. Label extension method have 6 overloaded versions.
TextBox
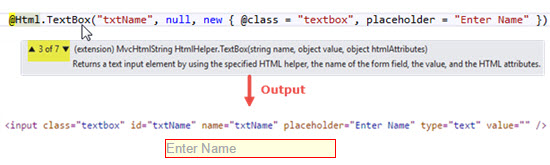
TextBox Helper method renders a textbox in View that has specified name. We can also add attributes like class, placeholder etc. with the help of overloaded method in which we have to pass objects of HTML Attributes.
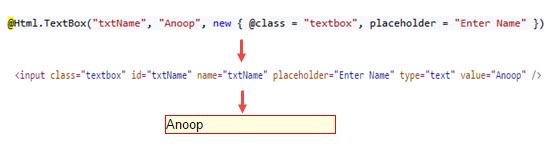
We can also set the value In Textbox by passing a value in TextBox extension method.
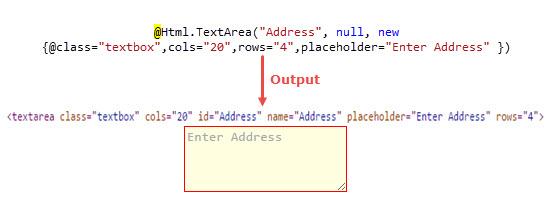
TextArea: TextArea Method renders <textarea> element on view.
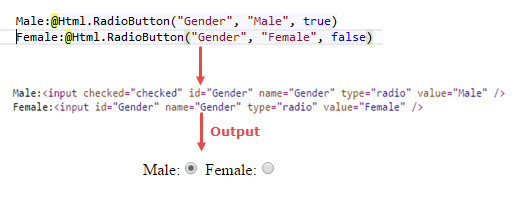
RadioButton
RadioButton can be rendered in the view using the RadioButton Helper method. In the simplest form, RadioButton Helper method takes three parameters i.e. name of the control, value and Boolean value for selecting the value initially.
CheckBox: CheckBox helper method renders a checkbox and has the name and id that you specify.
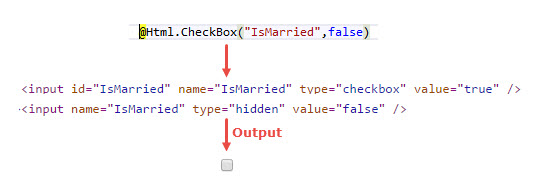
In the above example, Did you noticed an Additional input element? In case if you unchecked the checkbox or checkbox value not selected then you will get the value from the hidden field.
DropDownlist: DropDownList helper renders a drop down list.
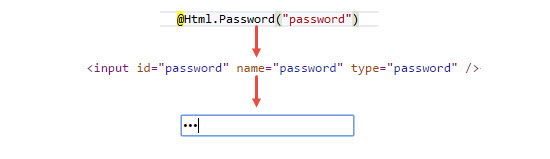
Password: Password Helper method renders input type as password.
Hidden: Hidden Helper method renders a Hidden field.

Strongly Typed Helper method:
Just like Standard Helper, we have several strongly typed methods.
Html.TextBoxFor(), Html.TextAreaFor(), Html.DropDownListFor(), Html.CheckboxFor(), Html.RadioButtonFor(), Html.ListBoxFor(), Html.PasswordFor(), Html.HiddenFor(), Html.LabelFor() etc.
Strongly Typed Helper requires lambda expressions. For using Strongly Typed Helper method, Firstly We have to make Strongly Typed View.
Let’s create a simple example:
Create an empty MVC Application and Add a Student class in model.
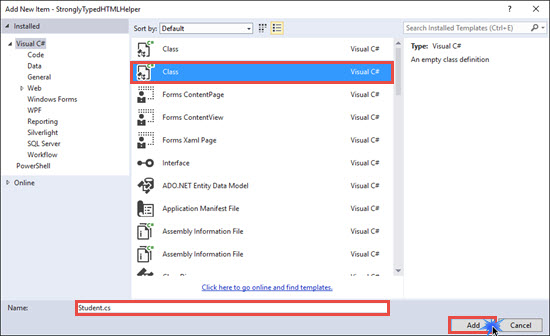
public class Student
{
public int RollNo { get; set; }
public string Name { get; set; }
public string Gender { get; set; }
public string City { get; set; }
[DataType(DataType.MultilineText)]
public string Address { get; set; }
}
In Student class, I have added DataType attribute on Address property. I have added this attribute for showing a Templated HTML Helper example along with strongly Typed Helper method example. DataTypeAttribute class is present in System.ComponentModel.DataAnnotations namespace.
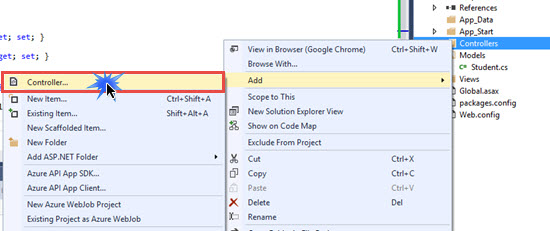
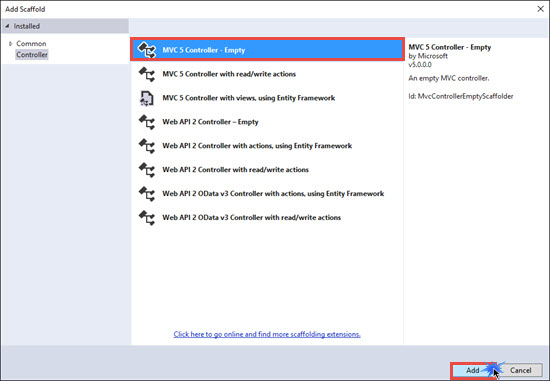
Now Add an empty controller and Name it as HomeController.
[HttpGet]
public ActionResult Index()
{
return View();
}
[HttpPost]
public ActionResult Index(Student stud)
{
return View();
}
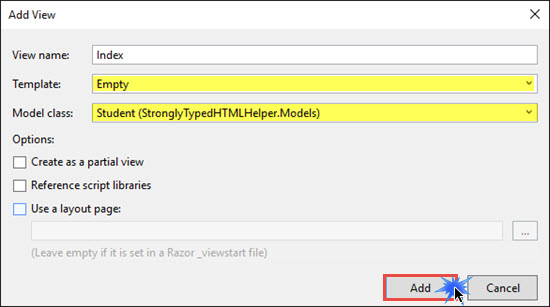
Right click on Index Action method for get request and click on Add View. Select Student Model class and Select empty template. Click on Add.
Go to view and Add the following code. I am not going to use any scaffolding template for this example.
@model StronglyTypedHTMLHelper.Models.Student
@{
Layout = null;
}
<!DOCTYPE html>
<html>
<head>
<meta name="viewport" content="width=device-width" />
<title>Index</title>
</head>
<body>
<div>
@using(@Html.BeginForm("Index","Home",FormMethod.Post)){
<table>
<tr><td>@Html.LabelFor(m=>Model.RollNo)</td><td>@Html.TextBoxFor(m=>Model.RollNo)</td></tr>
<tr><td>@Html.LabelFor(m => Model.Name)</td><td>@Html.TextBoxFor(m => Model.Name)</td></tr>
<tr><td>@Html.LabelFor(m => Model.Gender)</td><td>Male:@Html.RadioButtonFor(m => m.Gender, "Male", new { @checked="checked"})Female:@Html.RadioButtonFor(m => m.Gender, "Female", true)</td></tr>
<tr><td>@Html.LabelFor(m => Model.City)</td><td>@Html.TextBoxFor(m => Model.City)</td></tr>
<tr><td>@Html.LabelFor(m => Model.Address)</td><td>@Html.EditorFor(m => Model.Address)</td></tr>
<tr><td></td><td><input type="submit" value="Submit"/></td></tr>
</table>
}
</div>
</body>
</html>
In above code, we have bounded helpers with the model property using lambda expression. EditorFor is Tempate HTML Helper which will generate HTML element based upon the datatype of Address property of Student class.
Preview:
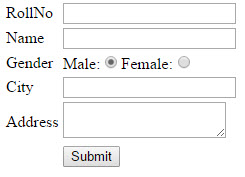
Fill the form and click on submit. Request comes to Index Action method with [HTTPPost] attribute, from here we can get all posted values from the form and we can use that student object for any kind of Data Operations.
Template Helper Method
These methods are very flexible and generate the HTML element based on the properties of the model class. We have already seen an EditorFor Helper method in the previous example, which generates TextArea element because we have declared MultiLine Datatype on Address property. Display, DisplayFor,Editor and EditorFor are the examples of Template Helper method.