European ASP.NET MVC Hosting

BLOG about Latest ASP.NET MVC Hosting and Its Technology - Dedicated to European Windows Hosting Customer

ASP.NET MVC 6 Hosting - HostForLIFEASP.NET :: JsonResult Type in MVC

clock June 8, 2021 07:20 by author Peter

The JSON format is an open standard format. The format of data looks very easy to understand and the data objects consist of attribute-value pairs.

 
ContentEncoding: It helps to indicate the content encoding type, the default encoding for JSON is UTF-8.
ContentType: It helps to indicate the content type. The default content type for JSON is application/json; charset=utf-8.
Note: ContentType and ContentEncoding are not necessary to mention when sending the data in JSON format as the HTTP headers are having a responsibility to tell the recipient what kind of content they're dealing with.
Data: This indicates what the content data is, that means what you will send in JSON format.
JsonRequestBehavior: This property has two options. Those are AllowGet and DenyGet. The default option is DenyGet. When you send data in JSON format, using Get Request, it's necessary to specify the property as AllowGet otherwise it shows the error as “The request would be blocked since the JSON data is considered as sensitive data information”.
MaxJsonLength: This helps to get or set the maximum JSON content length that you will send. The default value for this is 2097152 characters, that is equal to 4 MB of Unicode string data. You can even increase the size based if needed, for that you will get an idea later in this article.
RecursionLimit: Indicates the constraining number of object levels to process. The default value is 100. It means you can serialize the objects that are nested to a depth of 100 objects referencing each other. In a general scenario, the default limit 100 is obviously sufficient when you deal with a JsonResult so there is no need to increase it even though you have the option to increase the limit if required.

Sample Project with Various Scenarios by using JsonResult
Create a new project with the name JsonResultDemo and choose the template as MVC as shown in the following screenshots.

Now, click on the OK button then the displayed screen is as in the following.

As in the preceding template, you need to select the “Add Unit Tests” option as well. So It helps to create a Unit Test project and then again click on the OK button then the project will be created and the startup application page displayed like the following.

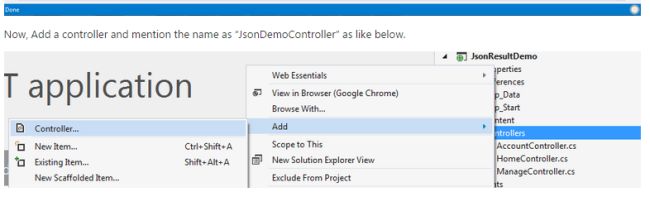
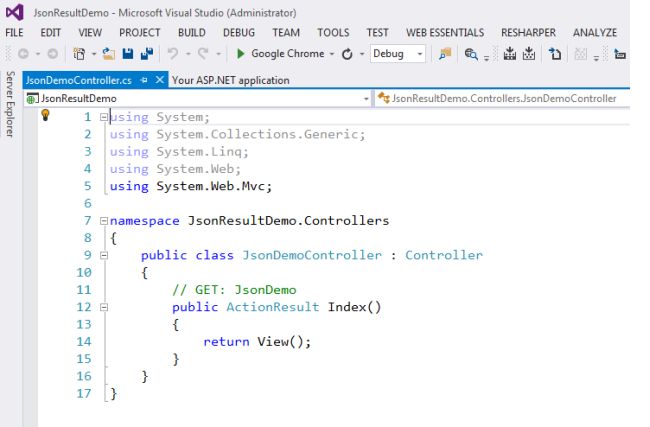
Now, add a controller and provide the name as “JsonDemoController” as in the following.

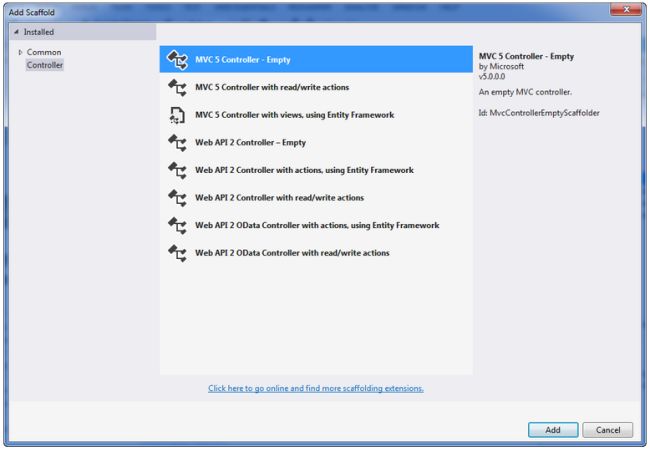
Click on the Controller and then it will open the popup window as in the following.

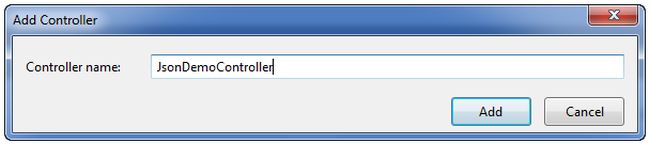
Now, click on the “Add” button and then it opens a popup to enter the name. So enter the name as “JsonDemoController” as shown in the screenshot.

After adding the controller to the project the controller page looks like the following.

Until now, you are done with the creation of the sample project template with the addition of one controller named “JsonDemoController”.
 
Scenario 1: Send JSON Content welcome note based on user type
 
In this scenario, you will learn how to send a simple welcome note message in JSON format from the controller. Now, replace the existing code with the following code in the JsonDemoController.cs file.
    using System;  
    using System.Collections.Generic;  
    using System.Text;  
    using System.Web.Mvc;  
    using System.Web.Script.Serialization;  
    using JsonResultDemo.Models;  
      
    namespace JsonResultDemo.Controllers  
    {  
        public class JsonDemoController : Controller  
        {  
            #region ActionControllers  
      
            /// <summary>  
            /// Welcome Note Message  
            /// </summary>  
            /// <returns>In a Json Format</returns>  
            public JsonResult WelcomeNote()  
            {  
                bool isAdmin = false;  
                //TODO: Check the user if it is admin or normal user, (true-Admin, false- Normal user)  
                string output = isAdmin ? "Welcome to the Admin User" : "Welcome to the User";  
      
                return Json(output, JsonRequestBehavior.AllowGet);  
            }  
         }  
    }


Then, build the application (F6) and then hit the F5 to run an application and then navigate to the following URL http://localhost:49568/JsonDemo/WelcomeNote (It might be a chance to get a different Port Id at your end).

Then the displayed screen looks like the following.

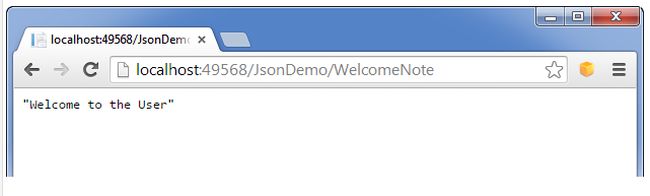
In this scenario, you now have an idea of how to send a simple string in JSON format.
 
Scenario 2: Get the list of users in JSON Format
In this scenario, you will send a list of users in JSON format.
 
Step 1: Add a class file “UserModel.cs” like the following.

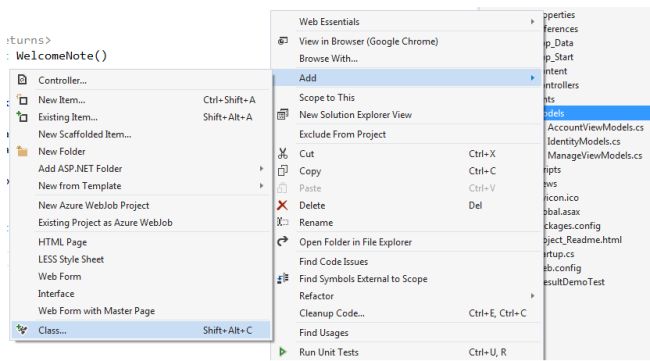
Click on “Class” and then the displayed link is as the following.

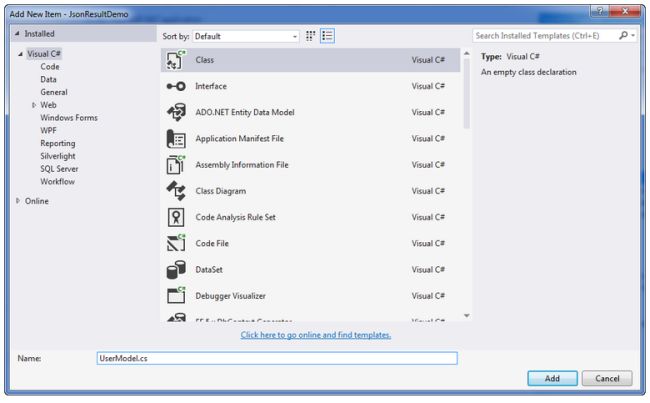
Enter the name as “UserModel.cs” and then click on the Add button.
 
Step 2: Update the code in UserMode.cs with the following code.
    using System;  
    using System.Collections.Generic;  
    using System.Linq;  
    using System.Web;  
      
    namespace JsonResultDemo.Models  
    {  
        public class UserModel  
        {  
            public int UserId { get; set; }  
            public string UserName { get; set; }  
            public string Company { get; set; }  
        }  
    }

Step 3: Add one method named GetUsers in the JsonDemoController.cs file that will return the list of sample users.
            /// <summary>  
            /// Get the Users  
            /// </summary>  
            /// <returns></returns>  
            private List<UserModel> GetUsers()  
            {  
                var usersList = new List<UserModel>  
                {  
                    new UserModel  
                    {  
                        UserId = 1,  
                        UserName = "Ram",  
                        Company = "Mindfire Solutions"  
                    },  
                    new UserModel  
                    {  
                        UserId = 1,  
                        UserName = "chand",  
                        Company = "Mindfire Solutions"  
                    },  
                    new UserModel  
                    {  
                        UserId = 1,  
                        UserName = "Abc",  
                        Company = "Abc Solutions"  
                    }  
                };  
      
                return usersList;  
            }

Step 4: Create one Action Controller method named GetUsersData with the following code in the JsonDemoController.cs file.
    /// <summary>  
            /// Get tthe Users data in Json Format  
            /// </summary>  
            /// <returns></returns>  
            public JsonResult GetUsersData()  
            {  
                var users = GetUsers();  
                return Json(users, JsonRequestBehavior.AllowGet);  
            }


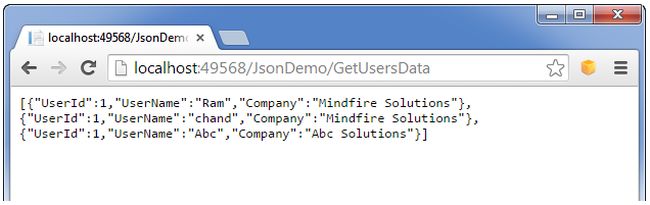
Step 5: Run the application with this URL http://localhost:49568/JsonDemo/GetUsersData then the output looks like the following.
 

Scenario 3: Create JSON data at the client side and send content to the controller
 
In this scenario, you will create JSON data at the client side and then that data will be sent to the Controller action. The controller action request type is HttpPost.
 
Step 1: Create one Action controller method named Sample like the following in the JsonDemoController.cs file.

    /// <summary>  
    /// Sample View  
    /// </summary>  
    /// <returns></returns>  
    public ActionResult Sample()  
    {  
        return View();  
    }


Step 2: Create a View file named “Sample.cshtml” by right-clicking on View() in the Sample action controller method then click on “Add View” in the Sample action like the following.

By clicking on Add View it opens a popup and deselects the "Use a layout page" option. It then should look as in the following.

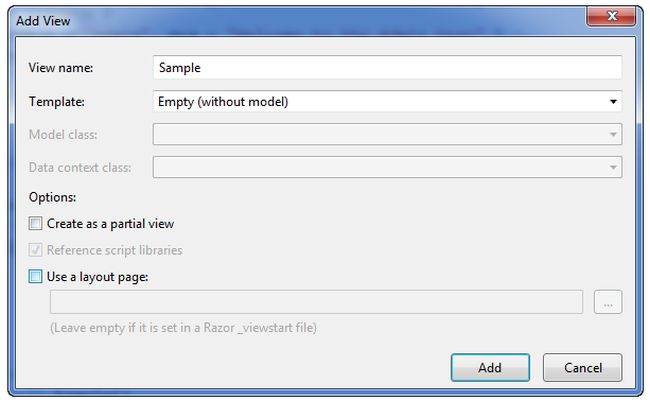
Now, click on the OK button then the sample.cshtml file will be created.
 
Step 3: Replace it with the following cshtml code in the sample.cshtml file.

    @{  
        Layout = null;  
    }  
      
    <!DOCTYPE html>  
      
    <html>  
        <head>  
            <meta name="viewport" content="width=device-width" />  
            <title>Create Sample JSON Data and send it to controller</title>  
        </head>  
        <body>  
            <div>  
                <label>Create Sample User JSON Data and send it to controller</label><br/><br />  
                <input type="button" id="btnUpdateUserDetail" value="Update User Detail" onclick="UpdateUserDetail();"/>  
            </div>  
        </body>  
    </html>  
    <script src="~/Scripts/jquery-1.10.2.min.js"></script>  
    <script lang="en" type="text/javascript">  
        function UpdateUserDetail() {  
            var usersJson = GetSampleUsersList();  
            var getReportColumnsParams = {  
                "usersJson": usersJson  
            };  
            $.ajax({  
                type: "POST",  
                traditional: true,  
                async: false,  
                cache: false,  
                url: '/JsonDemo/UpdateUsersDetail',  
                context: document.body,  
                data: getReportColumnsParams,  
                success: function (result) {  
                    alert(result);  
                },  
                error: function (xhr) {  
                    //debugger;  
                    console.log(xhr.responseText);  
                    alert("Error has occurred..");  
                }  
            });  
        }  
        function GetSampleUsersList() {  
            var userDetails = {};  
            var usersList = [];  
            for (var i = 1; i <= 3; i++) {  
                userDetails["UserId"] = i;  
                userDetails["UserName"] = "User- " + i;  
                userDetails["Company"] = "Company- " + i;  
                usersList.push(userDetails);  
            }  
            return JSON.stringify(usersList);  
        }  
    </script>


The following is a brief description of the Sample.cshtml file:
    The HTML body contains a label, about, to describe the functionality and one input button with an onclick of the UpdateUserDetail() function.

    The JavaScript part contains the jQuery reference and it contains two functions.

    GetSampleUsersList() will return the sample users in a stringified JSON format.

    UpdateUserDetail() sends the ajax request of post type for JsonDemoController with UpdateUserDetail action.

Step 4: A Create Action method named UpdateUsersDetail in the JsonDemoController as in the following and put a breakpoint in this method on the first line of code to help to trace the details.
    /// <summary>  
    /// Update the user details  
    /// </summary>  
    /// <param name="usersJson">users list in JSON Format</param>  
    /// <returns></returns>  
    [HttpPost]  
    public JsonResult UpdateUsersDetail(string usersJson)  
    {  
        var js = new JavaScriptSerializer();  
        UserModel[] user = js.Deserialize<UserModel[]>(usersJson);  
      
        //TODO: user now contains the details, you can do required operations  
        return Json("User Details are updated");  
    }


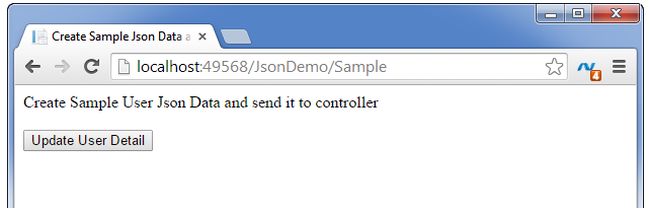
Step 5: Build and run the application (hit F5) with the URL (http://localhost:49568/JsonDemo/Sample) then the resultant screen looks like the following.

Step 6: Now, click on the “Update User Detail” button as it appears in the aforesaid screenshot. Then the resultant screen looks like the following.

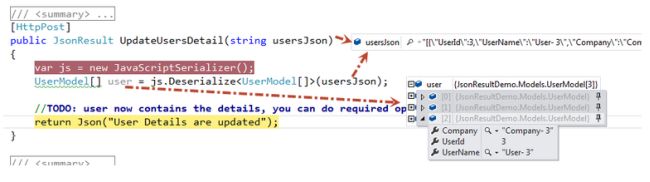
Step 7: Just review the preceding image, you can identify that you are able to send the JSON data to the controller action from the client side and as well as you have deserialized the JSON data and assigned that data to the UserModel entity.
 
Scenario 4: How to handle a huge amount of JSON Data
 
In this scenario, you will get an idea of how to send a huge amount of JSON Data. Actually, in certain scenarios, you must send a huge amount of data from a controller to a view. In that case, the following example will be helpful to you.
 
Step 1: Create one method named GetUsersHugeData() as in the following. It just helps to generate sample user data.  
            /// <summary>  
            /// Get the huge list of users  
            /// </summary>  
            /// <returns></returns>  
            private List<UserModel> GetUsersHugeData()  
            {  
                var usersList = new List<UserModel>();  
                UserModel user;  
                for (int i = 1; i < 51000; i++)  
                {  
                    user = new UserModel  
                    {  
                        UserId = i,  
                        UserName = "User-"+i,  
                        Company = "Company-"+i  
                    };  
                    usersList.Add(user);  
                }  
      
                return usersList;  
            }

Step 2: Create an Action method named GetUsersHugeList() like the following in the JsonDemoController.cs file.
    /// <summary>  
    /// Get the huge list of Users  
    /// </summary>  
    /// <returns></returns>  
    public JsonResult GetUsersHugeList()  
    {  
        var users = GetUsersHugeData();  
        return Json(users, JsonRequestBehavior.AllowGet);  
    }


Step 3: Now, build and run (hit F5) the application with the URL (http://localhost:49568/JsonDemo/GetUsersHugeList) then the error screen appears like the following.

Step 4: To fix the preceding error add the following code in the JsonDemoController file. This methods helps to update the MaxJsonLength property value to Int32.MaxValue.
     /// <summary>  
    /// Override the JSON Result with Max integer JSON lenght  
    /// </summary>  
    /// <param name="data">Data</param>  
    /// <param name="contentType">Content Type</param>  
    /// <param name="contentEncoding">Content Encoding</param>  
    /// <param name="behavior">Behavior</param>  
    /// <returns>As JsonResult</returns>  
    protected override JsonResult Json(object data, string contentType,  
        Encoding contentEncoding, JsonRequestBehavior behavior)  
    {  
        return new JsonResult()  
        {  
            Data = data,  
            ContentType = contentType,  
            ContentEncoding = contentEncoding,  
            JsonRequestBehavior = behavior,  
            MaxJsonLength = Int32.MaxValue  
        };  
    }


In the same way, you can increase the RecursionLimit property value. Also if you require JsonData with a depth (nested levels) greater than 100.
 
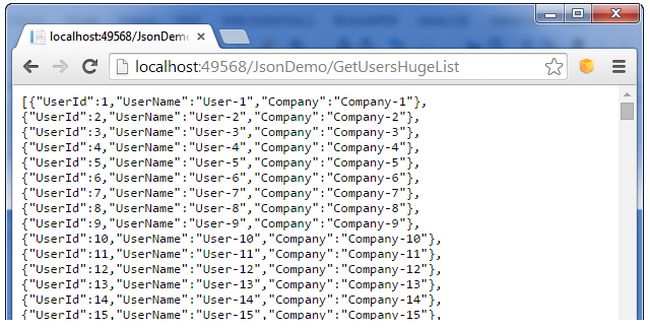
Step 5: Now, build and run (hit F5) the application with the URL (http://localhost:49568/JsonDemo/GetUsersHugeList) and then the huge data result appears instead of an error.

I have provided the formatted complete code for the JsonDemoController.cs file for what you have done until now in the aforesaid scenarios.
    using System;  
    using System.Collections.Generic;  
    using System.Text;  
    using System.Web.Mvc;  
    using System.Web.Script.Serialization;  
    using JsonResultDemo.Models;  
      
    namespace JsonResultDemo.Controllers  
    {  
        public class JsonDemoController : Controller  
        {  
            #region ActionControllers  
      
            /// <summary>  
            /// Welcome Note Message  
            /// </summary>  
            /// <returns>In a JSON Format</returns>  
            public JsonResult WelcomeNote()  
            {  
                bool isAdmin = false;  
                //TODO: Check the user if it is admin or normal user, (true-Admin, false- Normal user)  
                string output = isAdmin ? "Welcome to the Admin User" : "Welcome to the User";  
      
                return Json(output, JsonRequestBehavior.AllowGet);  
            }  
      
            /// <summary>  
            /// Get tthe Users data in JSON Format  
            /// </summary>  
            /// <returns></returns>  
            public JsonResult GetUsersData()  
            {  
                var users = GetUsers();  
                return Json(users, JsonRequestBehavior.AllowGet);  
            }  
      
            /// <summary>  
            /// Sample View  
            /// </summary>  
            /// <returns></returns>  
            public ActionResult Sample()  
            {  
                return View();  
            }  
      
            /// <summary>  
            /// Update the user details  
            /// </summary>  
            /// <param name="usersJson">users list in JSON Format</param>  
            /// <returns></returns>  
            [HttpPost]  
            public JsonResult UpdateUsersDetail(string usersJson)  
            {  
                var js = new JavaScriptSerializer();  
                UserModel[] user = js.Deserialize<UserModel[]>(usersJson);  
      
                //TODO: user now contains the details, you can do required operations  
                return Json("User Details are updated");  
            }  
              
            /// <summary>  
            /// Get the huge list of Users  
            /// </summary>  
            /// <returns></returns>  
            public JsonResult GetUsersHugeList()  
            {  
                var users = GetUsersHugeData();  
                return Json(users, JsonRequestBehavior.AllowGet);  
            }  
     
            #endregion  
     
     
            #region Methods  
      
            /// <summary>  
            /// Get the Users  
            /// </summary>  
            /// <returns></returns>  
            private List<UserModel> GetUsers()  
            {  
                var usersList = new List<UserModel>  
                {  
                    new UserModel  
                    {  
                        UserId = 1,  
                        UserName = "Ram",  
                        Company = "Mindfire Solutions"  
                    },  
                    new UserModel  
                    {  
                        UserId = 1,  
                        UserName = "chand",  
                        Company = "Mindfire Solutions"  
                    },  
                    new UserModel  
                    {  
                        UserId = 1,  
                        UserName = "Abc",  
                        Company = "Abc Solutions"  
                    }  
                };  
      
                return usersList;  
            }  
      
            /// <summary>  
            /// Get the huge list of users  
            /// </summary>  
            /// <returns></returns>  
            private List<UserModel> GetUsersHugeData()  
            {  
                var usersList = new List<UserModel>();  
                UserModel user;  
                for (int i = 1; i < 51000; i++)  
                {  
                    user = new UserModel  
                    {  
                        UserId = i,  
                        UserName = "User-"+i,  
                        Company = "Company-"+i  
                    };  
                    usersList.Add(user);  
                }  
      
                return usersList;  
            }  
      
            /// <summary>  
            /// Override the Json Result with Max integer JSON lenght  
            /// </summary>  
            /// <param name="data">Data</param>  
            /// <param name="contentType">Content Type</param>  
            /// <param name="contentEncoding">Content Encoding</param>  
            /// <param name="behavior">Behavior</param>  
            /// <returns>As JsonResult</returns>  
            protected override JsonResult Json(object data, string contentType,  
                Encoding contentEncoding, JsonRequestBehavior behavior)  
            {  
                return new JsonResult()  
                {  
                    Data = data,  
                    ContentType = contentType,  
                    ContentEncoding = contentEncoding,  
                    JsonRequestBehavior = behavior,  
                    MaxJsonLength = Int32.MaxValue  
                };  
            }  
     
            #endregion  
        }  
    }


You now have an idea of how to use a JsonResult type in MVC application with various scenarios. Now, it's time to test the controller action methods using the JsonDemoController.Test project.

Unit Testing the JsonResult in MVC
The main feature of MVC applications is it supports the Test Data Driven (TDD) approach. Since the Controller file is just a kind of class file, it's easy to implement the Test methods in the Test Project. Now you will learn how to test the JsonResult methods in the test project.
 
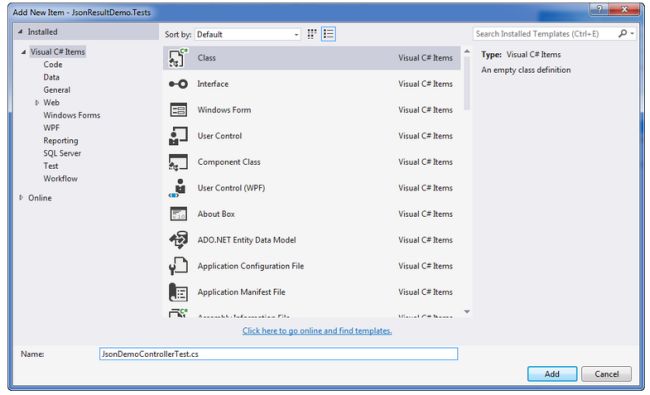
Step 1: Add a class file named “JsonDemoControllerTest.cs” to the JsonResultDemo.Tests projects like the following.


Click on “Class” to open a popup like the following and then update the name as “JsonDemoControllerTest.cs”.

Step 2: After clicking on the “Ok” button then the screen result looks like the following.

Step 3: Now, replace the existing code in the file JsonDeomControllerTest.cs with the following code.
    using System;  
    using System.Web.Mvc;  
    using Microsoft.VisualStudio.TestTools.UnitTesting;  
    using JsonResultDemo.Controllers;  
      
    namespace JsonResultDemo.Tests.Controllers  
    {  
        [TestClass]  
        public class JsonDemoControllerTest  
        {  
            [TestMethod]  
            public void WelcomeNote()  
            {  
                JsonDemoController controller = new JsonDemoController();  
      
                JsonResult result = controller.WelcomeNote();  
                string msg = Convert.ToString(result.Data);  
                // Assert  
                Assert.AreEqual("Welcome to the User", msg);  
            }  
        }  
    }


Brief Note about TestMethod of WelcomeNote()
    Create an object for JsonDemoController.

    Save the result of JsonDemoController controller method “WelcomeNote” method result in the “result” parameter of the type JsonResult.

    The string “msg” is assigned with the value from the JSON Result (result.Data).

    In this step, you are checking the expected output with the actual output using the Assert method. In a similar way, the Assert Method provides other options like AreNotEqual, AreSame, IsNotNull and so on.

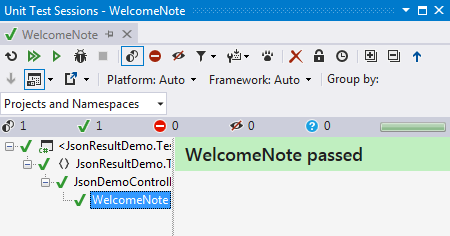
Step 4: Right-click on the WelcomeNote method and click on “Run Unit Tests” then the screen result looks like the following.

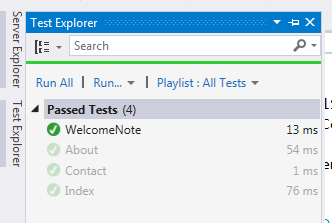
Step 5: You can also do the “Run Tests” by the clicking of (Ctrl +R, T). Then you can view the results in Test Explorer like the following.

In a similar way, you can create more test methods and it will be helpful to check the functionality in various cases since it provides correct results or not. I hope this article gives you an idea of JsonResult, JsonResult Properties, the usage of JsonResult with various scenarios and how can you test the JsonResult using the Test Project.


ASP.NET MVC 6 Hosting - HostForLIFEASP.NET :: Display Bootstrap Alerts Dynamically From ASP.NET Core 3.1 MVC

clock May 24, 2021 07:35 by author Peter

This article introduces how to display bootstrap alerts dynamically from an ASP.NET Core 3.1 MVC Application. Bootstrap provides us with an easy way to create predefined alerts. Bootstrap alerts are available for any length of text, as well as an optional close button. An example of a bootstrap alert is given below.

    <div class="alert alert-success alert-dismissible">    
       <a href="#" class="close" data-dismiss="alert" aria-label="close">×</a>    
       <strong>Success!</strong> This alert box could indicate a successful or positive action.    
     </div>   
 

Let's follow the below steps to show the alerts dynamically from a simple ASP.NET Core 3.1 MVC Application.
 
Step 1
Create an ASP.NET Core 3.1 MVC Web App.


Step 2
Add a new folder and add an Enum into that folder and give a suitable name like this.


Step 3
Now create a common service like this.

The code snippet for the CommonServices.cs class is given below. A new static method ‘ShowAlert’ is added here which takes two parameters and returns html as string.
    public class CommonServices {  
        public static string ShowAlert(Alerts obj, string message) {  
            string alertDiv = null;  
            switch (obj) {  
                case Alerts.Success:  
                    alertDiv = "<div class='alert alert-success alert-dismissable' id='alert'><button type='button' class='close' data-dismiss='alert'>×</button><strong> Success!</ strong > " + message + "</a>.</div>";  
                    break;  
                case Alerts.Danger:  
                    alertDiv = "<div class='alert alert-danger alert-dismissible' id='alert'><button type='button' class='close' data-dismiss='alert'>×</button><strong> Error!</ strong > " + message + "</a>.</div>";  
                    break;  
                case Alerts.Info:  
                    alertDiv = "<div class='alert alert-info alert-dismissable' id='alert'><button type='button' class='close' data-dismiss='alert'>×</button><strong> Info!</ strong > " + message + "</a>.</div>";  
                    break;  
                case Alerts.Warning:  
                    alertDiv = "<div class='alert alert-warning alert-dismissable' id='alert'><button type='button' class='close' data-dismiss='alert'>×</button><strong> Warning!</strong> " + message + "</a>.</div>";  
                    break;  
            }  
            return alertDiv;  
        }  
    }   


Now let’s call this method from a controller which is saving records in the database. The following is the code snippet for the controller.
    // POST: EmployeeController/Create    
    [HttpPost]  
    [ValidateAntiForgeryToken]  
    public ActionResult Create([FromForm] EmployeeViewModel collection) {  
        try {  
            int result = 0;  
            if (ModelState.IsValid) {  
                Employee objEmp = new Employee();  
                objEmp.EmpName = collection.EmpName;  
                objEmp.Address = collection.Address;  
                objEmp.Email = collection.Email;  
                objEmp.Phone = collection.Phone;  
                objEmp.BankAccountNo = collection.BankAccountNo;  
                objEmp.CreatedOn = DateTime.Now;  
                objEmp.CreatedBy = "SYSTEM";  
                objEmp.ModifiedOn = null;  
                objEmp.ModifiedBy = null;  
                result = _empRepo.Add(objEmp).Result;  
                //return RedirectToAction("Index");    
                if (result > 0) {  
                    ViewBag.Alert = CommonServices.ShowAlert(Alerts.Success, "Employee added");  
                } else ViewBag.Alert = CommonServices.ShowAlert(Alerts.Danger, "Unknown error");  
            }  
            return PartialView("_Create");  
        } catch {  
            return View();  
        }  
    }   


Code Explanation
 In post type method we pass EmployeeViewModel class as a parameter as a model name that gets all data from the user.
    _empRepo.Add() is a custom method used to save the Employee records. ( Repository Pattern is used to save a record here. You can download complete source code from the GitHub link given below ).

Step 4
Now add the below line in the view like this. It helps to render the HTML from the ViewBag string returned from the static method.
    @Html.Raw(@ViewBag.Alert) 


The following is the complete code snippet for the view.
    @model CodeSample.Models.EmployeeViewModel  
    @{  
        ViewData["Title"] = "Add Employee";  
        Layout = "~/Views/Shared/_Layout.cshtml";  
    }  
      
    <h4>Add Employee</h4>  
    <hr />  
    <div class="row">     
        <div class="col-md-4">  
            <form asp-action="Create" asp-controller="Employee" method="post">  
                <div asp-validation-summary="ModelOnly" class="text-danger"></div>  
                <div class="form-group">  
                    <label asp-for="EmpName" class="control-label">Enter employee name</label>  
                    <input asp-for="EmpName" class="form-control" />  
                    <span asp-validation-for="EmpName" class="text-danger"></span>  
                </div>  
                <div class="form-group">  
                    <label asp-for="Email" class="control-label">Enter email</label>  
                    <input asp-for="Email" class="form-control" />  
                    <span asp-validation-for="Email" class="text-danger"></span>  
                </div>  
                <div class="form-group">  
                    <label asp-for="Phone" class="control-label">Enter Phone No.</label>  
                    <input asp-for="Phone" class="form-control" />  
                    <span asp-validation-for="Phone" class="text-danger"></span>  
                </div>  
                <div class="form-group">  
                    <label asp-for="Address" class="control-label">Enter Address</label>  
                    <textarea asp-for="Address" class="form-control"></textarea>  
                    <span asp-validation-for="Address" class="text-danger"></span>  
                </div>  
                <div class="form-group">  
                    <label asp-for="BankAccountNo" class="control-label">Enter Bank Account No.</label>  
                    <input asp-for="BankAccountNo" class="form-control" />  
                    <span asp-validation-for="BankAccountNo" class="text-danger"></span>  
                </div>  
                <div class="form-group">  
                    <input type="submit" id="SaveEmp" value="Create" class="btn btn-primary" />  
                </div>  
            </form>  
        </div>  
     </div>  
    <div class="row">  
        <div class="col-md-12">  
            <div class="form-group">  
                @Html.Raw(@ViewBag.Alert)  
            </div>  
        </div>  
    </div>  
      
     <div><a asp-action="Index">Back to List</a></div>  
      
     @section Scripts {  
      
            @{await Html.RenderPartialAsync("_ValidationScriptsPartial");}  
     }  

Now if something goes wrong and the application is unable to insert the record in the database, it will show an error alert like this.


Else it will show a success alert like this.


Here we saw how to display a bootstrap alert dynamically from ASP.NET Core 3.1 MVC Application. Hope you like this article and get some information from it.


ASP.NET MVC 6 Hosting - HostForLIFEASP.NET :: Install Bootstrap In ASP.NET MVC 5

clock May 19, 2021 08:29 by author Peter

Today I will share the way to install Bootstrap in ASP.NET MVC5 using Visual Studio 2019. Setup Bootstrap 3.3.1 to ASP.NET MVC 5
 
Right-click Project -> Manager NuGet Packages -> Click icon setting configuration, add package source.
 
https://api.nuget.org/v3/index.json


Continue by adding a package source (following image)


You search keyword “bootstrap” and then install


You can see bootstrap in project after a successful installation.


Okay, installation is successful!
You can use bootstrap in Layout file of Views/Shared/_LayoutHome.cshtml directory. (Note you add css,javascript to file)

    <link rel="stylesheet" href="~/Content/bootstrap.min.css" />  
    <script src="~/Scripts/jquery-3.3.1.min.js"></script>  
    <script src="~/Scripts/bootstrap.min.js"></script>  

Example - Views/Shared/_LayoutHome.cshtml

    <!DOCTYPE html>  
    <html>  
    <head>  
        <meta name="viewport" content="width=device-width" />  
        <title>@ViewBag.Title</title>  
        <link rel="stylesheet" href="~/Content/bootstrap.min.css" />  
        <script src="~/Scripts/jquery-3.3.1.min.js"></script>  
        <script src="~/Scripts/bootstrap.min.js"></script>  
    </head>  
    <body>  
        <div>  
            @RenderBody()  
        </div>  
    </body>  
    </html>  

Views/Home/Index.cshtml

    <div class="container">  
        <div class="row">  
            <div class="col-md-12">  
                <h2>@ViewBag.title</h2>  
                <a href="https://hostforlifeasp.net" class="btn btn-success">https://hostforlifeasp.net/</a>  
            </div>  
        </div>  
    </div>  

Ok, we successfully installed bootstrap in ASP.NET MVC 5


ASP.NET MVC 6 Hosting - HostForLIFEASP.NET :: GET and POST Calls to Controller's Method in MVC

clock May 6, 2021 07:37 by author Peter

In this article I am going to cover some really interesting material that is very useful today in web application development. You will learn how to make jQuery Ajax GET and POST calls to controller methods.

When we use jQuery Ajax to access a server (controller's method) without reloading the web page we have two choices for how to pass the information for the request to the server (controller's method). These two options are to use either GET or POST.
 
Note: Before beginning with the code, ensure you are using the jQuery library before the GET or POST script.
 
GET
GET is used to request data from a specified resource. With all the GET request we pass the URL which is compulsory, however it can take the following overloads.
    .get( url [, data ] [, success(data, textStatus, jqXHR) ] [, dataType ] ).done/.fail  

Now, let's try to use GET in MVC application.
 
GET call to Controller's Method that will return string data
 
Let's imagine we have the following method in the controller:
    public string TellMeDate()  
    {  
        return DateTime.Today.ToString();  
    }  


This method will return string data (date-time) when we call it, let's make an async call using jQuery Ajax.
    <p id="rData">  
    </p>   
    <script type="text/jscript">  
        var url = "/Home/TellMeDate";  
        $.get(url, null, function (data) {  
            $("#rData").html(data);  
        });  
    </script>  


When the page gets loaded, jQuery Ajax will generate an Ajax GET request/call. The first parameter is the URL and the second is data (this is an optional, even we can avoid typing "null") and the third is the success function when the response is received. The success function takes one parameter "data" that holds the string content and we attached this content to a DOM element.
 
If you want to generate an Ajax GET request when the user clicks a button then can use the following instead:
    <script type="text/jscript">  
        $('#ButtonID').click(function () {  
            var url = "/Home/TellMeDate";  
            $.get(url, null, function (data) {  
                $("#rData").html(data);  
            });  
        })  
    </script>  


If you run the application, you will see the following output:

GET call with parameter to Controller's Method that will return string data
 
Let's imagine we have the following method in the controller:
    public string WelcomeMsg(string input)  
    {  
        if (!String.IsNullOrEmpty(input))  
            return "Please welcome " + input + ".";  
        else  
            return "Please enter your name.";  
    }   


This method will accept a parameter and will return string data (a welcome message or instruction message) when we call it. Now, let's make an async call to this method using jQuery Ajax.
    <p>  
        Enter you name @Html.TextBox("Name")  
        <input type="submit" id="SubmitName" value="Submit"/>  
    </p>   
    <script type="text/jscript">  
        $('#SubmitName').click(function () {  
            var url = "/Home/WelcomeMsg";  
            var name = $('#Name').val();  
            $.get(url, { input: name }, function (data) {  
                $("#rData").html(data);  
            });  
        })  
    </script>   


As you can see, when we click the button after typing a name in the TextBox, jQuery Ajax will generate an Ajax GET request/call. Notice that the second parameter to the "get" function now contains a key { input: name } (parameter). This example supplies one parameter, but can be extended to provide multiple parameters.

GET call with parameter to Controller's Method that will return JSON data
 
The Controller's method we used above returns simple strings. Now, to deal with complex data we need JSON. The following method will return a JsonResult having the customer's ContactName and Address from NorthwindEntities. I am using the Northwind database and EF Database First approach in this sample.
    public JsonResult CustomerList(string Id)  
    {  
        NorthwindEntities db = new NorthwindEntities();  
        var result = from r in db.Customers  
                        where r.Country == Id  
                        select new { r.ContactName, r.Address };  
        return Json(result, JsonRequestBehavior.AllowGet);  
    }   


The above method will accept Id as a parameter and return a "JsonResult". This action method can be called using the following jQuery Ajax GET call:
    <p id="rData">  
    </p>   
    <p>  
        Enter country name @Html.TextBox("Country")  
        <input type="submit" id="GetCustomers" value="Submit"/>  
    </p>   
    <script type="text/jscript">  
        $('#GetCustomers').click(function () {  
            $.getJSON('/Home/CustomerList/' + $('#Country').val(), function (data) {   
                var items = '<table><tr><th>Name</th><th>Address</th></tr>';  
                $.each(data, function (i, country) {  
                    items += "<tr><td>" + country.ContactName + "</td><td>" + country.Address + "</td></tr>";  
                });  
                items += "</table>";   
                $('#rData').html(items);  
            });  
        })  
    </script>   


As you can see, when we click the button after typing a country name in the TextBox, jQuery Ajax will generate an Ajax GET request/call. Notice that the "getJSON" function now contains an URL in the format "/Controller/ActionMethod/Key", here the key (parameter) is the supplied country name.

Using Firebug we can sniff the response. We have used a TextBox where we typed the country name and clicked on a button to get the list of customers.
 
Alternatively, we can populate the list of countries in the dropdownlist box and then when the user selects the country name from the dropdownlist, we can display the list of customers.   

Here is the controller that will populate the country list in the dropdownlist box:
    public ActionResult About()  
    {  
        var result = from r in db.Customers  
                        select r.Country;  
        ViewBag.Country = result;   
        return View();  
    }   


Now, once we have a list of countries in the dropdownlist box, we can implement an Ajax GET request/call. Here it is with a complete view page.
    @Html.DropDownListFor(model => model.Country, new SelectList(ViewBag.Country), "Select Country")   
    <p id="rData">  
    </p>   
    @section Scripts {  
        <script type="text/jscript">  
            $('#Country').click(function () {  
                $.getJSON('/Home/CustomerList/' + $('#Country').val(), function (data) {   
                    var items = '<table><tr><th>Name</th><th>Address</th></tr>';  
                    $.each(data, function (i, country) {  
                        items += "<tr><td>" + country.ContactName + "</td><td>" + country.Address + "</td></tr>";  
                    });  
                    items += "</table>";   
                    $('#rData').html(items);  
                });  
            })  
        </script>  
    }   

Everything remains the same as in the TextBox version above.
 
POST
POST is used to submit data to be processed to a specified resource. With all the POST requests we pass the URL which is compulsory and the data, however it can take the following overloads.  
    .post( url [, data ] [, success(data, textStatus, jqXHR) ] [, dataType ] )   

Now, let's try to use POST in a MVC application.
 
POST call to Controller's Method to save TextBox data (not form)
 
There are various ways to POST form data to a method but in the example given below I'm not going to use any form. I will just use two textboxes and a submit button, when the user clicks the button I want to save the data using a jQuery Ajax POST call. So, here is the method accepting the two parameters for name and address:
    [HttpPost]  
    public string SubmitSubscription(string Name, string Address)  
    {  
        if (!String.IsNullOrEmpty(Name) && !String.IsNullOrEmpty(Address))  
            //TODO: Save the data in database  
            return "Thank you " + Name + ". Record Saved.";  
        else  
            return "Please complete the form.";             
    }   


We can implement method above to save the data in the database, it will also return the response back to the client. Here is the jQuery Ajax POST function:
    <h2>Subscription</h2>   
    <p>  
        Enter your name  
        <br />  
        @Html.TextBox("Name")  
    </p>  
    <p>  
        Enter your address  
        <br />  
        @Html.TextBox("Address")  
    </p>   
    <input type="button" value="Save" id="Save" />  
    <span id="msg" style="color:red;"/>   
    <script type="text/javascript">  
        $('#Save').click(function () {  
            var url = "/Home/SubmitSubscription";  
            var name = $("#Name").val();  
            var address = $("#Address").val();  
            $.post(url, { Name: name, Address: address }, function (data) {  
                $("#msg").html(data);  
            });  
        })  
    </script>   


POST call to Controller's Method to save form data
In case above we don't have a form, so I have used two individual properties/parameters (name and address) with a jQuery Ajax POST call and also on the method side, but this approach will be painful since the number of properties increase. In this case we can use the model approach that will allow us to work with intelisense. So, let's go and create the "Subscription" model class with two properties.
    public class Subscription  
    {  
        public string Name { get; set; }  
        public string Address { get; set; }  
    }  

Now that we have the model we can create our controller method:
    [HttpPost]  
    public string SubmitSubscription(Subscription subs)  
    {  
        if (!String.IsNullOrEmpty(subs.Name) && !String.IsNullOrEmpty(subs.Address))  
            //TODO: Save the data in database  
            return "Thank you " + subs.Name + ". Record Saved.";  
        else  
            return "Please complete the form.";             
    }  

Still the same, just using a model instead of individual properties.
    <h2>Subscription</h2>   
    <form id="subscriptionForm" action="/Home/SubmitSubscription" method="post">  
    <p>  
        Enter your name  
        <br />  
        @Html.TextBox("Name")  
    </p>  
    <p>  
        Enter your address  
        <br />  
        @Html.TextBox("Address")  
    </p>   
    <input type="button" value="Save" id="Save" />  
    <span id="msg" style="color:red;"/>  
    </form>   
    @section Scripts{  
        <script type="text/javascript">  
            $('#Save').click(function () {   
                var form = $("#subscriptionForm");  
                var url = form.attr("action");  
                var formData = form.serialize();  
                $.post(url, formData, function (data) {  
                    $("#msg").html(data);  
                });  
            })  
        </script>  
    }  


Noting new, everything is the same, just a few changes that allow us to work with a form.


ASP.NET MVC 6 Hosting - HostForLIFEASP.NET :: How To Create ASP.NET Core MVC Application?

clock April 26, 2021 07:06 by author Peter

In this article, we will learn how to create an ASP.NET Core MVC web application step by step. Prior to creating the application, let's know about the ASP.NET Core.

What is ASP.NET Core?
ASP.NET Core is an open source cross platform framework for developing and building web, cloud, IoT applications.
 
Why should we use ASP.NET Core?

  • ASP.NET is an open-source platform that runs on Microsoft .NET Core Framework.
  • We can build and run the ASP.NET core application on a cross platform environment such as Windows, MacOs, Linux etc.
  • We can build modern apps such as Cloud, IoT, Web apps, mobile backend etc. and those can be easily enabled to run over the cloud platform.
  • We can host applications on any modern platform such as docker, AKS, or any environment.
  • Saves the efforts of the developer by built-in features such as dependency injection, you can enable docker, containerization, swagger support in just one click.


Now let's start creating an ASP.NET Core MVC web application.
 
Step 1 - Open Visual Studio
Open Visual Studio ( I am using 2019)
Once the Visual Studio Opens, Then click on Continue Without Code as shown in the following image

Then from Visual Studio Menu, click on File => New Project, as shown in the following image

Click on the New Project, then the following window appears as shown in step 2.
 
Step 2 - Choose Project Template
You will see the two project templates,

  • ASP.NET Core Web App: This project template creates the web application with Razor pages without Model, View, Controller.
  • ASP.NET Core Web App (Model-View-Controller): This project template creates the web application with Model, View, Controller (MVC).


Choose the ASP.NET Core Web App(Model-View-Controller) Template as shown in the following image.

After choosing the project template click on Next.
 
Step 3 - Define Project Name and Location
In the project configuration window you will see the following options,
Project Name
Define any name for your project as per your choice.

Location

Choose the location to save the project files on your hard drive of the machine. I have chosen the Project/VS folder of the E drive of the machine, and obviously it's different on your computer.

Solution Name
Solution name is auto-defined based on the project name, but you can change the name based on your own choice.

Additionally, there is a checkbox, if you have checked it, then the solution file (.sln) and project files will be saved in the same folder. Now Choose the minimum details for ease of understanding as shown in the following image.


After defining the required details, click on the Next.
 
Step 4 - Choose the Target Framework
Choose the target framework .NET 5 which is the latest or you can choose based on your requirement, skip the other details for ease of understanding as shown in the following image.

After providing the required details, click the create button. It will create the ASP.NET Core MVC web application as shown in step 5.
 
Step 5 - Understanding ASP.NET Core MVC Folder Structure
The following is the default folder structure of the ASP.NET Core ASP.NET MVC application.

Let's understand preceding project folder structure in brief.
 
The wwwroot folder
The wwwroot is the default root folder for storing the static files related to the project and those files can be accessed programmatically with a relative path.
 
Controller Folder
The controller folder contains the controller classes where the operation related code written.
 
Model Folder
The Models Folder contains the domain or entity classes. Models can be written anywhere in the solution such as in separate class library or folder etc.
 
Views Folder
The Views folder holds the razor pages which are responsible for showing and getting the data from the users.
 
The appsettings.json File
The appsettings.json folder contains the configuration and secret details of the application.
 
Program.cs File

The Program.cs is the starting point of the application which will create the host for an application to run the application.
 
Startup.cs File
The Startup.cs file allows to configure the behaviour of the application such as defining the routes, dependency injection etc.
 
Step 6 - Run the ASP.NET Core MVC Application
You can run the application with default contents or let open the Index.cshtml file and put some contents there. Now press F5 on the keyboard or use the run option from Visual Studio to run the application in the browser.


ASP.NET MVC 6 Hosting - HostForLIFEASP.NET :: Consuming ASP.NET Web API REST Service In ASP.NET MVC Using HttpClient

clock April 20, 2021 08:44 by author Peter

In many forum posts, developers and students have asked one common question, that is, how to use Web API REST Service in ASP.NET MVC application and how to make a call between them to exchange the information. So, considering this demand, I have decided to write this article to demonstrate how to consume ASP.NET Web API REST Service in ASP.NET MVC application with the help of HttpClient.

 
Prerequisites
If you don't know what is Web API REST service and how to create, publish, host ASP.NET Web API REST Service, then please refer to my video as well as articles, using the following links. Also, follow the same sequence if you want to learn web API REST service from creating to hosting to consuming in client application.
    Creating ASP.NET Web API REST Service
    Publishing ASP.NET Web API REST Service Using File System Method
    Hosting ASP.NET Web API REST Service on IIS 10

In this article, we will use the same hosted Web API REST service to consume in our created ASP.NET MVC web application. Now, let's start consuming Web API REST service in ASP.NET MVC application step by step.

Step 1 - Create MVC Application.
    "Start", followed by "All Programs" and select "Microsoft Visual Studio 2015".

    Click "File", followed by "New" and click "Project". Select "ASP.NET Web Application Template", provide the Project a name as you wish and click OK.

    After clicking, the following Window will appear. Choose empty project template and check on MVC option.

The preceding step creates the simple empty ASP.NET MVC application without Model, View, and Controller, The Solution Explorer of created web application will look like the following.

Step 2 - Install HttpClient library from NuGet
We are going to use HttpClient to consume the Web API REST Service, so we need to install this library from NuGet Package Manager .
 
What is HttpClient?
HttpClient is base class which is responsible to send HTTP request and receive HTTP response resources i.e from REST services.
To install HttpClient, right click on Solution Explorer of created application and search for HttpClient, as shown in the following image.

Now, click on "Install" button after choosing the appropriate version. It will get installed after taking few seconds, depending on your internet speed.
 
Step 3 - Install WebAPI.Client library from NuGet
This package is used for formatting and content negotiation which provides support for System.Net.Http. To install, right click on Solution Explorer of created application and search for WebAPI.Client, as shown in following image.

Now, click on "Install" button after choosing the appropriate version. It will get installed after taking few seconds depending on your internet speed. We have installed necessary NuGet packages to consume Web API REST services in web application. I hope you have followed the same steps.
 
Step 4 - Create Model Class
Now, let us create the Model class named Employee.cs  or as you wish, by right clicking on Models folder with same number of entities which are exposing by our hosted Web API REST service to exchange the data. The code snippet of created Employee.cs class will look like this.
 
Employee.cs
    public class Employee  
    {  
        public int Id { get; set; }  
        public string Name { get; set; }  
                 
        public string City { get; set; }  
      
    }   


Step 5 - Add Controller Class
Now, let us add ASP.NET MVC controller, as shown in the screenshot given below.

After clicking Add button, it will show in the Window. Specify the Controller name as Home with suffix Controller. Now, let's modify the default code of Home controller .
 
Our hosted Web API REST Service includes these two methods, as given below.

    GetAllEmployees (GET )
    GetEmployeeById (POST ) which takes id as input parameter

We are going to call GetAllEmployees method which returns the all employee details ,The hosted web api REST service base URL is http://192.168.95.1:5555/ and to call GetAllEmployees from hosted web API REST service, The URL should be Base url+api+apicontroller name +web api method name as following,

http://192.168.95.1:5555/api/Employee/GetAllEmployees

In the preceding url

    http://localhost:56290 Is the base address of web API service, It can be different as per your server.
    api It is the used to differentiate between Web API controller and MVC controller request .
    Employee This is the Web API controller name.
    GetAllEmployees This is the Web API method which returns the all employee list.

After modifying the code of Homecontroller class, the code will look like the following.
 
Homecontroller.cs
    using ConsumingWebAapiRESTinMVC.Models;  
    using Newtonsoft.Json;  
    using System;  
    using System.Collections.Generic;  
    using System.Net.Http;  
    using System.Net.Http.Headers;  
    using System.Threading.Tasks;  
    using System.Web.Mvc;  
      
    namespace ConsumingWebAapiRESTinMVC.Controllers  
    {  
        public class HomeController : Controller  
        {  
            //Hosted web API REST Service base url  
            string Baseurl = "http://192.168.95.1:5555/";      
            public async Task<ActionResult> Index()  
            {  
                List<Employee> EmpInfo = new List<Employee>();  
                  
                using (var client = new HttpClient())  
                {  
                    //Passing service base url  
                    client.BaseAddress = new Uri(Baseurl);  
      
                    client.DefaultRequestHeaders.Clear();  
                    //Define request data format  
                    client.DefaultRequestHeaders.Accept.Add(new MediaTypeWithQualityHeaderValue("application/json"));  
                      
                    //Sending request to find web api REST service resource GetAllEmployees using HttpClient  
                    HttpResponseMessage Res = await client.GetAsync("api/Employee/GetAllEmployees");  
      
                    //Checking the response is successful or not which is sent using HttpClient  
                    if (Res.IsSuccessStatusCode)  
                    {  
                        //Storing the response details recieved from web api   
                        var EmpResponse = Res.Content.ReadAsStringAsync().Result;  
      
                        //Deserializing the response recieved from web api and storing into the Employee list  
                        EmpInfo = JsonConvert.DeserializeObject<List<Employee>>(EmpResponse);  
      
                    }  
                    //returning the employee list to view  
                    return View(EmpInfo);  
                }  
            }  
        }  
    }


I hope, you have gone through the same steps and understood about the how to use and call Web API REST service resource using HttpClient .
 
Step 6 - Create strongly typed View
Now, right click on Views folder of the created application and create strongly typed View named by Index by choosing Employee class to display the employee list from hosted web API REST Service, as shown in the following image.

Now, click on "Add" button. It will create View named index after modifying the default code. The code snippet of the Index View looks like the following.

Index.cshtml
    @model IEnumerable<ConsumingWebAapiRESTinMVC.Models.Employee>  
      
    @{  
        ViewBag.Title = "www.compilemode.com";  
    }  
      
    <div class="form-horizontal">  
      
        <hr />  
        <div class="form-group">  
      
      
            <table class="table table-responsive" style="width:400px">  
                <tr>  
                    <th>  
                        @Html.DisplayNameFor(model => model.Name)  
                    </th>  
                    <th>  
                        @Html.DisplayNameFor(model => model.City)  
                    </th>  
                      
                </tr>  
      
                @foreach (var item in Model) {  
                    <tr>  
                        <td>  
                            @Html.DisplayFor(modelItem => item.Name)  
                        </td>  
                        <td>  
                            @Html.DisplayFor(modelItem => item.City)  
                        </td>  
                          
                    </tr>  
    }  
      
            </table>  
        </div>  
    </div>


The preceding View will display all employees list . Now, we have done all the coding.

Step 7 - Run the Application


ASP.NET MVC 6 Hosting - HostForLIFEASP.NET :: Create Simple Web API In ASP.NET MVC

clock March 26, 2021 08:32 by author Peter

This article explains how to access data from a view to the controller's action method. The action method is a simple C# method that can be parameterized or without a parameter in the controller. We use two types of methods to handle our browser request; one is HTTP GET and another is HTTP POST. When we call an action method by a request's URL by the browser then the HTTP GET method will be called but when a request is from a button click event then the HTTP POST method will be called. So in this article, I am going to explaining how to access view input field data in the controller's action method when a HTTP POST request is called.

 
To understand how to access view input field data in the controller's action method (POST), we create a "Calculate Simple Interest" application. This application gets Principle, Rate and Time as user input and generates simple interest. So let's proceed with the application.
 
Create an action method in the CalculateSimpleInterest controller (CalculateSimpleInterestController.cs) that renders the view on the UI.
    public ActionResult SimpleInterest()  
    {  
        return View();  
    }  

Create a view to get user input from the UI, so the code is:
    <h2>Calculate Simple Interest</h2>  
    <fieldset>  
            <legend>Calculate Simple Interest</legend>  
        @using (Ajax.BeginForm("CalculateSimpleInterestResult","CalculateSimpleInterest",  
                                new AjaxOptions { UpdateTargetId = "divInterestDeatils" }))  
        {  
            <div id="divInterestDeatils"></div>  
            <ol>  
                <li>  
                    @Html.Label("Amount")  
                    @Html.TextBox("txtAmount")  
                </li>  
                <li>  
                    @Html.Label("Rate")  
                    @Html.TextBox("txtRate")  
                </li>  
                <li>  
                    @Html.Label("Year")  
                    @Html.TextBox("txtYear")  
                </li>  
            </ol>  
        <button>Calculate</button>  
        }     
    </fieldset>  


So now the screen is ready to get input and it shows it as:


Figure 1.1 Input screens to calculate simple interest

I will now explain the four ways to get the view's data in the controller action. These are:
    Using Traditional approach
    Using the FormCollection Object
    Using the Parameters
    Strongly type model binding to view

Using Traditional Approach
In the traditional approach we use the request object of the HttpRequestBase class. The request object has view input field values in name/value pairs. When we create a submit button then the request type POST is created and calls the POST method.

Figure 1.2 Requested Data

We have four data, those are in Name-Value pairs. So we can access these data in a POST method by passing the Name as an indexer in the Request and get values. Our POST method means the controller action that handles the POST request type is [HttpPost].
    [HttpPost]  
    public ActionResult CalculateSimpleInterestResult()  
    {  
        decimal principle = Convert.ToDecimal(Request["txtAmount"].ToString());  
        decimal rate = Convert.ToDecimal(Request["txtRate"].ToString());  
        int time = Convert.ToInt32(Request["txtYear"].ToString());  
       
        decimal simpleInteresrt = (principle*time*rate)/100;  
       
        StringBuilder sbInterest = new StringBuilder();  
        sbInterest.Append("<b>Amount :</b> " + principle+"<br/>");  
        sbInterest.Append("<b>Rate :</b> " + rate + "<br/>");  
        sbInterest.Append("<b>Time(year) :</b> " + time + "<br/>");  
        sbInterest.Append("<b>Interest :</b> " + simpleInteresrt);  
        return Content(sbInterest.ToString());  
    }  


When it executes, we get simple interest as the result as in the following:

Figure 1.3 Output screen after getting response

Using the FormCollection Object
We can also get post requested data by the FormCollection object. The FormCollection object also has requested data in the name/value collection as the Request object. To get data from the FormCollection object we need to pass it is as a parameter and it has all the input field data submitted on the form.
    [HttpPost]  
      
    public ActionResult CalculateSimpleInterestResult(FormCollection form)  
    {  
        decimal principle = Convert.ToDecimal(form["txtAmount"].ToString());  
        decimal rate = Convert.ToDecimal(form["txtRate"].ToString());  
        int time = Convert.ToInt32(form["txtYear"].ToString());  
       
        decimal simpleInteresrt = (principle*time*rate)/100;  
       
        StringBuilder sbInterest = new StringBuilder();  
        sbInterest.Append("<b>Amount :</b> " + principle+"<br/>");  
        sbInterest.Append("<b>Rate :</b> " + rate + "<br/>");  
        sbInterest.Append("<b>Time(year) :</b> " + time + "<br/>");  
        sbInterest.Append("<b>Interest :</b> " + simpleInteresrt);  
        return Content(sbInterest.ToString());  
    }


It also gives the same output as Figure 1.3 shows.
 
Using the Parameters

We can pass all input field names as a parameter to the post action method. The input field name and parameter name should be the same. These parameters have input field values that were entered by the user. So we can access view input field values from these parameters. The input field takes a string value from the user so the parameter should be a string type. There is no need to define a parameter in any specific sequence.
    [HttpPost]  
    public ActionResult CalculateSimpleInterestResult(string txtAmount, string txtRate, string txtYear)  
    {  
        decimal principle = Convert.ToDecimal(txtAmount);  
        decimal rate = Convert.ToDecimal(txtRate);  
        int time = Convert.ToInt32(txtYear);  
       
        decimal simpleInteresrt = (principle*time*rate)/100;  
       
        StringBuilder sbInterest = new StringBuilder();  
        sbInterest.Append("<b>Amount :</b> " + principle+"<br/>");  
        sbInterest.Append("<b>Rate :</b> " + rate + "<br/>");  
        sbInterest.Append("<b>Time(year) :</b> " + time + "<br/>");  
        sbInterest.Append("<b>Interest :</b> " + simpleInteresrt);  
        return Content(sbInterest.ToString());  
    }  


It also gives the same output as Figure 1.3 shows.
 
In all three approaches above we are parsing the string to a non-string type. If any of the parsing attempts fail then the entire action will fail. We are converting each value to avoid an exception but it also increases the amount of code. So we look at the fourth approach that would reduce the amount of code.
 
Strongly type model binding to view
 
We bind a model to the view; that is called strongly type model binding.
 
Step 1
Create a Model for Simple Interest
    namespace CalculateSimpleInterest.Models  
    {  
        public class SimpleInterestModel  
        {  
            public decimal Amount { get; set; }  
            public decimal Rate { get; set; }  
            public int Year { get; set; }  
        }  
    }  


Step 2
Create an action method that render a view on the UI
 
We are passing an empty model to be bound to the view.
    public ActionResult SimpleInterest()  
    {  
        SimpleInterestModel model = new SimpleInterestModel();  
        return View(model);  
    }  


Step 3
Create a strongly typed view that has the same screen as in Figure 1.1
    @model CalculateSimpleInterest.Models.SimpleInterestModel  
       
    @{  
        ViewBag.Title = "SimpleInterest";  
    }  
       
    <h2>Calulate Simple Interest</h2>  
       
    @using (Ajax.BeginForm("CalculateSimpleInterestResult","CalculateSimpleInterest",  
                                new AjaxOptions { UpdateTargetId = "divInterestDeatils" }))  
        {  
             
        <fieldset>  
            <legend>Calulate Simple Interest</legend>  
            <div id="divInterestDeatils"></div>  
       
            <div class="editor-label">  
                @Html.LabelFor(model => model.Amount)  
            </div>  
            <div class="editor-field">  
                @Html.EditorFor(model => model.Amount)            
            </div>  
       
            <div class="editor-label">  
                @Html.LabelFor(model => model.Rate)  
            </div>  
            <div class="editor-field">  
                @Html.EditorFor(model => model.Rate)            
            </div>  
       
            <div class="editor-label">  
                @Html.LabelFor(model => model.Year)  
            </div>  
            <div class="editor-field">  
                @Html.EditorFor(model => model.Year)             
            </div>  
            <p>  
                <input type="submit" value="Calculate" />  
            </p>  
        </fieldset>  
    }  
       
    @section Scripts {  
        @Scripts.Render("~/bundles/jqueryval")  
    }  

Step 4
Create an action method that handles the POST request and processes the data
 
In the action method we pass a model as the parameter. That model has UI input field data. Here we do not need to parse and do not need to write extra code.
    [HttpPost]  
    public ActionResult CalculateSimpleInterestResult(SimpleInterestModel model)  
    {  
        decimal simpleInteresrt = (model.Amount*model.Year*model.Rate)/100;  
        StringBuilder sbInterest = new StringBuilder();  
        sbInterest.Append("<b>Amount :</b> " + model.Amount+"<br/>");  
        sbInterest.Append("<b>Rate :</b> " + model.Rate + "<br/>");  
        sbInterest.Append("<b>Time(year) :</b> " + model.Year + "<br/>");  
        sbInterest.Append("<b>Interest :</b> " + simpleInteresrt);  
        return Content(sbInterest.ToString());  
    }  

It also gives the same output as Figure 1.3 shows.


ASP.NET MVC 6 Hosting - HostForLIFEASP.NET :: Understanding Separation Of Concern in ASP.NET MVC

clock February 22, 2021 06:01 by author Peter

What is Separation of Concern?
Wikipedia says “In computer science, separation of concerns (SoC) is a design principle for separating a computer program into distinct sections, such that each section addresses a separate concern. A concern is a set of information that affects the code of a computer program.”

As said concern is a set of information, in our application concern is known as modules or a set of responsibility, we use this principle to separate application module to manage scalable applications.

You can also think of separation the same as how we use layers in our application as follows:


However we can implement different tiers for databases as well.

The above architecture can be followed in any web or native (desktop) application, in order to use separation of concern.

How separation of concern in ASP.NET

A couple of years ago, Microsoft came up with ASP.NET MVC which is a superset of ASP.NET (now ASP.NET web form). Since before ASP.NET MVC there was Spring (JAVA), Ruby on Rail frameworks and may be others has already implemented MVC architecture.

ASP.NET MVC adds SoC for web (http) and separate Model (business), View(User Interface) and Controller (Processing data to view or vice versa), it gives responsibility to Model, View, Controller as follows :


You may have seen the above diagram in many articles. Herethe model is responsible to handle business logic, don’t get it confused with ViewModel as ViewModel are simple classes in ASP.NET MVC to bind strongly typed views.

Flexibility and its violation of SoC in ASP.NET MVC
As a ASP.NET MVC developer I feel it’s quite flexible to work with MVC as it’s a framework with extensibility as we can implement our own principles if required.

MVC framework uses loose coupling (another form of SoC) for every concern (modules). It’s recommended to use Model for business logic, controller for processing incoming requests and views to display information to end user.

But the actual problem is due to flexibility of ASP.NET MVC and it’s easy to violate these principles.

Examples of violation of MVC principle:

    Using ViewBag or ViewData for passing data from controller to view:
        // contoller  
        public ActionResult Index()   
        {  
                ViewBag.EmployeeData = getEmplyees(x => x.DOB > DateTime.Now);  
            }  
            // view  
        foreach(var employee in ViewBag.EmployeeData)  
        {  
            // using data  
        }  

    Above line of code doesn’t restrict developer, but it violates principle to use ViewModel to display data in view.

    Using business logic in controller:
        Public ActionResult Save(Employee model)  
        {  
            If(ModelState.IsValid)   
            {  
                _dbContext.Employees.Add(model)  
            }  
            Return RedirectToAction(“Success”);  
        }  

    Using above code, its violation of SRP because controller is having database logic to save information.

    Using business logic in view:
        @if(user.Role == ”Admin”)  
        {  
            //  
        }  
        Else   
        {  
            //  
        }  

    Using this we are using business logic in view which is only responsible to display information.

Apart from these, there area lot of code snippets you can find in your ASP.NET MVC project as well as online communities.

Recommendations

Where to put business logic:
It’s recommended to use a Service layer to implement business logic in your application as follows:
    public class EmployeeService   
    {  
        IRepository _employeeRepository;  
        public EmployeeService(IRepository employeeRepository)   
        {  
            this._employeeRepository = employeeRepository;  
        }  
        public IEnumeratble < Employee > GetEmplyee(int id)   
        {  
            return _employeeRepository.FindBy(x => x.ID == id).FirstOrDefault();  
        }…………..  
    }  


Repository pattern is a well known pattern for data access, here is a sample:
    public class Repository < T > : IRepository < T > where T: class   
    {  
        private DbContext Context;  
      
        public Repository(DbContext ctx)   
        {  
            Context = ctx;  
        }  
      
        public virtual IQueryable < T > GetAll()   
        {  
            IQueryable < T > query = Context.Set < T > ().AsQueryable();  
            return query;  
        }  
        public IQueryable < T > FindBy(System.Linq.Expressions.Expression < Func < T, bool >> predicate)   
        {  
            IQueryable < T > query = Context.Set < T > ().Where(predicate);  
            return query;  
        }
      
    }  


Repository can be wrapped with a unit of work to save final changes all together. Here is sample unit of work interface which can be implemented for convenience, however it’s not required.
    public interface IUnitOfWork  
    {  
        IRepository < TEntity > GetRepository < TEntity > () where TEntity: class;  
        void Save();  
    }  


And finally we can inject (using DI) service in controller to use business objects.
    public class EmployeeContoller   
    {  
        IService _employeeService;  
        Public EmployeeContoller(IService employeeService)   
        {  
            _employeeService = employeeService;  
        }…………  
    }  

I hope readers will avoidthe  above mentioned mistakes while working with ASP.NET MVC to deliver scalable applications.


ASP.NET MVC 6 Hosting - HostForLIFEASP.NET :: View Without Controller Action in MVC

clock February 19, 2021 12:18 by author Peter

In this quick article you will learn how a view can be rendered without its native Controller Action method.

Why do we need this?
Let's look at the following image.


In the image above, you can see that for each view we have a matching controller action. Each of these actions contains a single line of code. In fact, each of these actions contains exactly the same line of code. And this is completely unnecessary. Imagine what you will do when you have hundreds or thousands of views. Will you create hundreds or thousands of controller actions? Of course not, then how can we fix it?

In the MVC Framework, the controller class includes a method, HandleUnknownAction(), that executes whenever we attempt to invoke an action (or when we request a view that has no matching action method) on a controller that does not exist.


Now we are taking advantage of the HandleUnknownAction() method to render views even when a corresponding controller method does not exist.

In the image above you can see we don't have Post5.cshtml, so when I tried to access the Post5.cshtml view, it shows the following error.


To fix this issue, we can use a simple try-catch block and redirect the user on a PageNotFound view; here's how.


ASP.NET MVC 6 Hosting - HostForLIFE :: Upload Large Files To MVC / WebAPI Using Partitioning

clock February 8, 2021 09:26 by author Peter

Sending large files to an MVC/Web-API Server can be problematic. This article is about an alternative. The approach used is to break a large file up into small chunks, upload them, then merge them back together on the Server via file transfer by partitioning. The article shows how to send files to an MVC Server from both a webpage using JavaScript, and a Web-form httpClient, and can be implemented using either MVC or Web API.

In my experience, the larger the file you need to upload to a website/API, the bigger the potential problems you encounter. Even when you put the right settings in place, adjust your web.config, make certain you use the right multiplier for maxRequestLength and maxAllowedContentLength and of course don't forget about executionTimeout (eek!), things can still go wrong. Connections can fail when the file is *almost* transferred, servers unexpectedly (Murphy's law) run out of space, etc., the list goes on. The diagram below demonstrates the basic concept discussed in this article.

Background
The concept for this solution is very simple. The attached code works (I have it started in production), and can be improved by you in many ways. For example, for the purposes of this article the original large file is broken into app. 1mb chunks, and uploaded to the server sequentially, one chunk at a time. This could, for example, be made more efficient by threading, and sending chunks in parallel. It could also be made more robust by adding fault tolerance, auto-resume into a rest-api architecture etc. I leave you to implement these features yourself if you need them.

The code consists of two parts - the initial file-split/partitioning into chunks, and the final merge of the chunks back into the original file. I will demonstrate the file-split using both C# in a web-form, and JavaScript, and the file-merge using C# server-side.

File split
The concept of splitting a file is very basic. We transverse the file in a binary stream, from position zero, up to the last byte in the file, copying out chunks of binary data along the way and transferring these. Generally we set an arbitrary (or carefully thought out!) chunk size to extract, and use this as the amount of data to take at a time. Anything left over at the end is the final chunk.

In the example below, a chunk size of 128b is set. For the file shown, this gives us 3 x 128b chunks, and 1 x 32b. In this example there are four file chunks resulting from the split and to transfer to the server.

C# File Split
The accompanying demo "WinFileUpload" is a simple Windows forms application. Its sole function is to demonstrate splitting a sample large file (50 MB) in C#, and using a HTTPClient to post the file to a web-server (in this case, an MVC Server).

For this C# example, I have a class called Utils  that takes some input variables such as maximum file chunk size, temporary folder location, and the name of the file to split. To split the file into chunks, we call the method "SplitFile". SplitFile works its way through the input file and breaks it into separate file chunks. We then upload each file chunk it using "UploadFile".
Utils ut = new Utils();  
ut.FileName = "hs-2004-15-b-full_tif.bmp"; // hard coded for demo  
ut.TempFolder = Path.Combine(CurrentFolder, "Temp");  
ut.MaxFileSizeMB = 1;  
ut.SplitFile();  

foreach (string File in ut.FileParts)  
{  
UploadFile(File);  
}  
MessageBox.Show("Upload complete!");  


The file upload method takes an input file-name, and uses a HTTPClient to upload the file. Note the fact that we are sending MultiPartFormData to carry the payload.
public bool UploadFile(string FileName)  
{  
bool rslt = false;  
using (var client = new HttpClient())  
{  
using (var content = new MultipartFormDataContent())  
{  
 var fileContent = new   ByteArrayContent(System.IO.File.ReadAllBytes(FileName));  
 fileContent.Headers.ContentDisposition = new  
     ContentDispositionHeaderValue("attachment")  
       {  
        FileName = Path.GetFileName(FileName)  
       };  
 content.Add(fileContent);  

var requestUri = "http://localhost:8170/Home/UploadFile/";  
    try  
    {  
        var result = client.PostAsync(requestUri, content).Result;  
        rslt = true;  
    }  
    catch (Exception ex)  
    {  
        // log error  
        rslt = false;  
    }  
}  
}  
return rslt;  
}  


So, that's the supporting code out of the way. One of the critical things to be aware of next is the file naming convention that is being used. It consists of the original file-name, plus a code-parsable tail "_part." that will be used server-side to merge the different file chunks back into a single contiguous file again. This is simply the convention I put together - you can change it to your own requirements, just be sure you are consistent with it.

The convention for this example is,
Name = original name + ".part_N.X" (N = file part number, X = total files).

Here is an example of a picture file split into three parts.
MyPictureFile.jpg.part_1.3
MyPictureFile.jpg.part_2.3
MyPictureFile.jpg.part_3.3

It doesn't matter what order the file chunks are sent to the Server. The important thing is that some convention, like the above is used, so that the Server knows (a) what file part it is dealing with and (b) when all parts have been received and can be merged back into one large original file again.

Next, here is the meat of the C# code that scans the file, creating multiple chunk files ready to transfer.
public bool SplitFile()  
{  
bool rslt = false;  
string BaseFileName = Path.GetFileName(FileName);  
// set the size of file chunk we are going to split into  
int BufferChunkSize = MaxFileSizeMB * (1024 * 1024);  
// set a buffer size and an array to store the buffer data as we read it  
const int READBUFFER_SIZE = 1024;  
byte[] FSBuffer = new byte[READBUFFER_SIZE];  
// open the file to read it into chunks  
using (FileStream FS = new FileStream(FileName, FileMode.Open, FileAccess.Read, FileShare.Read))  
{  
// calculate the number of files that will be created  
int TotalFileParts = 0;  
if (FS.Length < BufferChunkSize)  
{  
    TotalFileParts = 1;  
}  
else  
{  
    float PreciseFileParts = ((float)FS.Length / (float)BufferChunkSize);  
    TotalFileParts = (int)Math.Ceiling(PreciseFileParts);  
}  

int FilePartCount = 0;  
// scan through the file, and each time we get enough data to fill a chunk, write out that file  
while (FS.Position < FS.Length)  
{  
    string FilePartName = String.Format("{0}.part_{1}.{2}",  
    BaseFileName, (FilePartCount + 1).ToString(), TotalFileParts.ToString());  
    FilePartName = Path.Combine(TempFolder, FilePartName);  
    FileParts.Add(FilePartName);  
    using (FileStream FilePart = new FileStream(FilePartName, FileMode.Create))  
    {  
        int bytesRemaining = BufferChunkSize;  
        int bytesRead = 0;  
        while (bytesRemaining > 0 && (bytesRead = FS.Read(FSBuffer, 0,  
         Math.Min(bytesRemaining, READBUFFER_SIZE))) > 0)  
        {  
            FilePart.Write(FSBuffer, 0, bytesRead);  
            bytesRemaining -= bytesRead;  
        }  
    }  
  // file written, loop for next chunk  
  FilePartCount++;  
}  

}  
return rslt;  
}  


That's it for the C# client-side - we will see the result and how to handle things server-side later in the article. Next, let's look at how to do the same thing in Javascript, from a web-browser.
JavaScript File Split

NB - The JavaScript code, and the C# Merge code are contained in the attached demo file "MVCServer"

In our browser, we have an input control of type "file", and a button to call a method that initiates the file-split and data transfer.
<input type="file" id="uploadFile" name="file" />  <a class="btn btn-primary" href="#" id="btnUpload">Upload file</a>  

On document ready, we bind to the click event of the button to call the main method.
$(document).ready(function () {  
$('#btnUpload').click(function () {  
UploadFile($('#uploadFile')[0].files);  
}  
)  
});  


Our UploadFile method does the work of splitting the file into chunks, and as in our C# example, passing the chunks off to another method for transfer. The main difference here is that in C#, we created individual files, in our JavaScript example, we are taking the chunks from an array instead.  
function UploadFile(TargetFile)  
{  
// create array to store the buffer chunks  
var FileChunk = [];  
// the file object itself that we will work with  
var file = TargetFile[0];  
// set up other initial vars  
var MaxFileSizeMB = 1;  
var BufferChunkSize = MaxFileSizeMB * (1024 * 1024);  
var ReadBuffer_Size = 1024;  
var FileStreamPos = 0;  
// set the initial chunk length  
var EndPos = BufferChunkSize;  
var Size = file.size;  

// add to the FileChunk array until we get to the end of the file  
while (FileStreamPos < Size)  
{  
// "slice" the file from the starting position/offset, to  the required length  
FileChunk.push(file.slice(FileStreamPos, EndPos));  
FileStreamPos = EndPos; // jump by the amount read  
EndPos = FileStreamPos + BufferChunkSize; // set next chunk length  
}  
// get total number of "files" we will be sending  
var TotalParts = FileChunk.length;  
var PartCount = 0;  
// loop through, pulling the first item from the array each time and sending it  
while (chunk = FileChunk.shift())  
{  
PartCount++;  
// file name convention  
var FilePartName = file.name + ".part_" + PartCount + "." + TotalParts;  
// send the file  
UploadFileChunk(chunk, FilePartName);  
}  
}  


The UploadFileChunk takes the part of the file handed by the previous method, and posts it to the Server in a similar manner to the C# example.
function UploadFileChunk(Chunk, FileName)  
{  
var FD = new FormData();  
FD.append('file', Chunk, FileName);  
$.ajax({  
type: "POST",  
url: 'http://localhost:8170/Home/UploadFile/',  
contentType: false,  
processData: false,  
data: FD  
});  
}  


File merge
NB - The JavaScript code, and the C# Merge code are contained in the attached demo file "MVCServer"

Over on the Server, be that MVC or Web-API, we receive the individual file chunks and need to merge them back together again into the original file.

The first thing we do is put a standard POST handler in place to receive the file chunks being posted up to the Server. This code takes the input stream, and saves it to a temp folder using the file-name created by the client (C# or JavaScript). Once the file is saved, the code then calls the "MergeFile" method which checks if it has enough file chunks available yet to merge the file together. Note that this is simply the method I have used for this article. You may decide to handle the merge trigger differently, for example, running a job on a timer every few minutes, passing off to another process, etc. It should be changed depending on your own required implementation.

[HttpPost]  
public HttpResponseMessage UploadFile()  
{  
foreach (string file in Request.Files)  
{  
var FileDataContent = Request.Files[file];  
if (FileDataContent != null && FileDataContent.ContentLength > 0)  
{  
    // take the input stream, and save it to a temp folder using  
    // the original file.part name posted  
    var stream = FileDataContent.InputStream;  
    var fileName = Path.GetFileName(FileDataContent.FileName);  
    var UploadPath = Server.MapPath("~/App_Data/uploads");  
    Directory.CreateDirectory(UploadPath);  
    string path = Path.Combine(UploadPath, fileName);  
    try  
    {  
        if (System.IO.File.Exists(path))  
            System.IO.File.Delete(path);  
        using (var fileStream = System.IO.File.Create(path))  
        {  
            stream.CopyTo(fileStream);  
        }  
        // Once the file part is saved, see if we have enough to merge it  
        Shared.Utils UT = new Shared.Utils();  
        UT.MergeFile(path);  
    }  
    catch (IOException ex)  
    {  
       // handle  
    }  
}  
}  
return new HttpResponseMessage()  
{  
StatusCode = System.Net.HttpStatusCode.OK,  
Content = new StringContent("File uploaded.")  
};  
}  


Each time we call the MergeFile method, it first checks to see if we have all of the file chunk parts required to merge the original file back together again. It determines this by parsing the file-names. If all files are present, the method sorts them into the correct order, and then appends one to another until the original file that was split, is back together again.
/// <summary>  
/// original name + ".part_N.X" (N = file part number, X = total files)  
/// Objective = enumerate files in folder, look for all matching parts of  
/// split file. If found, merge and return true.  
/// </summary>  
/// <param name="FileName"></param>  
/// <returns></returns>  
public bool MergeFile(string FileName)  
{  
bool rslt = false;  
// parse out the different tokens from the filename according to the convention  
string partToken = ".part_";  
string baseFileName = FileName.Substring(0, FileName.IndexOf(partToken));  
string trailingTokens = FileName.Substring(FileName.IndexOf(partToken) + partToken.Length);  
int FileIndex = 0;  
int FileCount = 0;  
int.TryParse(trailingTokens.Substring(0, trailingTokens.IndexOf(".")), out FileIndex);  
int.TryParse(trailingTokens.Substring(trailingTokens.IndexOf(".") + 1), out FileCount);  
// get a list of all file parts in the temp folder  
string Searchpattern = Path.GetFileName(baseFileName) + partToken + "*";  
string[] FilesList = Directory.GetFiles(Path.GetDirectoryName(FileName), Searchpattern);  
//  merge .. improvement would be to confirm individual parts are there / correctly in  
// sequence, a security check would also be important  
// only proceed if we have received all the file chunks  
if (FilesList.Count() == FileCount)  
{  
// use a singleton to stop overlapping processes  
if (!MergeFileManager.Instance.InUse(baseFileName))  
{  
    MergeFileManager.Instance.AddFile(baseFileName);  
    if (File.Exists(baseFileName))  
        File.Delete(baseFileName);  
    // add each file located to a list so we can get them into  
    // the correct order for rebuilding the file  
    List<SortedFile> MergeList = new List<SortedFile>();  
    foreach (string File in FilesList)  
    {  
        SortedFile sFile = new SortedFile();  
        sFile.FileName = File;  
        baseFileName = File.Substring(0, File.IndexOf(partToken));  
        trailingTokens = File.Substring(File.IndexOf(partToken) + partToken.Length);  
        int.TryParse(trailingTokens.  
           Substring(0, trailingTokens.IndexOf(".")), out FileIndex);  
        sFile.FileOrder = FileIndex;  
        MergeList.Add(sFile);  
    }  
    // sort by the file-part number to ensure we merge back in the correct order  
    var MergeOrder = MergeList.OrderBy(s => s.FileOrder).ToList();  
    using (FileStream FS = new FileStream(baseFileName, FileMode.Create))  
    {  
        // merge each file chunk back into one contiguous file stream  
        foreach (var chunk in MergeOrder)  
        {  
            try  
            {  
                using (FileStream fileChunk =  
                   new FileStream(chunk.FileName, FileMode.Open))  
                {  
                    fileChunk.CopyTo(FS);  
                }  
            }  
            catch (IOException ex)  
            {  
                // handle  
            }  
        }  
    }  
    rslt = true;  
    // unlock the file from singleton  
    MergeFileManager.Instance.RemoveFile(baseFileName);  
}  
}  
return rslt;  
}  


Using the file split on the client-side, and file-merge on the server-side, we now have a very workable solution for uploading large files in a more secure manner than simply sending up in one large block of data.


About HostForLIFE

HostForLIFE is European Windows Hosting Provider which focuses on Windows Platform only. We deliver on-demand hosting solutions including Shared hosting, Reseller Hosting, Cloud Hosting, Dedicated Servers, and IT as a Service for companies of all sizes.

We have offered the latest Windows 2019 Hosting, ASP.NET 5 Hosting, ASP.NET MVC 6 Hosting and SQL 2019 Hosting.


Month List

Tag cloud

Sign in