European ASP.NET MVC Hosting

BLOG about Latest ASP.NET MVC Hosting and Its Technology - Dedicated to European Windows Hosting Customer

ASP.NET MVC Hosting - HostForLIFEASP.NET :: Using MVC 6 And AngularJS 2 With .NET Core

clock March 8, 2023 07:22 by author Peter

Overview on ASP.NET

Let’s differentiate both.

.NET Framework

  • Developed and run on Windows platform only.
  • Built on the .NET Framework runtime.
  • Supported (MVC, Web API & SignalR) Dependency Injection (DI).
  • MVC & Web API Controller are separated.

.Net Core

  • Open Source.
  • Developed & run on Cross Platform.
  • Built on the .NET Core runtime & also on .NET Framework.
  • Facility of dynamic compilation.
  • Built in Dependency Injection (DI).
  • MVC & Web API Controller are unified, Inherited from same base class.
  • Smart tooling (Bower, NPM, Grunt & Gulp).
  • Command-line tools.


Start with .NET Core 1.0
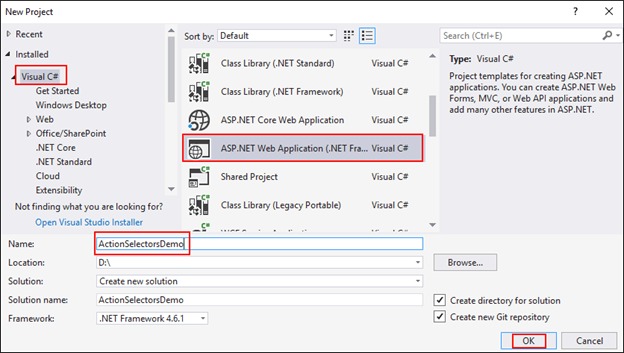
Let’s create a new project with Visual Studio 2015 > File > New > Project.

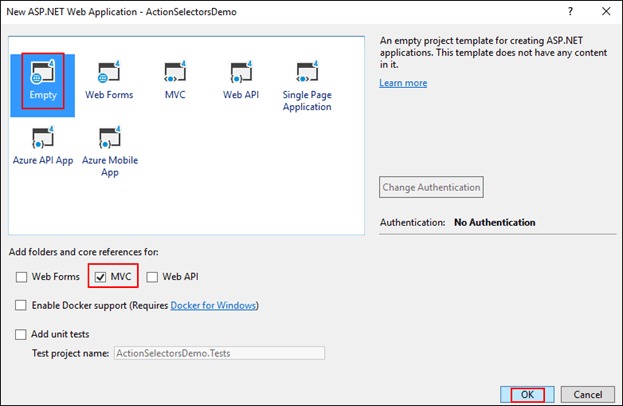
Choose empty template and click OK.


Visual Studio will create a new project of ASP.NET Core empty project.

We will now explore all initial files one by one.

Explore Initial Template

Those marked from Solution Explorer are going to be explored, one by one.

First of all, we know about program.cs file. Let’s concentrate on it.

Program.cs: Here, we have sample piece of code. Let’s get explanation.
    namespace CoreMVCAngular  
    {  
        public class Program   
        {  
            public static void Main(string[] args) {  
                var host = new WebHostBuilder().UseKestrel().UseContentRoot(Directory.GetCurrentDirectory()).UseIISIntegration().UseStartup < Startup > ().Build();  
                host.Run();  
            }  
        }  
    }  


.UseKestrel() : Define the Web Server. ASP.NET Core supports hosting in IIS and IIS Express.

HTTP servers
    Microsoft.AspNetCore.Server.Kestrel (cross-platform)
    Microsoft.AspNetCore.Server.WebListener (Windows-only)

.UseContentRoot(Directory.GetCurrentDirectory()) : Application base path that specifies the path to the root directory of the Application.
.UseIISIntegration() : For hosting in IIS and IIS Express.
.UseStartup<Startup>() : Specifies the Startup class.
.Build() : Build the IWebHost, which will host the app & manage incoming HTTP requests.

Startup.cs
This is the entry point of every .NET Core Application. It provides services, that the Application required.
    namespace CoreMVCAngular   
    {  
        public class Startup   
        {  
            // This method gets called by the runtime. Use this method to add services to the container.  
            // For more information on how to configure your application, visit http://go.microsoft.com/fwlink/?LinkID=398940  
            public void ConfigureServices(IServiceCollection services) {}  
                // This method gets called by the runtime. Use this method to configure the HTTP request pipeline.  
            public void Configure(IApplicationBuilder app, IHostingEnvironment env, ILoggerFactory loggerFactory) {}  
        }  
    }  


As you can see, there are two methods; one is ConfigureServices & another is Configure. In Configure method, three parameters are specified.

IApplicationBuilder defines a class, which provides the mechanisms to configure an Application's request.

We can add MVC (middleware) to the request pipeline by using “Use” extension method. Later, we will use it.
ConfigureServices is an extension method, which is configured to use the several services.

Project.json: This is where our Application dependencies are listed i.e by name & version. This file also manages runtime, compilation settings.

Dependencies: All Application dependencies can add new dependencies, if required, intellisense will help up to include with the name & version.

After saving changes, it will automatically restore the dependencies from NuGet.


Here, the code snippet is changed.
    "dependencies": {  
    "Microsoft.NETCore.App": {  
    "version": "1.0.0",  
    "type": "platform"  
    },  
    "Microsoft.AspNetCore.Diagnostics": "1.0.0",  
      
    "Microsoft.AspNetCore.Server.IISIntegration": "1.0.0",  
    "Microsoft.AspNetCore.Server.Kestrel": "1.0.0",  
    "Microsoft.Extensions.Logging.Console": "1.0.0",  
    "Microsoft.AspNetCore.Mvc": "1.0.0"  
    },  


To uninstall, go to Solution explorer > right click on package > Uninstall package.


Tools: This section manages and lists command line tools. We can see IISIntegration.Tools is added by default, which is a tool that contains dotnet publish iis command for publishing the Application on IIS.
    "tools": {  
    "Microsoft.AspNetCore.Server.IISIntegration.Tools": "1.0.0-preview2-final"  
    },  


Frameworks: As we can see, initially our app is running on the .NET Core platform by default with the runtime.
    “netcoreapp1 .0”.  
    "frameworks": {  
        "netcoreapp1.0": {  
            "imports": ["dotnet5.6", "portable-net45+win8"]  
        }  
    },
 

Build Options: Options, which are passed to the compiler while building the Application.
    "buildOptions": {  
        "emitEntryPoint": true,  
        "preserveCompilationContext": true  
    },  


RuntimeOptions: Manage Server garbage collection at Application runtime.
    "runtimeOptions": {  
        "configProperties": {  
            "System.GC.Server": true  
        }  
    },  


PublishOptions: This defines the file/folder to include/exclude to/from the output folder, while publishing the Application.
    "publishOptions": {  
        "include": ["wwwroot", "web.config"]  
    },  


Scripts: Scripts is an object type, which specifies that scripts run during building or publishing the Application.
    "scripts": {  
        "postpublish": ["dotnet publish-iis --publish-folder %publish:OutputPath% --framework %publish:FullTargetFramework%"]  
    }  


Add MVC6
It’s time to add MVC6. In .NET Core 1.0 MVC & Web API are unified, and become a single class, which inherits from the same base class.

Let’s add MVC Service to our Application. Open project.json to add new dependencies in it. In dependencies section, add two dependencies.
    "Microsoft.AspNetCore.Mvc": "1.0.0",
    "Microsoft.AspNetCore.StaticFiles": "1.0.0"


Click Save.

It will start restoring the packages automatically.


Now let’s add MVC (midleware) to request pipeline in Config method at startup class.
    public void Configure(IApplicationBuilder app, IHostingEnvironment env, ILoggerFactory loggerFactory) {  
        loggerFactory.AddConsole();  
        if (env.IsDevelopment()) {  
            app.UseDeveloperExceptionPage();  
        }  
        //app.UseStaticFiles();  
        app.UseMvc(routes => {  
            routes.MapRoute(name: "default", template: "{controller=Home}/{action=Index}/{id?}");  
        });  
    }  


In ConfigureServices method, we need to add framework Service. We have added services.AddMvc();
    public void ConfigureServices(IServiceCollection services) {  
        services.AddMvc();  
    }  

MVC Folder Structure

Let’s add MVC folder structure to our sample Application. We have added view files in the views folder & MVC controller in Controllers folder like old MVC Application.

Here, you may notice that there is a new file in the views folder “_ViewImports.cshtml”. This file is responsible for setting up the namespaces, which can be accessed by the views in the project, which was previously done by the Web.config file in the views folder.

We are almost done. Let’s modify our view content with welcome message. Now, run the Application. You can see welcome message appears in the home page.

Output

AngularJS2
AngularJS2 is a modern Client end JavaScript Framework for the Application development. This JavaScript framework is totally new & written, based on TypeScript.

We will follow the steps, given below, to learn, how we install it to our Application,
    Manage Client-side Dependencies
    Use Package Manager (NPM).
    Use Task Runner.
    Bootstrapping using Type Script.

Client-side Dependencies: We need to add a JSON config file for Node Package Manager(NPM). Click add > New Item > Client- Side > npm Configuration File and click OK.


Open our newly added npm config file and modify the initial settings.

Package.json
    {  
        "version": "1.0.0",  
        "name": "asp.net",  
        "private": true,  
        "Dependencies": {  
            "angular2": "2.0.0-beta.9",  
            "systemjs": "0.19.24",  
            "es6-shim": "^0.33.3",  
            "rxjs": "5.0.0-beta.2"  
        },  
        "devDependencies": {  
            "gulp": "3.8.11",  
            "gulp-concat": "2.5.2",  
            "gulp-cssmin": "0.1.7",  
            "gulp-uglify": "1.2.0",  
            "rimraf": "2.2.8"  
        }  
    }  

In the dependencies section, we need to add AngularJS2 with other dependencies and they are for:
    Es6-shim is a library, which provides compatibility on old environment.
    Rxjs provides more modular file structure in a variety of formats.
    SystemJS enables System.import TypeScript files directly.

As you can see, there are two different type objects; one is dependencies, which are used for the production purposes & the other one is devDependencies for development related things, like gulp is to run different tasks.

Click save. It will restore automatically. Here, we have all our required packages in the Dependencies section.


In this application we have added another package manager called Bower, Click add > New Item > Client- Side > Bower Configuration File then click Ok.

Comparing with NPM,
Bower:
    Manage html, css, js component
    Load minimal resources
    Load with flat dependencies

NPM:
    Install dependencies recursively
    Load nested dependencies
    Manage NodeJS module

Open the config file then add required dependencies in dependencies secction with specific version.

Save the JSON file after edit, it will automatically restore that package in our project. Here you can see we have added Jquery & Bootstrap package with Bower package manager.

Now, let’s add a gulp configuration file to run the task. Click Add > New Item > Client-Side. Select gulp JSON file to include.


Gulp.json
    /*
    This file in the main entry point for defining Gulp tasks and using Gulp plugins.
    Click here to learn more. http://go.microsoft.com/fwlink/?LinkId=518007
    */  
    "use strict";  
    var gulp = require("gulp");  
    var root_path = {  
        webroot: "./wwwroot/"  
    };  
    //library source  
    root_path.nmSrc = "./node_modules/";  
    //library destination  
    root_path.package_lib = root_path.webroot + "lib-npm/";  
    gulp.task("copy-systemjs", function() {  
        return gulp.src(root_path.nmSrc + '/systemjs/dist/**/*.*', {  
            base: root_path.nmSrc + '/systemjs/dist/'  
        }).pipe(gulp.dest(root_path.package_lib + '/systemjs/'));  
    });  
    gulp.task("copy-angular2", function() {  
        return gulp.src(root_path.nmSrc + '/angular2/bundles/**/*.js', {  
            base: root_path.nmSrc + '/angular2/bundles/'  
        }).pipe(gulp.dest(root_path.package_lib + '/angular2/'));  
    });  
    gulp.task("copy-es6-shim", function() {  
        return gulp.src(root_path.nmSrc + '/es6-shim/es6-sh*', {  
            base: root_path.nmSrc + '/es6-shim/'  
        }).pipe(gulp.dest(root_path.package_lib + '/es6-shim/'));  
    });  
    gulp.task("copy-rxjs", function() {  
        return gulp.src(root_path.nmSrc + '/rxjs/bundles/*.*', {  
            base: root_path.nmSrc + '/rxjs/bundles/'  
        }).pipe(gulp.dest(root_path.package_lib + '/rxjs/'));  
    });  
    gulp.task("copy-all", ["copy-rxjs", 'copy-angular2', 'copy-systemjs', 'copy-es6-shim']);  


To run the task, right click on Gulp.json file to reload.

Right click on copy-all & click run.

Task run & finish.

In Solution Explorer, all the required packages are copied. We also need to put the type definitions for es6-shim(typing folder), without this, it will cause error - "Cannot find name 'Promise'".

Bootstrapping with TypeScript

tsConfig.json
    {  
        "compilerOptions": {  
            "noImplicitAny": false,  
            "noEmitOnError": true,  
            "removeComments": false,  
            "sourceMap": true,  
            "target": "es5",  
            //add this to compile app component  
            "emitDecoratorMetadata": true,  
            "experimentalDecorators": true,  
            "module": "system",  
            "moduleResolution": "node"  
        },  
        "exclude": ["node_modules", "wwwroot/lib"]  
    }  


noImplicitAny : Raise an error on the expressions and declarations with an implied ‘any’ type.
noEmitOnError : Do not emit outputs, if any errors were reported.
Target : Specify ECMAScript target version: ‘es5’ (default), ‘es5’, or ‘es6’.
experimentalDecorators : Enables an experimental support for ES7 decorators.

Create an app folder for .ts file in wwwroot folder.


In Solution Explorer, you may add the files, given below.

In main.ts code snippet, bootstrap AngularJS with importing the component.

    import {bootstrap} from 'angular2/platform/browser';  
    import {AppComponent} from './app.component';  
    import {enableProdMode} from 'angular2/core';  
      
    enableProdMode();  
    bootstrap(AppComponent);  


Component: imports the Component function from Angular 2 library; use of import, app component class can be imported from other component.
import {Component} from 'angular2/core';

    @Component({  
        selector: 'core-app',  
        template: '<h3>Welcome to .NET Core 1.0 + MVC6 + Angular 2</h3>'  
    })  
    export class AppComponent {}  


MVC View: It’s time to update our layout & linkup the library.


Now, we will add the reference to our layout page.
    <!DOCTYPE html>  
    <html>  
      
    <head>  
        <meta name="viewport" content="width=device-width" />  
        <title>@ViewBag.Title</title>  
        <script src="~/lib-npm/es6-shim/es6-shim.js"></script>  
        <script src="~/lib-npm/angular2/angular2-polyfills.js"></script>  
        <script src="~/lib-npm/systemjs/system.src.js"></script>  
        <script src="~/lib-npm/rxjs/Rx.js"></script>  
        <script src="~/lib-npm/angular2/angular2.js"></script>  
    </head>  
      
    <body>  
        <div> @RenderBody() </div> @RenderSection("scripts", required: false) </body>  
      
    </html> Index.cshtml @{ ViewData["Title"] = "Home Page"; }  
    <core-app>  
        <div>  
            <p><img src="~/img/ajax_small.gif" /> Please wait ...</p>  
        </div>  
    </core-app> @section Scripts {  
    <script>  
        System.config({  
            packages: {  
                'app': {  
                    defaultExtension: 'js'  
                }  
            },  
        });  
        System.import('app/main').then(null, console.error.bind(console));  
    </script> }  


One more thing to do is to enable the static file serving. Add this line to startup config method.
app.UseStaticFiles();

Build & run application

Finally, build & run the Application.

Here, we can see our app is working with AngularJS2.


ASP.NET MVC Hosting - HostForLIFEASP.NET :: Introducing Flushing in ASP.Net MVC

clock March 1, 2023 07:53 by author Peter

There are two influential books released by Steve Souders on Web Performance named High Performance Web Sites and Even Faster Web Sites. The conclusion of these books changed the face of the web development and have been codified into several performance analysis tools including Yahoo YSlow and Google PageSpeed.


In the web application development, most web developers follow the recommendations written by the Steve Souders to be implemented. Some are the following:

    You can enable the HTTP Caching and Content Compression easily via a few settings in the Web.Config file.
    Layout pages make it easy to put stylesheets at the top of the page and information about the scripts present at the bottom of the page in a very consistent manner.
    You can get the ability to blend and reduce the assets by the Microsoft.AspNet.Web.Optimization NuGet Package.

Overview
I am describing Flushing in the MVC. So, what is this Flushing? Let's simplify this: Flushing is when the server sends the initial part of the HTML doc to the client before the entire response is ready. Then all main browsers parse the partial response. When it is done successfully, flushing results in a page that loads and feels faster. The key is choosing the right point at which to flush the partial HTML document response. A flush should be done before database queries and web service calls.

What is the Conflict?
In the .NET Framework 1.1, you can use the mechanism to flush a response stream to the client with a simple call to the HttpResponse.Flush(). This works very fine when you start to build the response. The MVC architecture doesn't really allow this command pattern. You can use it in MVC as in the following:
    @{ 
        Response.Flush(); 
    }


You can do this because at first MVC executes the controller before the View execution.

Getting Started
Instal the Optimization package in MVC using the following command in the Package Manager Console:
Install-Package Microsoft.AspNet.Web.Optimization

We can get it by manually executing and flushing the partial results:
    public ActionResult FlushSample() 
    { 
        PartialView("About").ExecuteResult(ControllerContext); 
        Response.Flush(); 
        return PartialView("Basic"); 
    }


If we want to use it in the controller then we can create it as in the following:
    public class ViewController : Controller 
    { 
        public void FlushSample(ActionResult action) 
        { 
            action.ExecuteResult(ControllerContext); 
            Response.Flush(); 
        } 
    }


The FlushSample() method clarifies the intent in the action method. And after in the same class:
    public ActionResult DemoFlush() 
    { 
        FlushSample(PartialView("About"); 
        return PartialView("Basic"); 
    }


We can also use the yield keyword and split the layout file into multiple partial views, as shown in the code below:
    public IEnumerable<ActionResult> DemoFlush() 
    { 
        yield return PartialView("Index"); 
        Thread.Sleep(5000); 
        yield return PartialView("About"); 
        Thread.Sleep(2000); 
        yield return PartialView("Basic"); 
    }


This article described the use of flushing in the MVC. In the future flushing can be used more effectively. Thanks for reading and Stay Updated.


ASP.NET MVC Hosting - HostForLIFEASP.NET :: Display Image From Byte Array In C# and ASP.NET

clock February 22, 2023 06:40 by author Peter

In this tutorial, I am going to explain how to display an image from a byte array in ASP.NET MVC using C# .NET and VB.NET.

  • Open Visual Studio and create a new MVC project.
  • Once the project is loaded, right-click on the Controllers folder and add a new Controller.
  • Create an Images folder in your project and add a sample image.
  • Now, open the DemoController and add the GetImageFromByteArray action method.
  • Within the action method, place the code given below (Below, I have given the entire Controller code).

C#.NET Code
using System;
using System.Collections.Generic;
using System.Linq;
using System.Web;
using System.Web.Mvc;

namespace DemoProject.Controllers
{
    public class DemoController : Controller
    {
        // GET: Demo/GetImageFromByteArray
        public ActionResult GetImageFromByteArray()
        {
            // Get image path
            string imgPath = Server.MapPath("~/images/self-discipline.png");
            // Convert image to byte array
            byte[] byteData = System.IO.File.ReadAllBytes(imgPath);
            //Convert byte arry to base64string
            string imreBase64Data = Convert.ToBase64String(byteData);
            string imgDataURL = string.Format("data:image/png;base64,{0}", imreBase64Data);
            //Passing image data in viewbag to view
            ViewBag.ImageData = imgDataURL;
            return View();
        }
    }
}


VB.NET Code

    Imports System.Collections.Generic
    Imports System.Linq
    Imports System.Web
    Imports System.Web.Mvc

    Namespace DemoProject.Controllers
        Public Class DemoController
            Inherits Controller
            ' GET: Demo/Image
            Public Function GetImageFromByteArray() As ActionResult
                ' Get image path
                Dim imgPath As String = Server.MapPath("~/images/self-discipline.png")
                ' Convert image to byte array
                Dim byteData As Byte() = System.IO.File.ReadAllBytes(imgPath)
                'Convert byte arry to base64string
                Dim imreBase64Data As String = Convert.ToBase64String(byteData)
                Dim imgDataURL As String = String.Format("data:image/png;base64,{0}", imreBase64Data)
                'Passing image data in viewbag to view
                ViewBag.ImageData = imgDataURL
                Return View()
            End Function
        End Class
    End Namespace


Now, let me explain what is there in the code.

  • I read the image from the folder into an imgPath local variable.
  • In the second step, I converted the image into a byte array using the ReadAllBytes method.
  • And then, I converted the byte array into base 64 string format using Convert.ToBase64String method.
  • Now, I have appended data:image/png;base64 at the beginning of the base64 string so that the browser knows that the src attribute value itself contains the image data.
  • Finally, I have assigned this image data in the ViewBag and returned it to the View.

Now, add a new View to the GetImageFromByteArray action method. And add an image view. We can directly assign the image data from ViewBag to src attribute of the image tag like below.
@{
    ViewBag.Title = "Asp.Net MVC Display image from byte array";
}

<h2>Asp.Net MVC Display image from byte array</h2>
<img src="@ViewBag.ImageData">

Output
Now, if you run the program, you can see the output of how to display the image from the byte array.

Now, if you look into the source of the page, you can see the base 64 string rendered as an image.


I hope you learned how to display the image from a byte array in ASP.NET. Please post your comments and feedback below.


ASP.NET MVC Hosting - HostForLIFEASP.NET :: Perform Code First Migration in ASP.Net MVC

clock February 21, 2023 08:19 by author Peter

As you know, we can perform CRUD operations in MVC 5 with an Entity Framework Model and we also work in Paging & Searching in MVC 5. Now, suppose we want to update the database with new details in the Students, Courses and Enrollments entities, then we need to migrate our application.


In that context, you'll learn today to do the Code First Migration in the MVC application. The migration helps you to update and change the data model that you've created for the application and you don't need to re-create or drop your database. So, let's proceed with the following section.

Apply Code First Migration
The data model in the database usually changes after developing the new application. When the data model changes, it becomes out of sync with the database. We've configured our Entity Framework in the app to drop and recreate the data model automatically. When any type of change is done in the entity classes or in the DbContext class, the existing database is deleted and the new database is created that matches the model and sees it with test data.

When the application runs in production, we do not want to loose everything each time we make changes like adding a column. The Code First Migration solved this problem by enabling the code first to update the database instead of dropping or recreating.

Use the following procedure to create a sample of that.

Step 1: Please disable the Database Initializer in the Web.Config file or in the Global.asax file like as in the following:
In Web.Config File:
    <!--<contexts> 
          <context type="Vag_Infotech.DAL.CollegeDbContext, Vag_Infotech"> 
            <databaseInitializer type="Vag_Infotech.DAL.CollegeDatabaseInitializer, Vag_Infotech"></databaseInitializer> 
          </context> 
    </contexts>--> 

In Global.asax File:

    // Database.SetInitializer(new CollegeDatabaseInitializer());


Step 2:
Please change the database name in the Web.Config file like as in the following:
    <connectionStrings>  
      <add name="CollegeDbContext" connectionString="Data Source=(LocalDb)\v11.0;Initial Catalog=VInfotechNew;Integrated Security=SSPI" providerName="System.Data.SqlClient" /> 
    </connectionStrings> 


Step 3: Open the Package Manager Console and enter the following commands:
enable-migration

add-migration InitialCreate


It'll create the Migration folder in your application and Configuration.cs file in it automatically.

You can see the Seed() created in the file and the purpose of this method is to enable the insert or change data after Code First creates or updates the database.

Editing Seed Method
Now, we add new code for updating our data model in this method. When we do not use the migration, the data model is dropped or re-created during the execution of the application each time, but now the data is retained after database changes.

Step 1: Modify your Configuration.cs with the following code:
namespace Vag_Infotech.Migrations 

    using System; 
    using System.Collections.Generic; 
    using System.Data.Entity; 
    using System.Data.Entity.Migrations; 
    using System.Linq; 
    using Vag_Infotech.Models; 
  
    internal sealed class Configuration : DbMigrationsConfiguration<Vag_Infotech.DAL.CollegeDbContext> 
    { 
        public Configuration() 
        { 
            AutomaticMigrationsEnabled = false; 
        } 
  
        protected override void Seed(Vag_Infotech.DAL.CollegeDbContext context) 
        { 
            var New_Students = new List<Student> 
            { 
                new Student{FirstName="Alec",LastName="Michael", 
                    EnrollmentDate=DateTime.Parse("2009-07-01")}, 
                new Student{FirstName="Marie",LastName="Jane", 
                    EnrollmentDate=DateTime.Parse("2009-07-01")}, 
                new Student{FirstName="Peter",LastName="Parker", 
                    EnrollmentDate=DateTime.Parse("2009-07-05")}, 
                new Student{FirstName="Tony",LastName="Stark", 
                    EnrollmentDate=DateTime.Parse("2009-10-01")}, 
                new Student{FirstName="Steve",LastName="Rogers", 
                    EnrollmentDate=DateTime.Parse("2010-07-01")}, 
                new Student{FirstName="Natasha",LastName="Romanoff", 
                    EnrollmentDate=DateTime.Parse("2010-07-10")}, 
                new Student{FirstName="Bruce",LastName="Banner", 
                    EnrollmentDate=DateTime.Parse("2009-09-01")}, 
                new Student{FirstName="Scott",LastName="Lang", 
                    EnrollmentDate=DateTime.Parse("2009-08-05")}, 
            }; 
            New_Students.ForEach(ns => context.Students.AddOrUpdate(p => p.LastName, ns)); 
            context.SaveChanges(); 
  
            var New_Courses = new List<Course> 
            { 
                new Course{CourseID=201,Name="MCA",Credit=3,}, 
                new Course{CourseID=202,Name="M.Sc.IT",Credit=2,}, 
                new Course{CourseID=203,Name="M.Tech.CS",Credit=2,}, 
                new Course{CourseID=204,Name="M.Tech.IT",Credit=4,} 
            }; 
            New_Courses.ForEach(ns => context.Courses.AddOrUpdate(p => p.Name, ns)); 
            context.SaveChanges(); 
  
            var New_Enrollments = new List<Enrollment> 
            { 
                new Enrollment{ 
                    StudentID= New_Students.Single(ns=>ns.FirstName=="
Alec").ID, 
                    CourseID=New_Courses.Single(nc=>nc.Name=="MCA").CourseID, 
                    Grade=StudentGrade.A 
                }, 
                new Enrollment{ 
                    StudentID= New_Students.Single(ns=>ns.FirstName=="
Marie").ID, 
                    CourseID=New_Courses.Single(nc=>nc.Name=="MCA").CourseID, 
                    Grade=StudentGrade.A 
                }, 
                new Enrollment{ 
                    StudentID= New_Students.Single(ns=>ns.FirstName=="
Marie").ID, 
                    CourseID=New_Courses.Single(nc=>nc.Name=="M.Tech.IT").CourseID, 
                    Grade=StudentGrade.B 
                }, 
                new Enrollment{ 
                    StudentID= New_Students.Single(ns=>ns.FirstName=="
Peter").ID, 
                    CourseID=New_Courses.Single(nc=>nc.Name=="M.Sc.IT").CourseID, 
                    Grade=StudentGrade.A 
                }, 
                new Enrollment{ 
                    StudentID= New_Students.Single(ns=>ns.FirstName=="
Tony").ID, 
                    CourseID=New_Courses.Single(nc=>nc.Name=="MCA").CourseID, 
                    Grade=StudentGrade.A 
                }, 
                new Enrollment{ 
                    StudentID= New_Students.Single(ns=>ns.FirstName=="
Tony").ID, 
                    CourseID=New_Courses.Single(nc=>nc.Name=="M.Sc.IT").CourseID, 
                    Grade=StudentGrade.B 
                }, 
                new Enrollment{ 
                    StudentID= New_Students.Single(ns=>ns.FirstName=="
Steve").ID, 
                    CourseID=New_Courses.Single(nc=>nc.Name=="M.Tech.IT").CourseID, 
                    Grade=StudentGrade.A 
                }, 
                new Enrollment{ 
                    StudentID= New_Students.Single(ns=>ns.FirstName=="
Natasha").ID, 
                    CourseID=New_Courses.Single(nc=>nc.Name=="MCA").CourseID, 
                    Grade=StudentGrade.B 
                }, 
                new Enrollment{ 
                    StudentID= New_Students.Single(ns=>ns.FirstName=="Bruce").ID, 
                    CourseID=New_Courses.Single(nc=>nc.Name=="M.Tech.IT").CourseID, 
                    Grade=StudentGrade.B 
                }, 
                new Enrollment{ 
                    StudentID= New_Students.Single(ns=>ns.FirstName=="
Scott").ID, 
                    CourseID=New_Courses.Single(nc=>nc.Name=="MCA").CourseID, 
                    Grade=StudentGrade.A 
                }, 
                new Enrollment{ 
                    StudentID= New_Students.Single(ns=>ns.FirstName=="
Scott").ID, 
                    CourseID=New_Courses.Single(nc=>nc.Name=="M.Tech.IT").CourseID, 
                    Grade=StudentGrade.D 
                }, 
            }; 
  
            foreach (Enrollment et in New_Enrollments) 
            { 
                var NewEnrollDb = context.Enrollments.Where( 
                    ns => ns.Student.ID == et.StudentID && 
                        ns.Course.CourseID == et.CourseID).SingleOrDefault(); 
                if (NewEnrollDb == null) 
                { 
                    context.Enrollments.Add(et); 
                } 
            } 
            context.SaveChanges(); 
        } 
    } 
}


In the code above the Seed() takes the context object as an input argument and in the code the object is used to add the entities to the database. We can see how the code creates the collection for the database for each entity type and then saves it by SaveChanges() and adds it through the DbSet property. It is not necessary to call the SaveChanges() after each group of entities.

Step 2: Build the solution.

Migration Executing

Step 1: Enter the following command in the Package Manager Console:

update-database

Step 2: Run the application and see the changes in the Students link.


ASP.NET MVC Hosting - HostForLIFEASP.NET :: Smooth Fight Between Web API And ASP.NET MVC API

clock February 14, 2023 08:59 by author Peter

Yesterday, I discussed with one of my friends and the topic was why choosing Web API for the service instead of ASP.NET MVC API. It was very interesting topic for me. At the end of the topic, what I learned, I am going to explain one by one.


Web API: It is a part of ASP.NET Framework to build and deploy the REST services on HTTP protocol and accessible to wide range of devices.

ASP.NET MVC API: When I am talking about ASP.NET MVC API, It means, it is also an API but creating with ASP.NET MVC application. I mean to say both view and data in the same project.

When you develop your web application using the MVC, many developers get confused between Web API and ASP.NET MVC. They are confused about which one will be better and how.

View and Data
As we all know Web API is used to create the fully REST service which is exposed only on HTTP protocol, so only HTTP enabled client is able to access the Web API service. Web API only returns data not view. There is not any graphical user interface to represent the data. Client can get the data and present it on their view.

But if you create the API using the ASP.NET MVC then you will be able to create view as well as return data. It means ASP.NET MVC APIs return data and represent this data on their view.

So, if you are going to create API which will be going to return only data then you need to prefer Web API otherwise it is good to go with ASP.NET MVC API.

Content Negotiation
Web API supports one of the most important features in API world and that is Content Negotiation. Web API decides and return best response format data that is acceptable by client very easily. The data format can be XML, JSON, ATOM or any other format data. But with ASP.NET MVC API, if we want the data in JSON, you need to cast your data.

Web API also supports self hosting with any ASP.NET application. So, if you think that your client application is not in ASP.NET MVC then you should always prefer to create your API in Web API.

But if you use ASP.NET MVC to create API then you cannot use self hosting feature with this application.

ASP.NET Web API
    public class EmployeeController: ApiController 
    { 
        // GET: /Api/Employees/ 
        public List < Employee > Get() 
        { 
            return EmployeeMaster.GetEmployees(); 
        } 
    } 

ASP.NET MVC API
    public class EmployeeController: Controller 
    { 
        // GET: /Employees/ 
        [HttpGet] 
        public ActionResult Index() 
        { 
            return Json(EmployeeMaster.GetEmployees(), JsonRequestBehavior.AllowGet); 
        } 
    } 

Standalone Service Layer
As we all know that ASP.NET Web API is part of ASP.NET framework. But the features of the Web API like filters, routing, model binding, etc. are totally different from ASP.NET MVC API because of ASP.NET Web API in System.Web.Http namespace but ASP.NET MVC API resides in System.Web.MVC. So, we can say that Web API is standalone and used with any other application which supports HTTP protocol.

So, Web API creates a service layer for the service. You can use HttpClient to access the Web API inside the ASP.NET MVC controller.

SoC [Separation of Concerns]
As we know APIs should be single entity over the internet for more flexibility and better accessibility. Web API separates your API from your project which contains static file and html pages. If you create your API with ASP.NET MVC API then you need to settle View, Partial View, Html helpers with APIs. So, it makes your APIs more complex as compared to Web API.

So, if you are not isolating API from your project then it is not best practice to keep the API and front end in the same project.

Performance
If you create your API using the ASP.NET MVC API then you will pay the performance issue with your API. I have seen that standalone API which is hosted on console apps are nearly 40 or more than 40% faster as compared to API which is created using ASP.NET MVC.

Web API is very light weight as compared to ASP.NET MVC API. So, using Web API increases the performance of the application when getting the data.

Authorization
If you are going to implement the authorization filters in your Web API then you just need to create only one filter for Authorization.
But when you mix MVC and Web API in the same project, then it is being tough and you need to create authorization filters for both.

Request Mapped
As you know Web API uses some HTTP verbs for CRUD operation and it is auto mapped with these verbs. But ASP.NET MVC is mapped with their action.

Which one is best choice?
So, finally as per my opinion the best thing is that Web API is a good choice when you are going to create standalone fully REST Service, but it is your project requirement to return data and represent it on View in same application. Then you should go with ASP.NET MVC API.

One more reason to choose Web API is that it provides us high performance in low cost as compared to ASP.NET MVC API.

So, finally as per my opinion ASP.NET Web API is the best instead of ASP.NET MVC API. But I suggest you need to try and see which one is better and why. You can add any other points which I left. You are most welcomed.


ASP.NET MVC Hosting - HostForLIFEASP.NET :: Getting Started With ASP.NET Core 7.0 MVC

clock February 10, 2023 07:32 by author Peter

In this article, I am going to explain Asp.Net Core 7.0 MVC, Asp.net Core MVC features. The Latest version of Asp.Net Core MVC is Asp .Net Core 7.0 MVC and how to create a simple ASP.NET Core 7.0 MVC application and run.


ASP .NET Core 7.0 MVC version was released on November 08, 2022. Visual Studio 2022 version 17.4.0 is required to develop ASP.Net Core 7.0 MVC web application. It focuses on being unified, modern, simple, and first. Asp.NET Core 7.0 MVC will be supported for only 18 months as standard-term support (STS).

Some New Features of Asp.Net Core 7.0 MVC
When using null state checking, Nullable page and view models are now supported to improve the experience.
Improvements to endpoint routing, link generation, and parameter binding.
Various improvements to the Razor compiler to improve performance.
The IParsable<TSelf>.TryParse using in MVC & API supports binding controller action parameter values.

What is Asp.Net Core MVC?
The ASP.NET Core MVC framework is a lightweight, open source, highly testable presentation framework for building web apps and APIs using the Model-View-Controller design pattern.

It is an architectural pattern that separates the representation and user interaction. It is divided into three sections Model, View, and Controller; this is called separation of concerns.

Model
It represents the real world object and provides data to the view. It is a set of classes that describes the business logic. Also defines business rules for data means how the data can be changed and manipulated.

View
The view is responsible for looking and feel. It represents the UI components like CSS, JQuery, and Html etc. It is only responsible for displaying the data that is received from the controller as the result.

Controller

The controller is responsible to take the end user request and load the appropriate “Model” and “View”.

Note

  • User interacts with the controller.
  • There is one-to-many relationship between controller and view means one controller can mapped to multiple views.
  • Controller and view can talk to each other.
  • Model and view can not talk to each other directly. They communicate to each other with the help of controller.

Prerequisites

    Install Visual Studio 2022 updated version 17.4.0
    Install .NET SDK 7.0

Connect To Visual Studio 2022 Community Edition and Create Your First Project

Step 1
First, install Visual Studio 2022 in your system.

Step 2
Go to all programs in your systems, we can see Visual Studio 2022 and Visual Studio Installer.

Step 3
Double-click on Visual Studio 2022 and it will open. It looks like the below screenshot. Opening it the first time it will take few time.


Creating Your First Project
Click on; create a new Project to create a new project.


You can see various project types there. Choose “Asp.Net Core Web App (Model-View-Controller)” project type for now.
Select Asp.Net Core Web App (Model-View-Controller), and then click Next.

Give a valid name to your project and select a path for it. Then click Next button.


Now, Select framework .NET 7.0 (Standard Term Support). You can select the Authentication Type as None. You can select Configure for HTTPS based on your need.If you need Docker in your project then Select Enable Docker.

Uncheck Do not use top-level statements.

Then click the create button.

Asp.Net Core 7.0 MVC Web application created and project structure is shown below,

Program.cs file looks like the below.

The Project.cspoj file looks like the below. Where you can see the target Framework net7.0, by default Nullanle and ImplicitUsings are enabled.


I have made some minor changes in the Index.cshtml view pages.


Now, build and Press Ctrl+F5 to run without the debugger.
If, Visual Studio displays the following dialog:

Select Yes if you trust the IIS Express SSL certificate.
If Again, The below dialog is displayed:

Select Yes if you agree to trust the development certificate.


ASP.NET MVC Hosting - HostForLIFEASP.NET :: Action Filter In MVC

clock February 2, 2023 08:27 by author Peter

Action filter in MVC provides the option to handle the scenarios when we would like to perform an operation before and after the execution of a controller action. For this purpose, we create a custom class, which inherits the FilterAttribute class and implements the IActionFilter interface. After creating the filter, we simply apply the class name as an attribute on the controller.
 

Here, the FilterAttribute class makes it possible to use the class as an attribute and IActionFilter interface contains two methods named OnActionExecuting and OnActionExecuted. The OnActionExecuting is executed before the controller method is executed and OnActionExecuted is called after the execution of the controller method. This kind of technique is quite helpful for the logging purposes. Thus, let's see how we can use this filter.
 
Let's start by adding a new class named MyActionFilter.cs. Now, derive this class from the FilterAttribute and the IActionFilter. Implement the  OnActionExecuting and OnActionExecuted methods and add your custom logic into the methods.Thus, the code will look as shown below.  
    public class MyActionFilter : FilterAttribute, IActionFilter 
    { 
        public void OnActionExecuted(ActionExecutedContext filterContext) 
        { 
            //Fires after the method is executed 
        } 
     
        public void OnActionExecuting(ActionExecutingContext filterContext) 
        { 
            //Fires before the action is executed 
        } 
    } 


Simply, apply the class as an attribute on the controller. Add debuggers on both the methods as well as the controller method.
    public class HomeController : Controller 
    { 
        [MyActionFilter] 
        public ActionResult Index() 
        { 
            return View(); 
        } 
     
        public ActionResult About() 
        { 
            ViewBag.Message = "Your application description page."; 
            return View(); 
        } 
     
        public ActionResult Contact() 
        { 
            ViewBag.Message = "Your contact page."; 
            return View(); 
        } 
    } 


Run the Application and debug step by step to see the order of execution of the methods. First, the OnActionExecuting will be executed, then the controller method and finally the OnActionExecuted method.


ASP.NET MVC Hosting - HostForLIFEASP.NET :: Generate QR Code In ASP.NET Core MVC

clock January 24, 2023 10:16 by author Peter

In this article, we are going to create an ASP.Net Core MVC application that generates QR Code for different purposes like Email, Website, Bookmark Websites, SMS, WhatsApp, etc. For this, we are going to use NuGet package called QRCoder.

About QRCoder NuGet Package
QRCoder is a simple library, written in C#.NET, which enables you to create QR codes. It hasn't any dependencies on other libraries and is available as .NET Framework and .NET Core PCL version on NuGet.

QRCoder provides many types of QR Codes but in this article, I will use only the following types.

    URL
    Bookmark Website
    Send SMS
    Send WhatsApp Message
    Compose Email
    Connect To WIFI

Create ASP.Net Core MVC project.

Step 1
Open Visual Studio and click on Create New Project.

Step 2
Select ASP.NET CORE Web App (Model-View-Controller) Template as shown in the below image and click on next button.

Step 3
Configure your project by specifying the name of the project and the location where you want to save your project.

Step 4
Select the version of the .Net Core framework you want to use and click on create button.
Add New Controller

Step 1
Right Click on Controller Folder then click on Add then Controller.

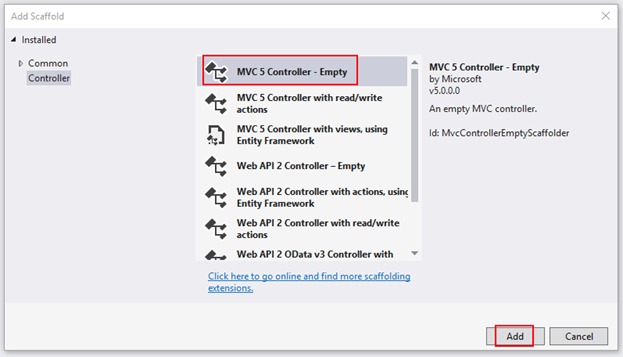
Step 2
Select MVC Empty Controller. And give a name whatever you want here I gave QRCode.


Add NuGet Package
Step 1
Right click on your project and then click on Manage NuGet Packages.

Step 2
Search for QRCoder in browse tab.

Step 3
Click on the install button and it will install in your project.

Create a new Model Class
For transferring data from controller to view and view to controller we have to use model class.

Step 1

For creating a model right click on the Model folder and click on Add then class.

Step 2
Give a suitable name for your class, Here I gave QRCodeModel.

Step 3
Create required properties in your class. As you can see in the below code I have created different properties for different types of QR Codes.
public class QRCodeModel {
    public int QRCodeType {
        get;
        set;
    }
    public string QRImageURL {
        get;
        set;
    }
    //for bookmark qr code
    public string BookmarkTitle {
        get;
        set;
    }
    public string BookmarkURL {
        get;
        set;
    }
    // for email qr codes
    public string ReceiverEmailAddress {
        get;
        set;
    }
    public string EmailSubject {
        get;
        set;
    }
    public string EmailMessage {
        get;
        set;
    }
    //for sms qr codes
    public string SMSPhoneNumber {
        get;
        set;
    }
    public string SMSBody {
        get;
        set;
    }
    //for website
    public string WebsiteURL {
        get;
        set;
    }
    // for whatsapp qr message code
    public string WhatsAppNumber {
        get;
        set;
    }
    public string WhatsAppMessage {
        get;
        set;
    }
    // for wifi qr code
    public string WIFIName {
        get;
        set;
    }
    public string WIFIPassword {
        get;
        set;
    }
}


Design View

Step 1
Create an action method in your controller as you want. Here I used the index action method.

Step 2

Right-click on the action method and click on Add View to add a new view.

Step 3
Return the model from the controller which you have created. If you want to pass some extra data you can pass it. Here as you see in the below code I just created object of model and pass that model to view.
public IActionResult Index() {
    QRCodeModel model = new QRCodeModel();
    return View(model);
}


Step 4
Design your view as per your requirements.
@model QRCodeModel
@{
    ViewData["Title"] = "Generate QR Code";
}

<form asp-action="Index">

    <div class="row mt-2">
        <div class="col-lg-6 col-md-6 col-sm-12">
            <label>Select QR Code Type</label>
            <select asp-for="QRCodeType" id="QRCodeType" class="form-control" onchange="onQRCodeTypeChange()">
                <option value="1">Website</option>
                <option value="2">Bookmark URL</option>
                <option value="3">SMS</option>
                <option value="4">WhatsApp</option>
                <option value="5">Email</option>
                <option value="6">WIFI</option>
            </select>
        </div>
    </div>

    <!--  Website  -->
    <div class="row mt-2 hideDiv" id="DIV1">
        <div class="col-lg-6 col-md-6 col-sm-12">
            <label>Enter your website URL</label>
            <input autocomplete="off" type="url" asp-for="WebsiteURL" class="form-control" />
        </div>
    </div>

    <!-- Book Mark URL   -->
    <div class="row mt-2 hideDiv" id="DIV2">
        <div class="col-lg-6 col-md-6 col-sm-12">
            <label>Enter your URL</label>
            <input type="url" asp-for="BookmarkURL" class="form-control" autocomplete="off" />
        </div>
    </div>

    <!--  SMS  -->
    <div id="DIV3" class="hideDiv">
        <div class="row mt-2">
            <div class="col-lg-6 col-md-6 col-sm-12">
                <label>Enter Phone Number with country code(eg. +91)</label>
                <input type="text" asp-for="SMSPhoneNumber" class="form-control" autocomplete="off" />
            </div>
        </div>
        <div class="row mt-2">
            <div class="col-lg-6 col-md-6 col-sm-12">
                <label>Enter your Message</label>
                <textarea asp-for="SMSBody" class="form-control"></textarea>
            </div>
        </div>
    </div>

    <!--  Whats App Message  -->
    <div id="DIV4" class="hideDiv">
        <div class="row mt-2">
            <div class="col-lg-6 col-md-6 col-sm-12">
                <label>Enter WhatsApp Number with country code(eg. +91)</label>
                <input type="text" asp-for="WhatsAppNumber" class="form-control" autocomplete="off" />
            </div>
        </div>
        <div class="row mt-2">
            <div class="col-lg-6 col-md-6 col-sm-12">
                <label>Enter your Message</label>
                <textarea asp-for="WhatsAppMessage" class="form-control"></textarea>
            </div>
        </div>
    </div>

    <!--  Compose Email  -->
    <div id="DIV5" class="hideDiv">
        <div class="row mt-2">
            <div class="col-lg-6 col-md-6 col-sm-12">
                <label>Enter Receive's Email Address</label>
                <input type="text" asp-for="ReceiverEmailAddress" class="form-control" autocomplete="off" />
            </div>
        </div>
        <div class="row mt-2">
            <div class="col-lg-6 col-md-6 col-sm-12">
                <label>Enter Email Subject</label>
                <input type="text" asp-for="EmailSubject" class="form-control" autocomplete="off" />
            </div>
        </div>
        <div class="row mt-2">
            <div class="col-lg-6 col-md-6 col-sm-12">
                <label>Enter Email Message</label>
                <textarea asp-for="EmailMessage" class="form-control"></textarea>
            </div>
        </div>
    </div>

    <!--   WIFI   -->
    <div id="DIV6" class="hideDiv">
        <div class="row mt-2">
            <div class="col-lg-6 col-md-6 col-sm-12">
                <label>Enter WIFI Name</label>
                <input type="text" asp-for="WIFIName" class="form-control" autocomplete="off" />
            </div>
        </div>
        <div class="row mt-2">
            <div class="col-lg-6 col-md-6 col-sm-12">
                <label>Enter WIFI Password</label>
                <input type="text" asp-for="WIFIPassword" class="form-control" autocomplete="off" />
            </div>
        </div>
    </div>

    <div class="row mt-2">
        <div class="col-lg-6 col-md-6 col-sm-12">
            <button type="submit" class="btn btn-primary">Generate</button>
            <button type="reset" class="btn btn-secondary">Reset</button>
        </div>
    </div>

    @if (!string.IsNullOrEmpty(Model.QRImageURL))
    {
        <div class="row mt-2" id="qrCodeImage">
            <div class="col-lg-6 col-md-6 col-sm-12">
                <img height="250" width="250" src="@Model.QRImageURL" />
            </div>
        </div>
    }

</form>

@section Scripts{

    <script>
        $(document).ready(function () {
            $("#QRCodeType").trigger("change");
        });

        function onQRCodeTypeChange() {
            let qrcodeType = $("#QRCodeType").val();
            $(".hideDiv").hide();
            $("#DIV" + qrcodeType).show();
        }
    </script>
}


Code Explanation
As you can see in the above HTML code I created inputs as per my properties.

Here I add drop-down for QR Code type and based on that type I show and hide DIV of codes.
<div class="row mt-2">
  <div class="col-lg-6 col-md-6 col-sm-12">
    <label>Select QR Code Type</label>
    <select asp-for="QRCodeType" id="QRCodeType" class="form-control" onchange="onQRCodeTypeChange()">
      <option value="1">Website</option>
      <option value="2">Bookmark URL</option>
      <option value="3">SMS</option>
      <option value="4">WhatsApp</option>
      <option value="5">Email</option>
      <option value="6">WIFI</option>
    </select>
  </div>
</div>

For different types of QR Codes, I have created different div and gave an id to that div same as I gave the value in dropdown. Also gave same class name to all div.

At bottom, there are two buttons for submitting and resetting page.

Below button, there is an image that shows QR Code Image when the view return from controller after generating QR Code. Here we directly pass QR Code Image as base64 string instead of saving image and then show it on view side.
@if (!string.IsNullOrEmpty(Model.QRImageURL))
{
    <div class="row mt-2" id="qrCodeImage">
        <div class="col-lg-6 col-md-6 col-sm-12">
            <img height="250" width="250" src="@Model.QRImageURL" />
        </div>
    </div>
}


At last, there is JavaScript code in the Scripts section which contain a function called onQRCodeTypeChange which gets value of QR Code Type drop-down then hide all the divs and only show which has id same as drop down value.
function onQRCodeTypeChange() {
    let qrcodeType = $("#QRCodeType").val();
    $(".hideDiv").hide();
    $("#DIV" + qrcodeType).show();
}


On the document ready event I triggered the change event of QR Code type drop-down.
$(document).ready(function() {
    $("#QRCodeType").trigger("change");
});

Code for Generate QR Code
Create post action method in your controller to post data from form. In this method, we are going to generate QR Code as per its type.
[HttpPost]
public IActionResult Index(QRCodeModel model) {
    Payload payload = null;
    switch (model.QRCodeType) {
        case 1: // website url
            payload = new Url(model.WebsiteURL);
            break;
        case 2: // bookmark url
            payload = new Bookmark(model.BookmarkURL, model.BookmarkURL);
            break;
        case 3: // compose sms
            payload = new SMS(model.SMSPhoneNumber, model.SMSBody);
            break;
        case 4: // compose whatsapp message
            payload = new WhatsAppMessage(model.WhatsAppNumber, model.WhatsAppMessage);
            break;
        case 5: //compose email
            payload = new Mail(model.ReceiverEmailAddress, model.EmailSubject, model.EmailMessage);
            break;
        case 6: // wifi qr code
            payload = new WiFi(model.WIFIName, model.WIFIPassword, WiFi.Authentication.WPA);
            break;
    }
    QRCodeGenerator qrGenerator = new QRCodeGenerator();
    QRCodeData qrCodeData = qrGenerator.CreateQrCode(payload);
    QRCode qrCode = new QRCode(qrCodeData);
    var qrCodeAsBitmap = qrCode.GetGraphic(20);
    // use this when you want to show your logo in middle of QR Code and change color of qr code
    //Bitmap logoImage = new Bitmap(@"wwwroot/img/Virat-Kohli.jpg");
    //var qrCodeAsBitmap = qrCode.GetGraphic(20, Color.Black, Color.Red, logoImage);
    string base64String = Convert.ToBase64String(BitmapToByteArray(qrCodeAsBitmap));
    model.QRImageURL = "data:image/png;base64," + base64String;
    return View("Index", model);
}
private byte[] BitmapToByteArray(Bitmap bitmap) {
    using(MemoryStream ms = new MemoryStream()) {
        bitmap.Save(ms, ImageFormat.Png);
        return ms.ToArray();
    }
}

Step 1
Create a new object of QRCodeGenerator class.
QRCodeGenerator qrGenerator = new QRCodeGenerator();

Step 2

Call the CreateQrCode method using this object and pass payload in its constructor. Payload is an object of PayloadGenerator.Payload type. There are different payload types as per QR Code types. We will discuss different types of payload later in this article.
QRCodeData qrCodeData = qrGenerator.CreateQrCode(payload);

Step 3
Create object of QRCode type and Pass QR Data object to its constructor.
QRCode qrCode = new QRCode(qrCodeData);

Step 4
Call GetGraphic method of this QR Code object which take one integer parameter which define pixels per module.
var qrCodeAsBitmap = qrCode.GetGraphic(20);

There are also some overloaded methods using which you can change the color of QR Code and also set logo in QR Code.
// use this when you want to show your logo in middle of QR Code and change color of qr code
Bitmap logoImage = new Bitmap(@"wwwroot/img/Peter.jpg");
var qrCodeAsBitmap = qrCode.GetGraphic(20, Color.Black, Color.Red, logoImage);

Step 5
GetGraphic method return bitmap image as return type. You can save this image in your local path but here I convert this bitmap image to byte array and then convert this byte array to base64 string which I’m going to bind in QRImageURL property and pass it to the view so user can view this QR Code.
string base64String = Convert.ToBase64String(BitmapToByteArray(qrCodeAsBitmap));
model.QRImageURL = "data:image/png;base64," + base64String;

For converting bitmap to byte first convert it to memory stream and then get byte array from this stream in user define method BitmapToByteArray. As you can see in below code.
private byte[] BitmapToByteArray(Bitmap bitmap) {
    using(MemoryStream ms = new MemoryStream()) {
        bitmap.Save(ms, ImageFormat.Png);
        return ms.ToArray();
    }
}


Step 6
Return view data after generating QR Code so user can see Generated QR Code in their browser.
Followings are different payload type which is used in this article.
Payload payload = null;

URL Payload
To generate QR Code that opens URL or any Website QRCoder provider payload type of URL class.

This class takes one argument in its constructor which is URL of website.
payload = new Url(model.WebsiteURL);

Bookmark Payload
To generate QR Code for bookmark type we have to Use Bookmark payload.
Bookmark class’s constructor takes two parameters first is the URL of the website and second is the title of the bookmark.
payload = new Bookmark(model.BookmarkURL, model.BookmarkURL);

SMS Payload

To generate QR Code for composing SMS we have to pass payload of SMS type. QR Code provider SMS class for this type of payload.

SMS class’s constructor takes two parameters first is phone number to whom you want to send the SMS and the second is the message you want to send. Message parameter s optional you can only pass phone number to it.
payload = new SMS(model.SMSPhoneNumber, model.SMSBody);

WhatsApp Message Payload
To generate QR Code that send WhatsApp message we have to pass WhatsAppMessage payload. QRCoder provides WhatsAppMessage class to generate payload.
WhatsAppMessage provides two overloaded methods one only takes one parameter which is message only and second takes two parameter WhatsApp number and message both.
payload = new WhatsAppMessage(model.WhatsAppNumber, model.WhatsAppMessage);

Mail Payload
To generate QR Code which compose email we have to use MAIL payload.

Mail class’s constructor does not required any parameter. It’s all parameters are by default set to null. But here we are going to pass receiver email address, Subject, and body of mail.
payload = new Mail(model.ReceiverEmailAddress, model.EmailSubject, model.EmailMessage);

WiFi Payload
To generate QR Code which connect to WIFI we have to pass data in WIFI payload.
WiFi class’s constructor takes three required parameter wifi name, wifi password, and authentication mode (WEP, WPA, nopass). You can pass any theme but mostly WPA is used in all wifi so here I by default set it.
payload = new WiFi(model.WIFIName, model.WIFIPassword, WiFi.Authentication.WPA);


ASP.NET MVC Hosting - HostForLIFEASP.NET :: Folder Structure Of ASP.NET Core MVC 6.0 Project

clock January 20, 2023 06:25 by author Peter

In this article, I am going to explain to you, the default folder structure of an ASP.NET Core MVC 6.0 web application and describe the purpose of each folder. In my previous article, we created an empty ASP.NET Core MVC 6.0 Project and the structure of the project as shown in the following image.

Let’s start exploring each folder and file that exists in the Project Structure for easy understanding.

Project Folder Structure Description
The details of the default project structure can be seen in the solution explorer, it displays all the projects related to a single solution.


.csproj File

Double click on the project name in Solution Explorer to open .csproj file in the editor. Right-click on the project and then click on Edit Project File in order to edit the .csproj file. As shown in the following image.

Once clicked on Edit Project File, .csproj file will be opened in Visual Studio as shown below.

As you can see the project’s SDK is Microsoft.NET.Sdk.Web. The target framework is net6.0 indicating that we are using .NET 6. Notice the Nullable and ImplicitUsings elements.
The <Nullable> elements decide the project wide behaviour of Nullable of Nullable reference types. The value of enable indicates that the Nullable reference types are enabled for the project.

The < ImplicitUsings > element can be used to enable or disable. When < ImplicitUsings > is set to enable, certain namespaces are implicitly imported for you.

Connected Services
It contains the details about all the service references added to the project. A new service can be added here, for example, if you want to add access to Cloud Storage of Azure Storage you can add the service here. As shown in the following image.

Dependencies
The Dependencies node contains all the references of the NuGet packages used in the project. Here the Frameworks node contains reference two most important dotnet core runtime and asp.net core runtime libraries. Project contains all the installed server-side NuGet packages, as shown below.


Properties
Properties folder contains a launchSettings.json file, which containing all the information required to lunch the application. Configuration details about what action to perform when the application is executed and contains details like IIS settings, application URLs, authentication, SSL port details, etc.


WWWroot
This is the webroot folder and all the static files required by the project are stored and served from here. The webroot folder contains a sub-folder to categorize the static file types, like all the Cascading Stylesheet files, are stored in the CSS folder, all the javascript files are stored in the js folder and the external libraries like bootstrap, jquery are kept in the library folder.

Generally, there should be separate folders for the different types of static files such as JavaScript, CSS, Images, library scripts, etc. in the wwwroot folder as shown below.

Controllers
Controller handles all the incoming requests. All the controllers needed for the project are stored here. Controllers are responsible for handling end user interaction, manipulating the model and choose a view to display the UI. Each controller class inherits a Controller class or ControllerBase class. Each controller class has “Controller” as a suffix on the class name, for example, the default “HomeController.cs” file can be found here. As shown below.

Models
A Model represents the data of the application and a ViewModel represents data that will be displayed in the UI. The models folder contains all the domain or entity classes. Please note user can add folders of his choice to create logical grouping in the project.

Views
A view represents the user interface that displays ViewModel or Model data and can provide an option to let the user modify them. Mostly a folder in name of the controller is created and all the views related to it are stored in it. Here HomeController related view Index.cshtml and Privacy.cshtml is stored in Home folder and all the shared view across the application is kept in Shared folder. Under this shared folder there are _Layout.cshtml, _ValidationScriptsPartial.cshtml and Error.cshtml view files. There are two more view files, _ViewImports.cshtml and _ViewStart.cshtml under the view folder.

appsettings.json
This file contains the application settings, for example, configuration details like logging details, database connection details.


Program.CS
This class is the entry point of the web application. It builts the host and executes the run method.

I hope the article helped you to understand ASP.NET Core MVC 6.0 Project Structure.

Conclusion
In this article we explained, the folder structure of ASP.NET Core MVC 6.0 application. I hope this article is useful to understand.


ASP.NET MVC Hosting - HostForLIFEASP.NET :: ASP.NET MVC 5 With Entity Framework And MySQL

clock January 17, 2023 07:46 by author Peter

We know how to use Code First Migration in SQL Server. But in most cases, a customer will think we can use it for the open source database. So that’s the reason we pick the “MySQL” database, and we can follow the same steps we follow in the “SQL” database. In this article, we are going to explain Code First Migration in ASP.NET MVC 5 with Entity FrameWork & MySQL.

Create a Web Application using MVC 5
Click on File -> New -> Project -> Visual C# -> Web -> ASP.Net Web Application ( .Net Framework ).


Click on “OK” then click on “MVC”.
 
Install Entity Framework & MySQL Entity
Go to Visual Studio “Tools -> NuGet Package Manager -> Manage Nuget Packages for Solution” or right click on your web application then click on “Manage NuGet Packages”.
 
EntityFramework
Search EntityFramework in the “Browse” Section.

Once we installed EntityFramework & MySql Entity in our application then it will generate a SQL and MySQL Provider inside the EntityFramework Section in Web.Config.
    <entityFramework> 
        <defaultConnectionFactory type="System.Data.Entity.Infrastructure.SqlConnectionFactory, EntityFramework" /> 
        <providers> 
          <provider invariantName="System.Data.SqlClient" type="System.Data.Entity.SqlServer.SqlProviderServices, EntityFramework.SqlServer" /> 
          <provider invariantName="MySql.Data.MySqlClient" type="MySql.Data.MySqlClient.MySqlProviderServices, MySql.Data.Entity.EF6, Version=6.8.8.0, Culture=neutral, PublicKeyToken=c5687fc88969c44d"></provider></providers>   
      </entityFramework> 

Model Class
We just created a sample model class for demo purposes.
    using System; 
    using System.Collections.Generic; 
    using System.Linq; 
    using System.Web; 
      
    namespace WebAppWithMySql.Models 
    { 
        public class Student 
        { 
            public int Id { get; set; } 
      
            public string Name { get; set; } 
      
            public string Password { get; set; } 
        } 
    } 


Creation of DBContext

Create a db context class in our application. The following dbcontext will point out our connection string in WebConfig.
    using MySql.Data.Entity; 
    using System.Data.Entity; 
    using WebAppWithMySql.Models; 
      
    namespace WebAppWithMySql 
    { 
        [DbConfigurationType(typeof(MySqlEFConfiguration))] 
        public class WebAppContext : DbContext 
        { 
            public DbSet<Student> Products 
            { 
                get; 
                set; 
            } 
            public WebAppContext() 
                //Reference the name of your connection string ( WebAppCon ) 
                : base("WebAppCon") { } 
        } 
    } 


Connection String
We added the same connection string name that we added in the dbcontext class. The following connection string represents “MySql” Db.
    <connectionStrings> 
        <add name="WebAppCon" providerName="MySql.Data.MySqlClient" connectionString="server=localhost;userid=root;password=peter123;database=WebAppMySql;persistsecurityinfo=True" /> 
      </connectionStrings> 


Migration Steps

Go to Visual Studio "Tools -> NuGet Package Manager -> Package Manager Console". Then execute the following command.
    Enable-Migrations – ( We need to enable the migration, only then can we do the EF Code First Migration ).
    Add-Migration IntialDb (migration name) – ( Add a migration name and run the command ).
    Update-Database -Verbose — if it is successful then we can see this message (Running Seed method).

Once Migration is done; then, we can see that the respective files are auto-generated under the “Migrations” folder.

Output


About HostForLIFE

HostForLIFE is European Windows Hosting Provider which focuses on Windows Platform only. We deliver on-demand hosting solutions including Shared hosting, Reseller Hosting, Cloud Hosting, Dedicated Servers, and IT as a Service for companies of all sizes.

We have offered the latest Windows 2019 Hosting, ASP.NET 5 Hosting, ASP.NET MVC 6 Hosting and SQL 2019 Hosting.


Tag cloud

Sign in