There are a ton of in-app notifications, everyone uses a ton of websites and apps every day, communication is crucial in today's fast-paced environment. But those in-app alerts won't appear until we launch the program. Therefore, adding SMS functionality to projects could greatly increase user interaction and engagement. Among other communication services, Twilio, a well-known cloud communications company, offers developers a robust API that makes it simple to send and receive SMS texts.

This post will explain how to incorporate Twilio into a C# MVC project from scratch in order to send SMS. So let's get started on the project by first creating a Twilio account.
Setting up a Twilio account
To set up a Twilio account, we will first sign up, and that's quite easy. If you already have a Twilio account, you can skip step 1 and just follow from step 2.
Step 1. Sign Up in Twilio
Sign up by filling in the basic details on the following link - www.twilio.com. By clicking on "Continue," you will be redirected to another page to verify your email. Once the email is verified, you will need to verify your phone number as well. After that, you will be redirected to another page that will provide a recovery code. Please copy the code and keep it somewhere safe for future use.
Step 2. Log in to Twilio
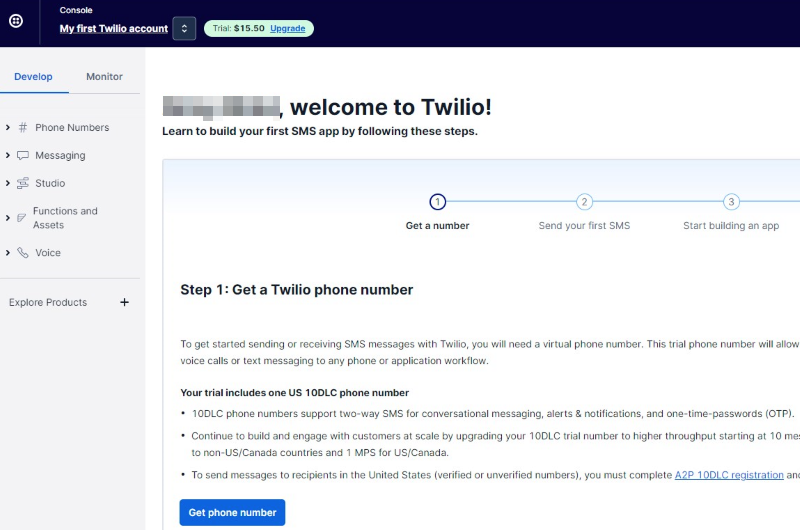
If you are logging in for the first time, Twilio will ask you a few questions. Just answer them, and it will take you to the dashboard, which will look like below.

Step 3. Get the Phone Number
Click on the "Get Phone Number" button, and you will receive the number. Before purchasing their plan, your account will be a trial account, and the number given to you will be a trial number.

Step 4. Get SID and Auth Token
In the same screen, you will have a section named "Account Info", where you will following information -Account SID, Auth Token, and My Twilio phone number, which we will be using during development.

Step 5. Verify Phone Numbers
This step is only for trial account users. Since it is a trial account, you will need to verify the numbers on which you want to send the SMS using your project. You can skip this step if you have purchased a Twilio SMS plan. To verify numbers, follow the following steps.
- Click on the verified phone numbers link. You will be redirected to another page.
- Click on the "Add a new caller ID" button in the right corner. A popup will open to add the number.
- Select the country, number, and mode through which you want to verify the number.
- Click verify the number, you will get an OTP on the number you just entered.
- Enter the OTP to verify the number and it will be shown in verified caller IDs.
Now that you have set up the Twilio account. Let's move to the project.
Setting up the project
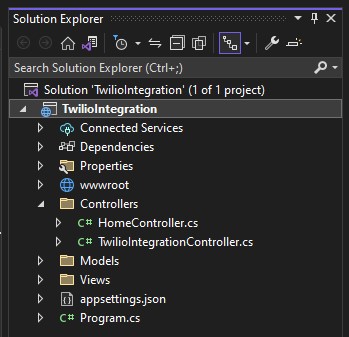
You can either create a new project or you can integrate Twilio into an existing project. Here, I have created a demo project to integrate Twilio in it and created a Controller named "TwilioIntegrationController". In this controller, I will be writing Twilio-related code. Let's move to the project.

Step 1. Install dependencies
To be able to integrate Twilio in the project, you will need some dependencies, that will help Twilio run.
- Click on Tools.
- Select "Nuget Package Manager".
- Click "Manage Nuget Package for solution".
- In the Browse section, search for Package "Twilio" and install the solution.
- Then, search "Twilio.AspNet.Mvc" and install it too.
Now that you have installed all the necessary dependencies. Let's move to the next step.
Step 2. Code to Send SMS
In the "TwilioIntegrationController", write your code for sending SMS. Here, I am putting all my code in one file. But you should put the necessary code where it should be.
using Microsoft.AspNetCore.Mvc;
using Twilio;
using Twilio.Rest.Api.V2010.Account;
namespace TwilioIntegration.Controllers
{
public class TwilioIntegrationController : Controller
{
[Route("send-SMS")]
public IActionResult SendSMS()
{
string sId = ""; // add Account from Twilio
string authToken = ""; //add Auth Token from Twilio
string fromPhoneNumber = "+120*******"; //add Twilio phone number
TwilioClient.Init(sId, authToken);
var message = MessageResource.Create(
body: "Hi, there!!",
from: new Twilio.Types.PhoneNumber(fromPhoneNumber),
to: new Twilio.Types.PhoneNumber("+9175********") //add receiver's phone number
);
Console.WriteLine(message.ErrorCode);
return View(message);
}
}
}
Code Explanation
In the above code,
- Add 'using Microsoft.AspNetCore.Mvc;', 'using Twilio;', 'using Twilio.Rest.Api.V2010.Account;' to use Twilio API in the code.
- Then, I have created a method named SendSMS().
- In the method, I created three string variables - sId, authToken, and fromPhoneNumber to store Twilio account SId, Auth Token, and Twilio phone number. I have placed all three in this method, but you should store them in an appsettings file and access them from there.
- Then, initiate TwilioClient by passing your account SId and Auth Token using this lineTwilioClient.Init(sId, authToken);.
- In the next line "MessageResource.Create()" is a method call to create a new SMS message using the Twilio API. It indicates that we are creating a new message resource. We are passing the message body, from phone number and to phone number in it. It creates the message and sends it using the Twilio API.
- In the next line, I have consoled the ErrorCode, if any error occurs during the sending of SMS.
- If you got this exception while executing the method, Permission to send an SMS has not been enabled for the region indicated by the 'To' number. Click here to resolve this- solution
Step 3. Call the above method
Call the method that we created earlier from your code to send SMS from wherever you want in your code, and Twilio will send the SMS to the account that you mentioned earlier.

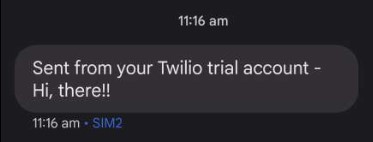
In the above image, you can see the message is sent successfully from the project and the body is the same as we mentioned in our code. But as we are using a trial account, hence, Twilio adds the prefix "Sent from your Twilio trial account-" in all the messages that you will send from your trial account. Hence, for real-life projects, it is better to buy a plan.
Conclusion
In this article, we have seen how to create a Twilio account, set it up, and integrate Twilio with the code in the C# MVC project. By following simple steps to set up a Twilio account and implementing Twilio's API, developers can easily send and receive SMS messages, offering a valuable tool for improving project functionality and user experience.
Like this, you can also integrate Twilio in other languages too. The process is almost similar. You can also use Twilio to send WhatsApp messages and voice messages, etc by simply integrating it into your project. This integration empowers developers to leverage Twilio's robust cloud communication platform to enhance their projects across various programming languages, facilitating effective communication and user engagement.