Swagger (OpenAPI) is a language-agnostic specification for describing REST APIs. It allows both computers and humans to understand the capabilities of a REST API without direct access to the source code. Swagger UI offers a web-based UI that provides information about the service, using the generated OpenAPI specification. Swagger UI is an alternative to Postman.

I used Swagger more than several times in my articles, but just as a minor tool used in different topics. When I tried to get info of Swagger, I had to search from these articles, which were not convinient. So, I rewrite these two articles, especially about Swagger for .NET MVC Web API or .NET Core MVC Web API.
If we created a new .NET Core 5.0 Web API project, the Swagger cient for Web API would be installed by default. In our current case, although we use .NET Core 5.0, the Web API is created in a MVC module, so we need to install Swagger manually. This way will work for the .NET Core version before 5.0.
This article is part of my another article: Consume Web API By MVC In .NET Core (1), Server And Framework, we got Swagger related part here. You can see details from there.
Step 1 - Create an ASP.NET Core MVC application
We use the version of Visual Studio 2019 16.8 and .NET 5.0 SDK to build the app.
Start Visual Studio and select Create a new project.
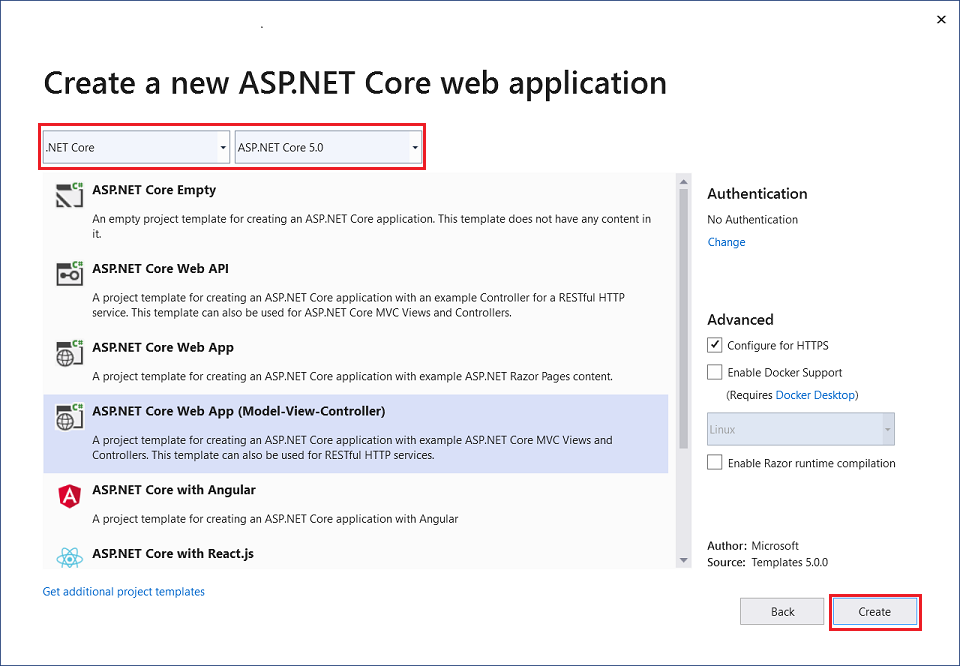
In the Create a new project dialog, select ASP.NET Core Web Application > Next.
In the Configure your new project dialog, enter MVCCallWebAPI for Project name.
Select Create.
In the Create a new ASP.NET Core web application dialog, select,
.NET Core and ASP.NET Core 5.0 in the dropdowns.
ASP.NET Core Web App (Model-View-Controller).
Create
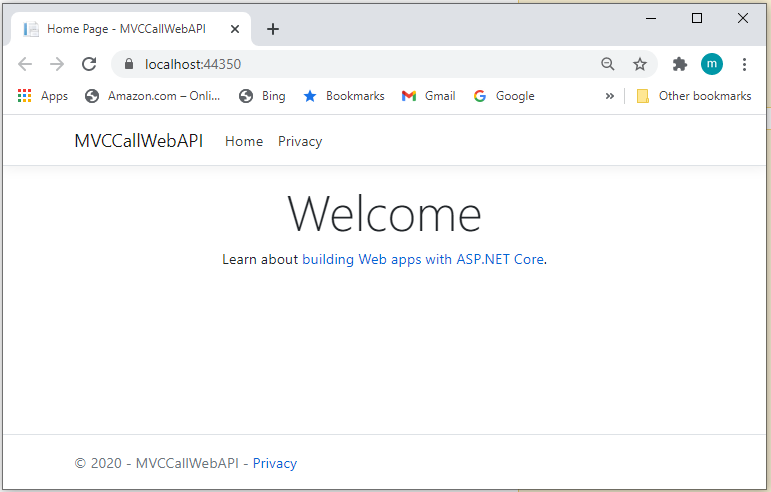
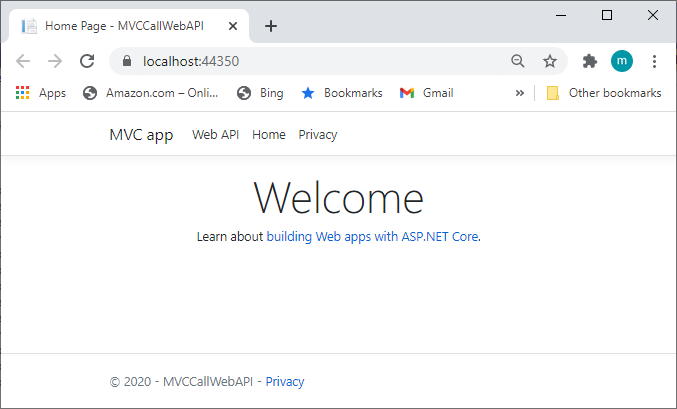
Build and run the app, you will see the following image shows the app,
Step 2~3 - Scaffold API Controller with Action using Entity Framework
Please see the article, Consume Web API By MVC In .NET Core (1), Server And Framework,
B: Add Web API with Entity Framework Code First
Step 1: Set up a new Database context
Step 2: Work with a database using Entity Framework code first appoach.
Step 3,:Scaffold API Controller with Action using Entity Framework
Step 4 - Add Swagger client for Web API
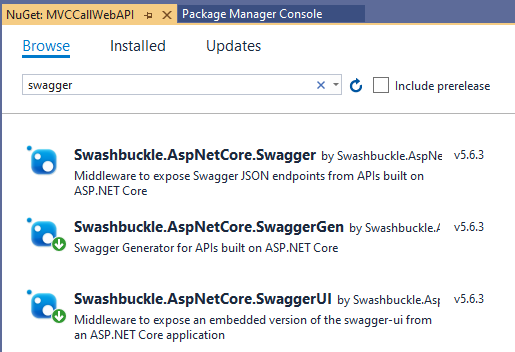
1. Install Swagger Client
Right-click the project in Solution Explorer > Manage NuGet Packages, search for Swagger
Step 2~3 - Scaffold API Controller with Action using Entity Framework
Please see the article, Consume Web API By MVC In .NET Core (1), Server And Framework,
B: Add Web API with Entity Framework Code First
Step 1: Set up a new Database context
Step 2: Work with a database using Entity Framework code first appoach.
Step 3,:Scaffold API Controller with Action using Entity Framework
Step 4 - Add Swagger client for Web API
1. Install Swagger Client
Right-click the project in Solution Explorer > Manage NuGet Packages, search for Swagger
There are three main components to Swashbuckle (Swagger), we only need to install two of them: SwaggerGen and SwaggerUI, the Swagger would be included.
2. Register Swagger Client in startup.cs file
Add the Swagger generator to the services collection in the Startup.ConfigureServices method,
// This method gets called by the runtime. Use this method to add services to the container.
public void ConfigureServices(IServiceCollection services)
{
// Register the Swagger generator, defining 1 or more Swagger documents
services.AddSwaggerGen(c =>
{
c.SwaggerDoc("v2", new OpenApiInfo { Title = "MVCCallWebAPI", Version = "v2" });
});
......
}
Enable the middleware for serving the generated JSON document and the Swagger UI, in the Startup.Configure method,
// This method gets called by the runtime. Use this method to configure the HTTP request pipeline.
public void Configure(IApplicationBuilder app, IWebHostEnvironment env)
{
// Enable middleware to serve generated Swagger as a JSON endpoint.
app.UseSwagger();
// Enable middleware to serve swagger-ui (HTML, JS, CSS, etc.),
// specifying the Swagger JSON endpoint.
app.UseSwaggerUI(c =>
{
c.SwaggerEndpoint("/swagger/v2/swagger.json", "MVCCallWebAPI");
});
......
}
Now, we are almost ready to run the app.
Step 5 - Run and Test the app
Before we run the app, modify the header of the file: Views/Shared/_layout.cshtml Views again to add Swagger (line 11~13), shown below,
<header>
<nav class="navbar navbar-expand-sm navbar-toggleable-sm navbar-light bg-white border-bottom box-shadow mb-3">
<div class="container">
<a class="navbar-brand" asp-area="" asp-controller="StoresMVC" asp-action="Index">MVC app</a>
<button class="navbar-toggler" type="button" data-toggle="collapse" data-target=".navbar-collapse" aria-controls="navbarSupportedContent"
aria-expanded="false" aria-label="Toggle navigation">
<span class="navbar-toggler-icon"></span>
</button>
<div class="navbar-collapse collapse d-sm-inline-flex justify-content-between">
<ul class="navbar-nav flex-grow-1">
<li class="nav-item">
<a class="nav-link text-dark" asp-area="" asp-controller="Swagger" asp-action="Index">Web API</a>
</li>
<li class="nav-item">
<a class="nav-link text-dark" asp-area="" asp-controller="Home" asp-action="Index">Home</a>
</li>
<li class="nav-item">
<a class="nav-link text-dark" asp-area="" asp-controller="Home" asp-action="Privacy">Privacy</a>
</li>
</ul>
</div>
</div>
</nav>
</header>
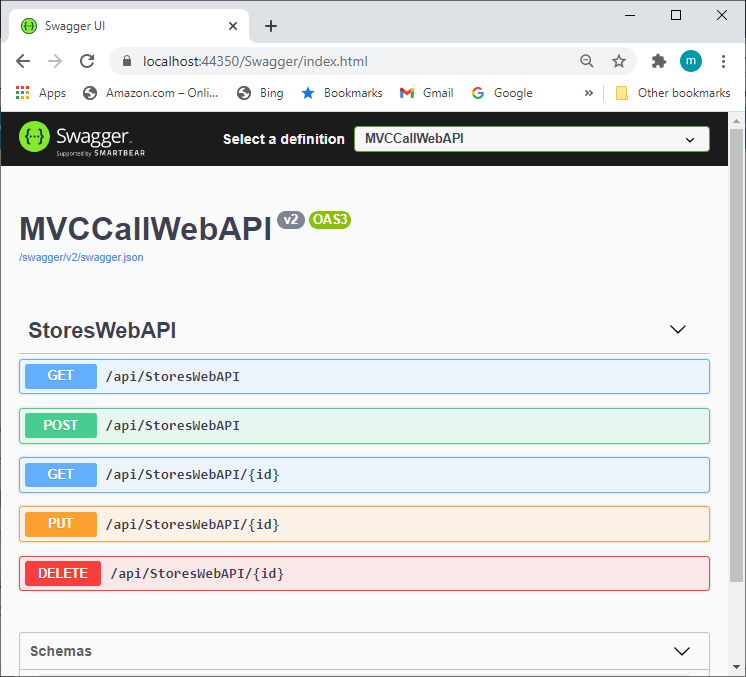
Now, we run the app,
Click Web API, we got the Swagger Client screen,